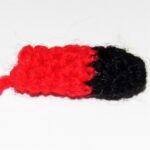
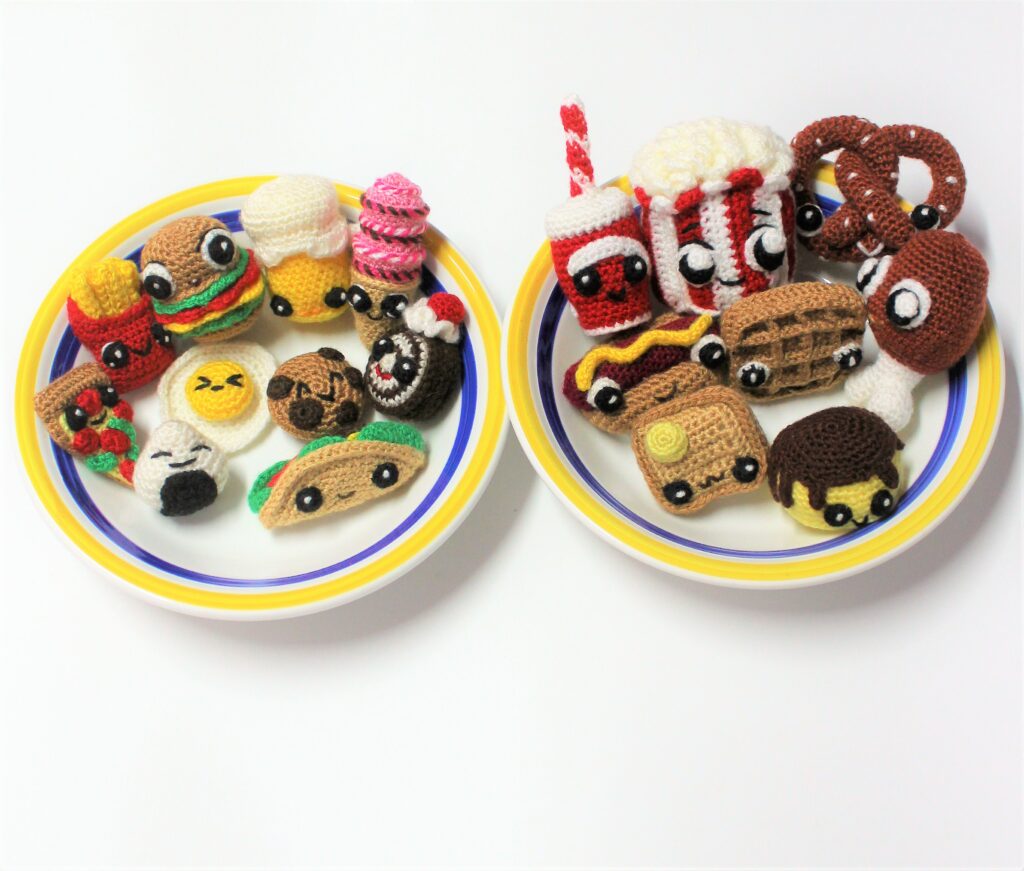
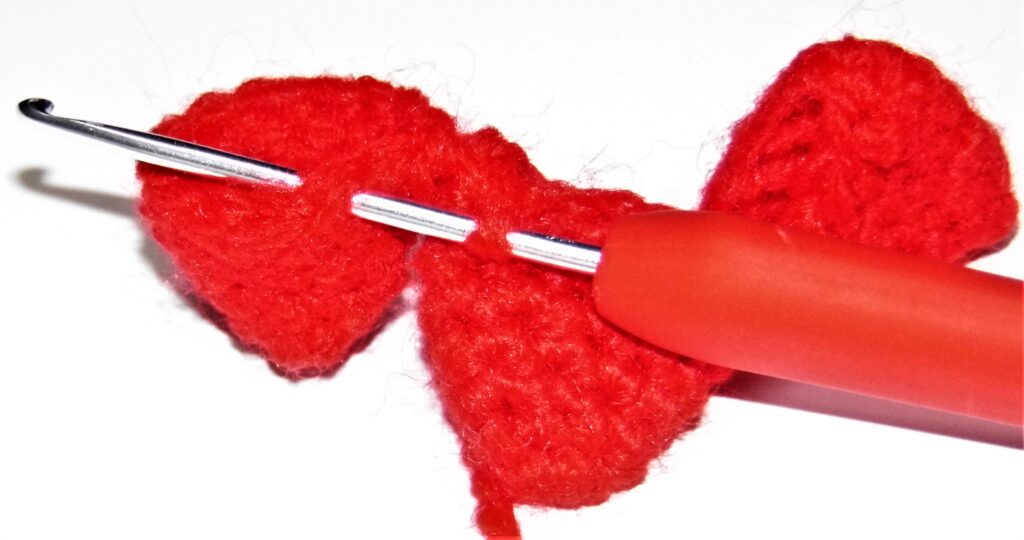
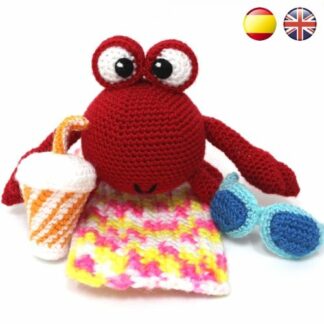
I am very excited to show you the video tutorial How to sew the parts of an amigurumi that our friend from Ylanas Yecla has made. You can see how to assemble the pieces of Baby Taz, your favorite character from the Baby Looney Tunes collection.
It’s great, right?
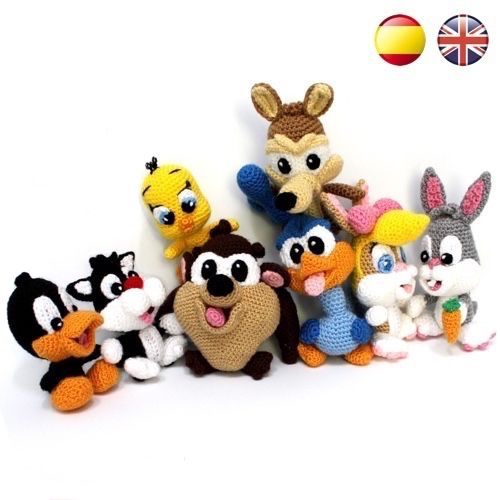
You can find the patterns of Baby Taz and his friends: Bugs Bunny, Lola Bunny, Tweety, Sylvester, Road runner, Coyote and Daffy Duck here in our store:
As you can see with the Baby Taz example, the patterns in the Baby Looney Tunes collection are very easy to crochet and easy to assemble.
In addition, they are perfect for the little ones, both for their size and for their design. No hard materials are used. You can crochet them simply with a hook, yarn and fiber fill. No hard parts (buttons, zippers,…). All “soft”.
Don’t forget to visit the Ylanas Yecla online store that has a lot of products so that we can crochet our favorite amigurumis and many other things at incredible prices.
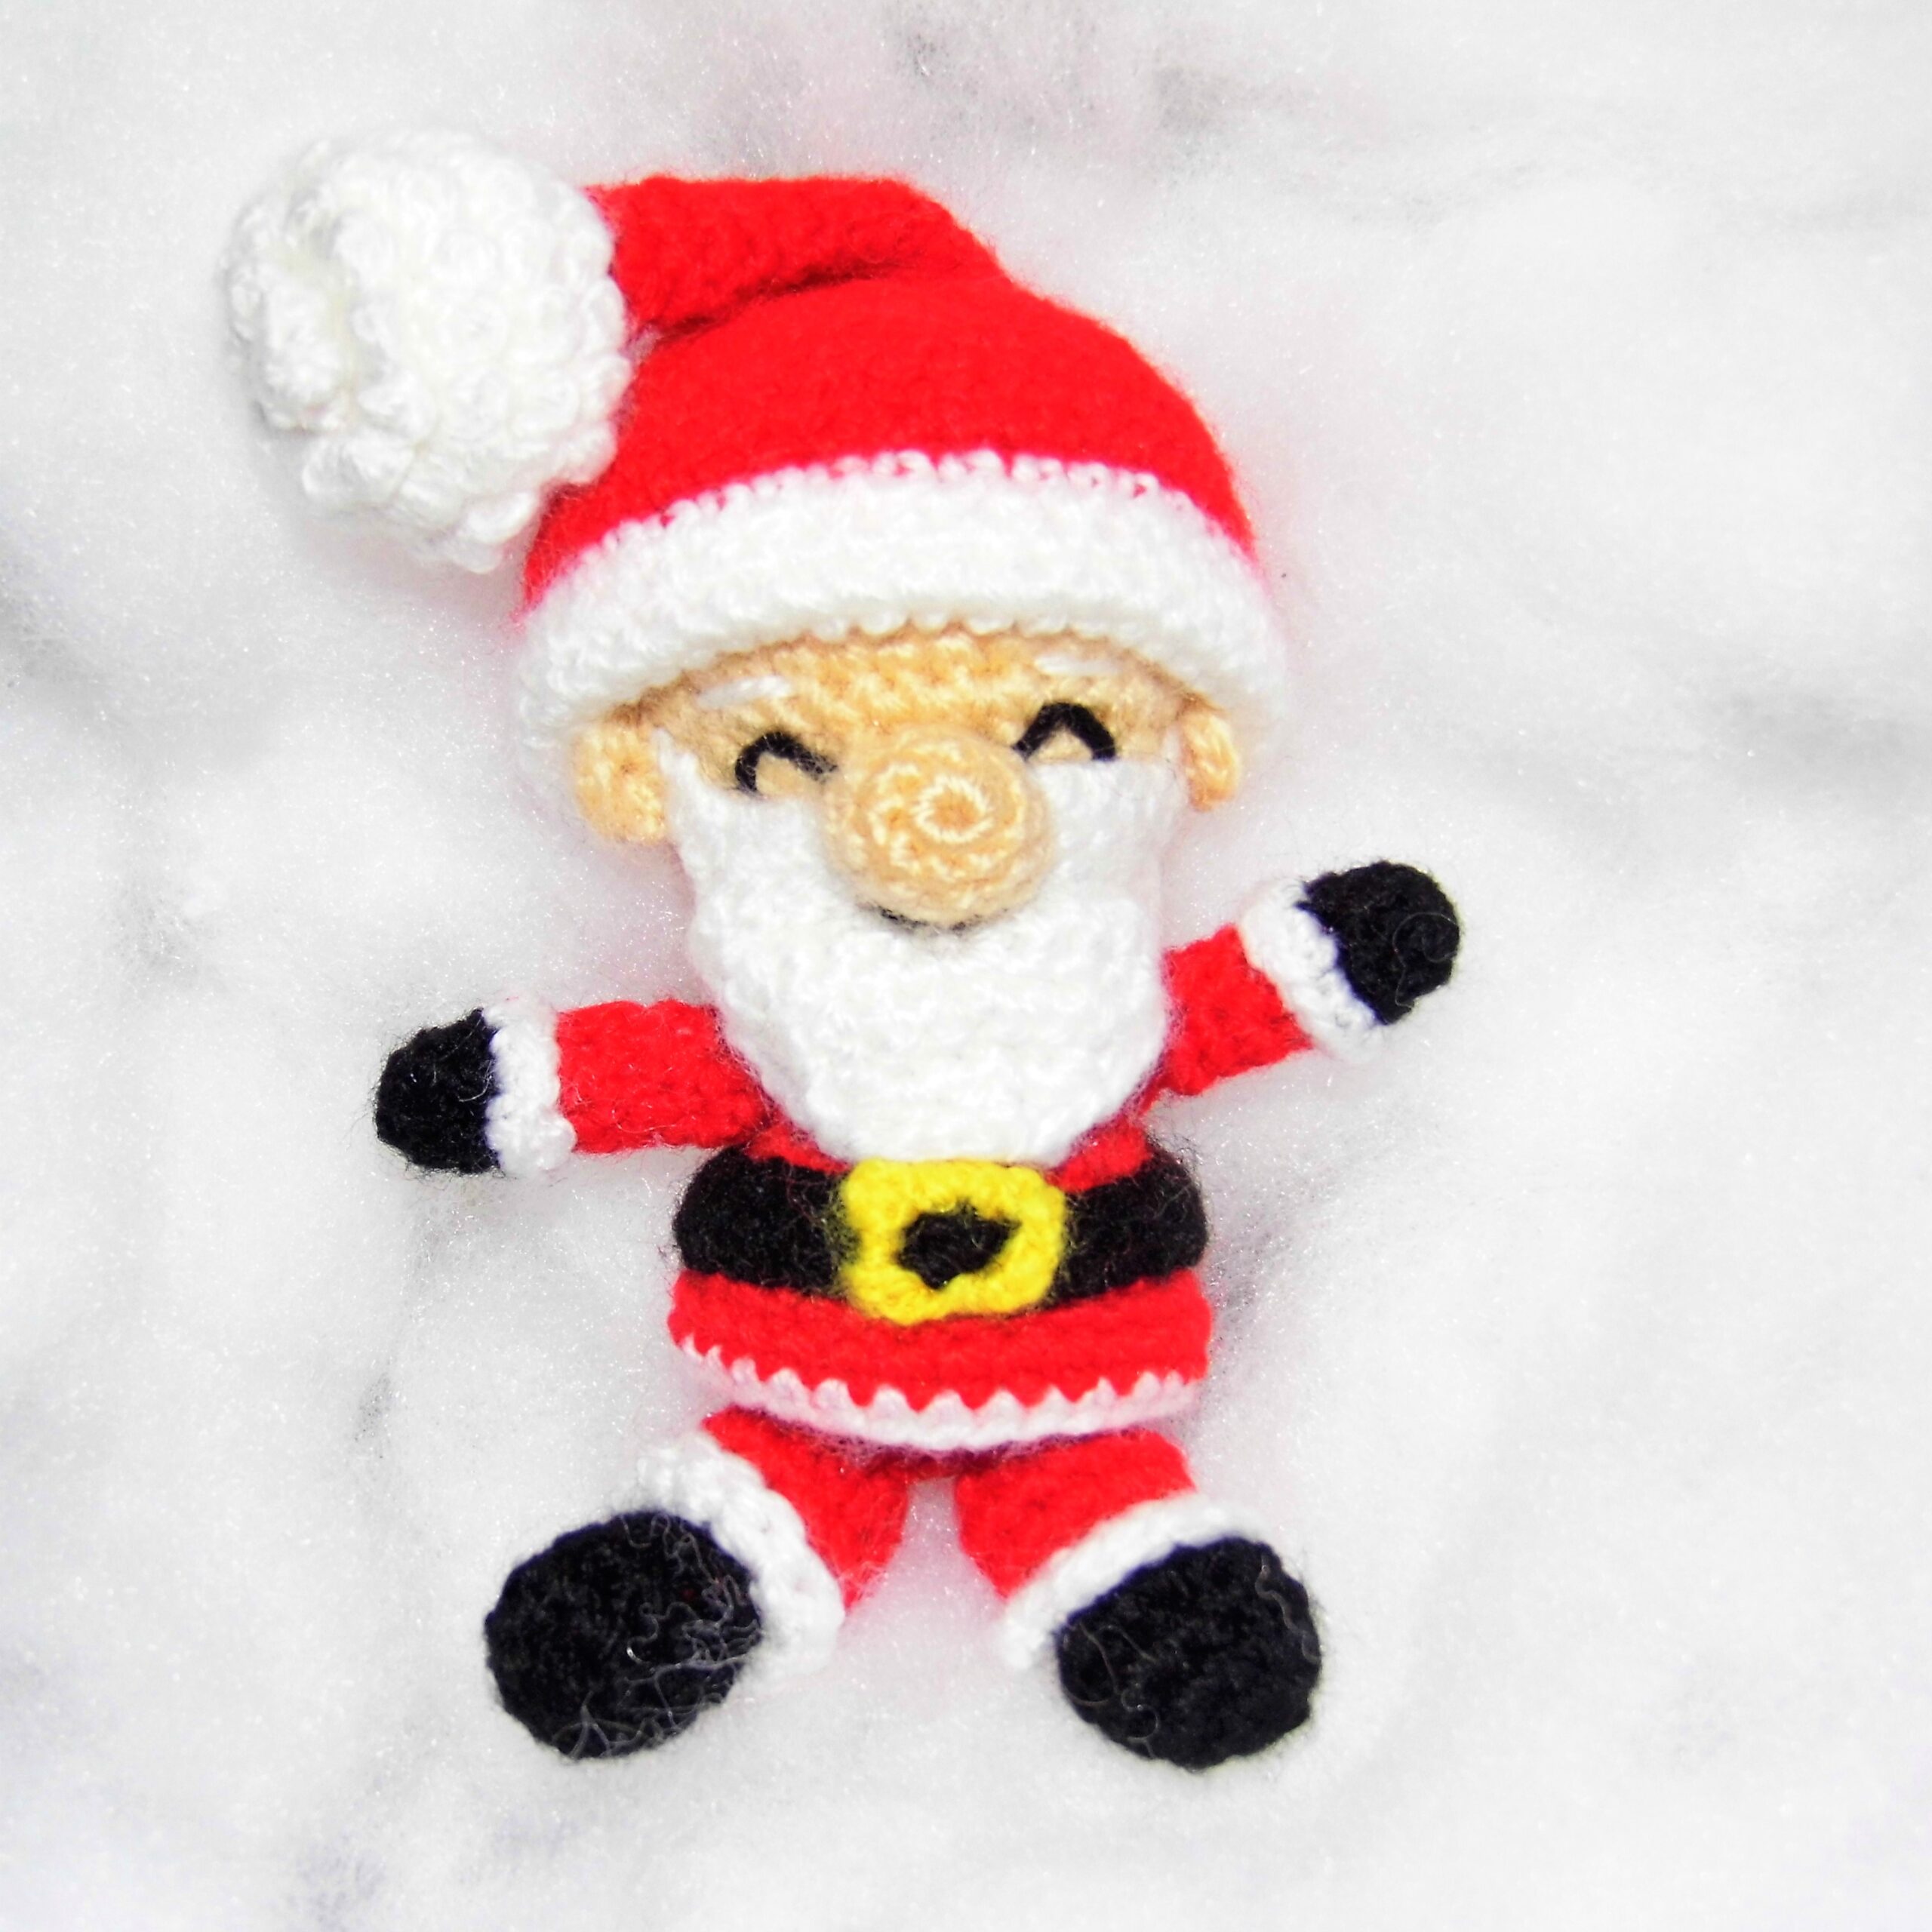
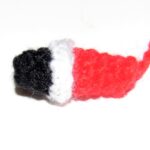
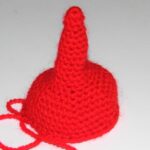
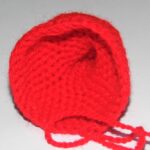
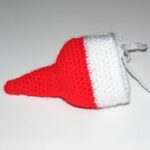
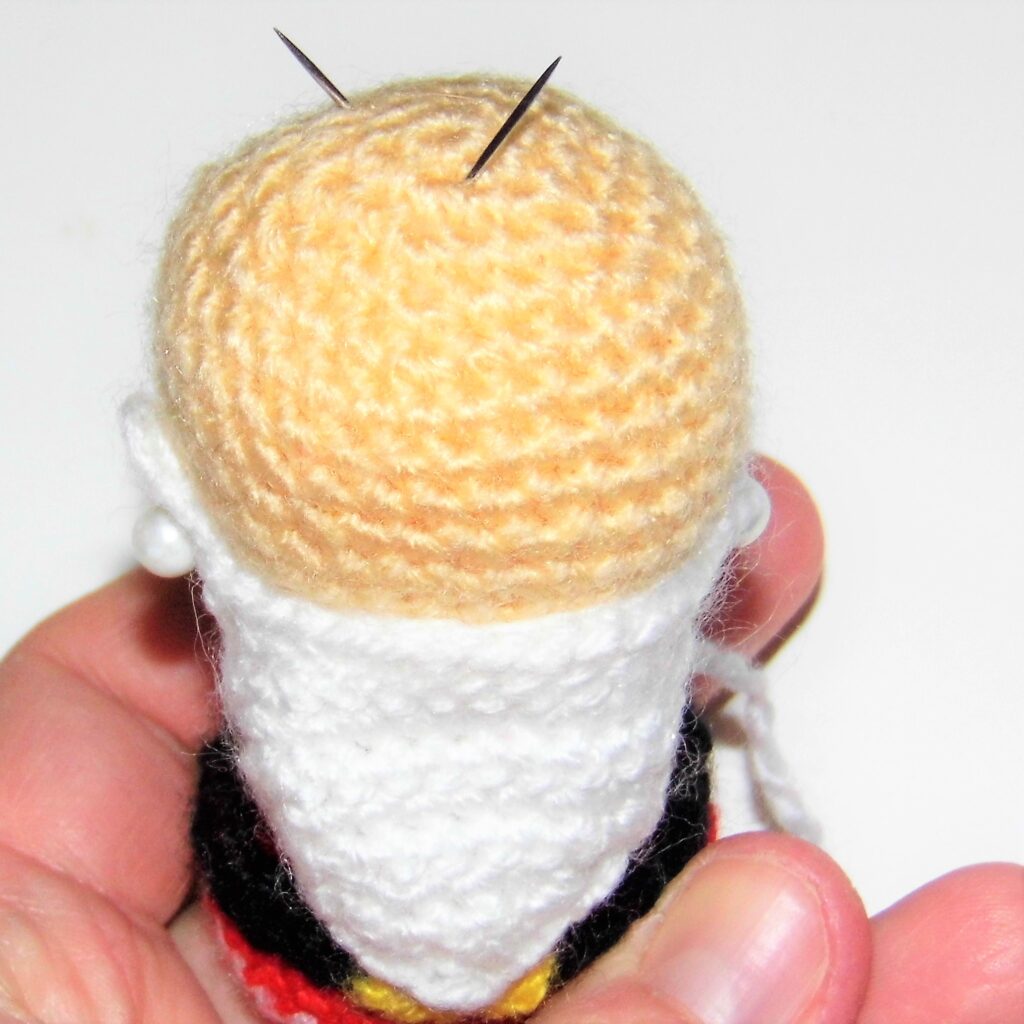
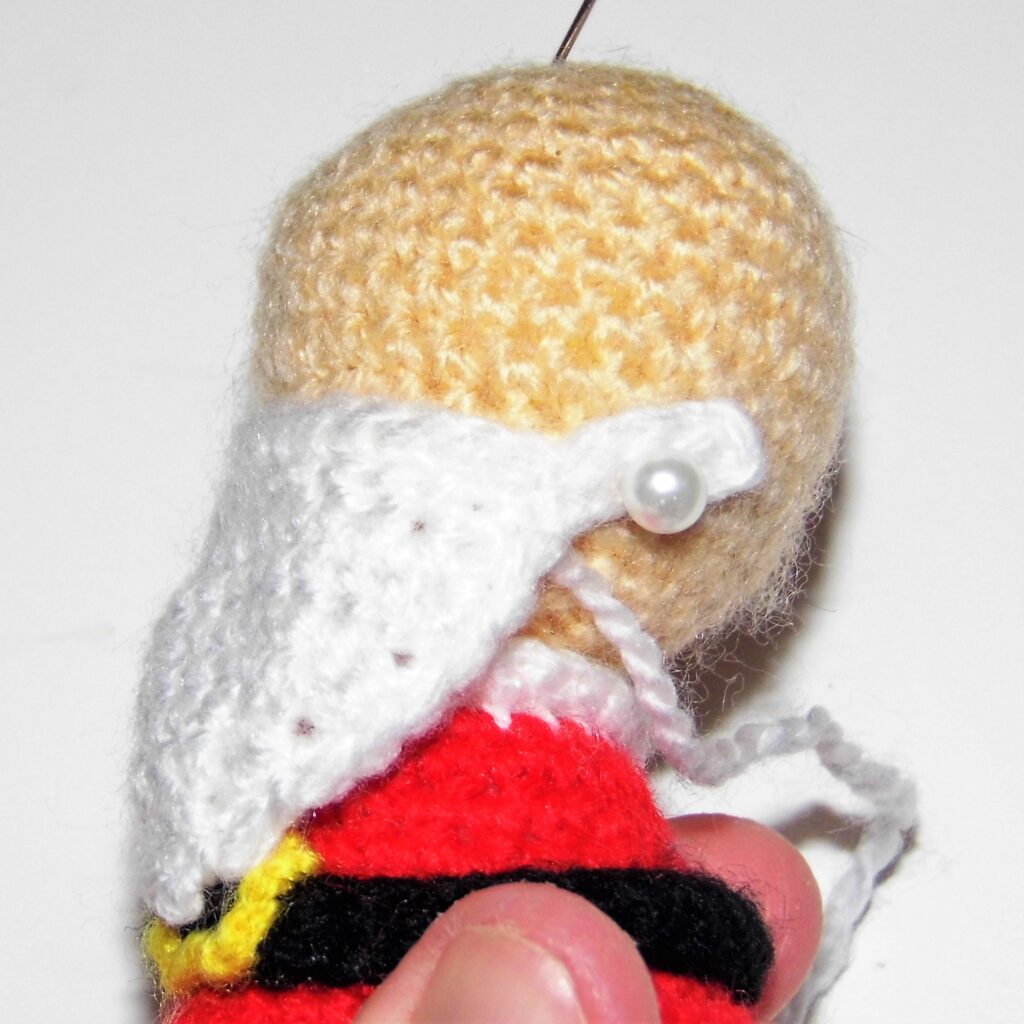
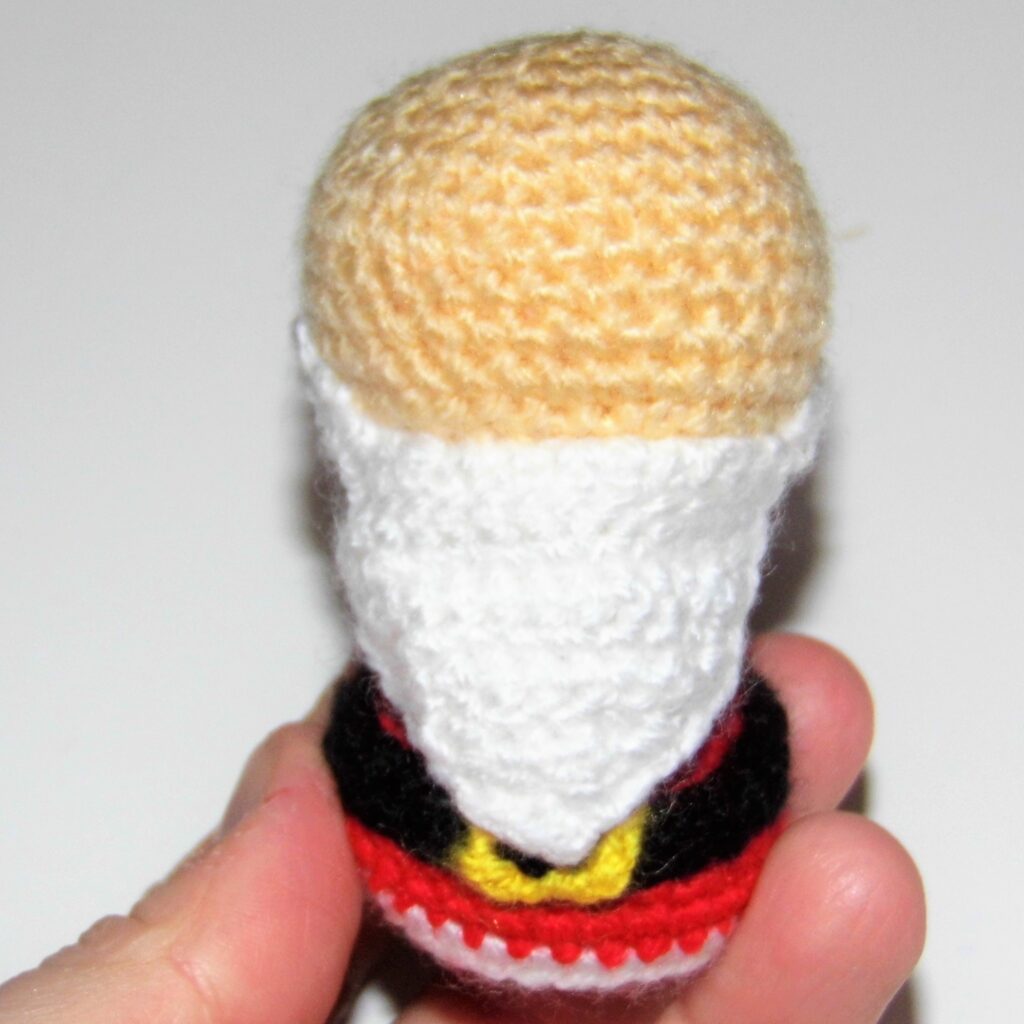
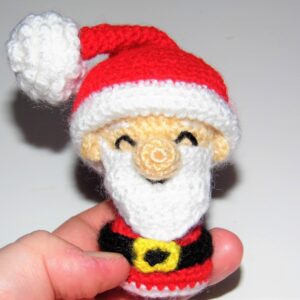
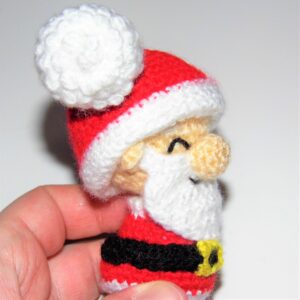
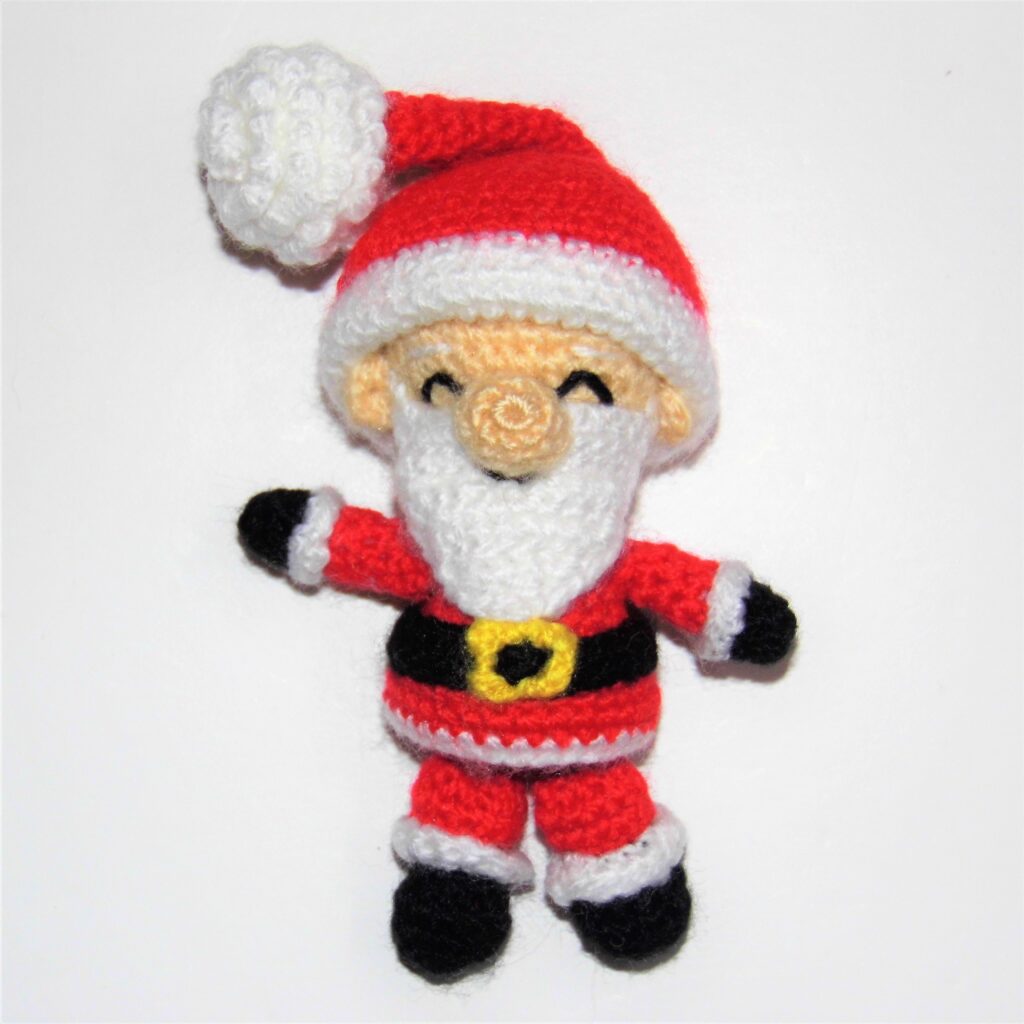
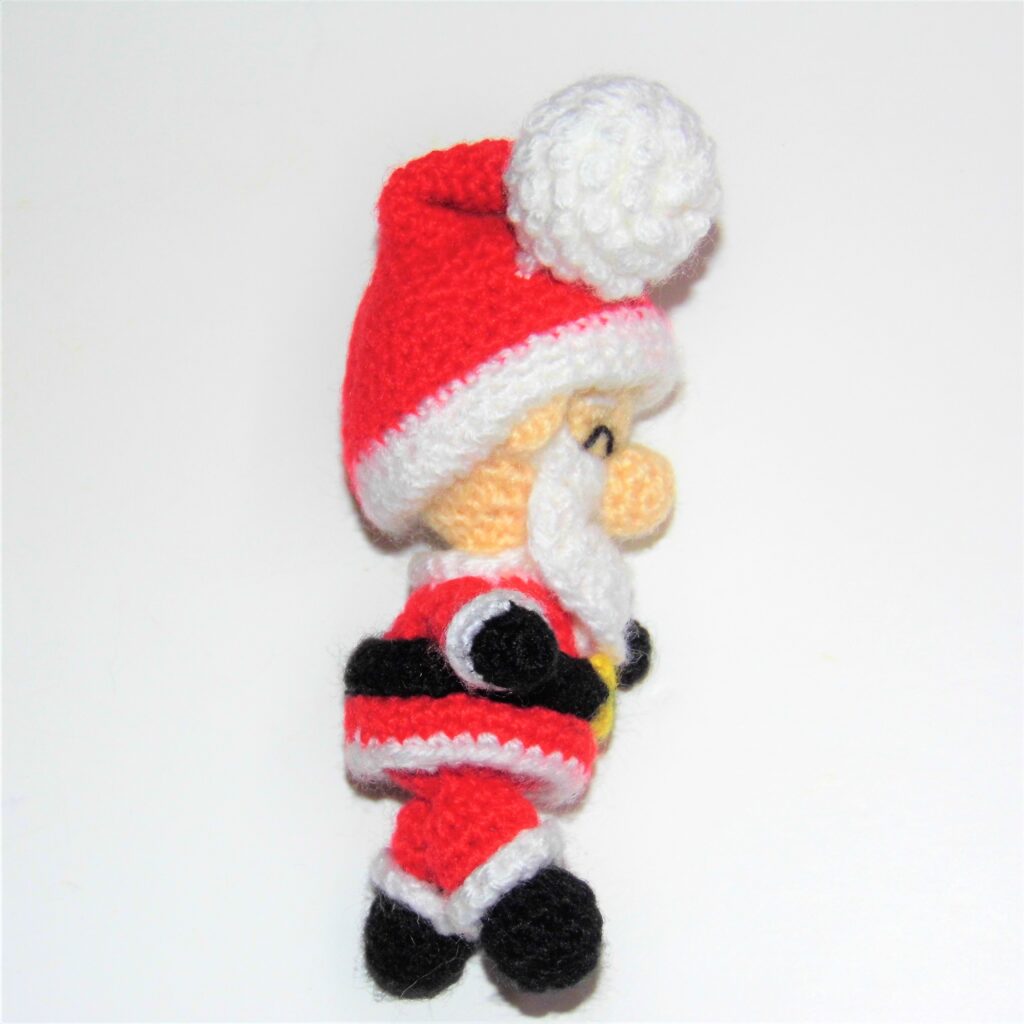
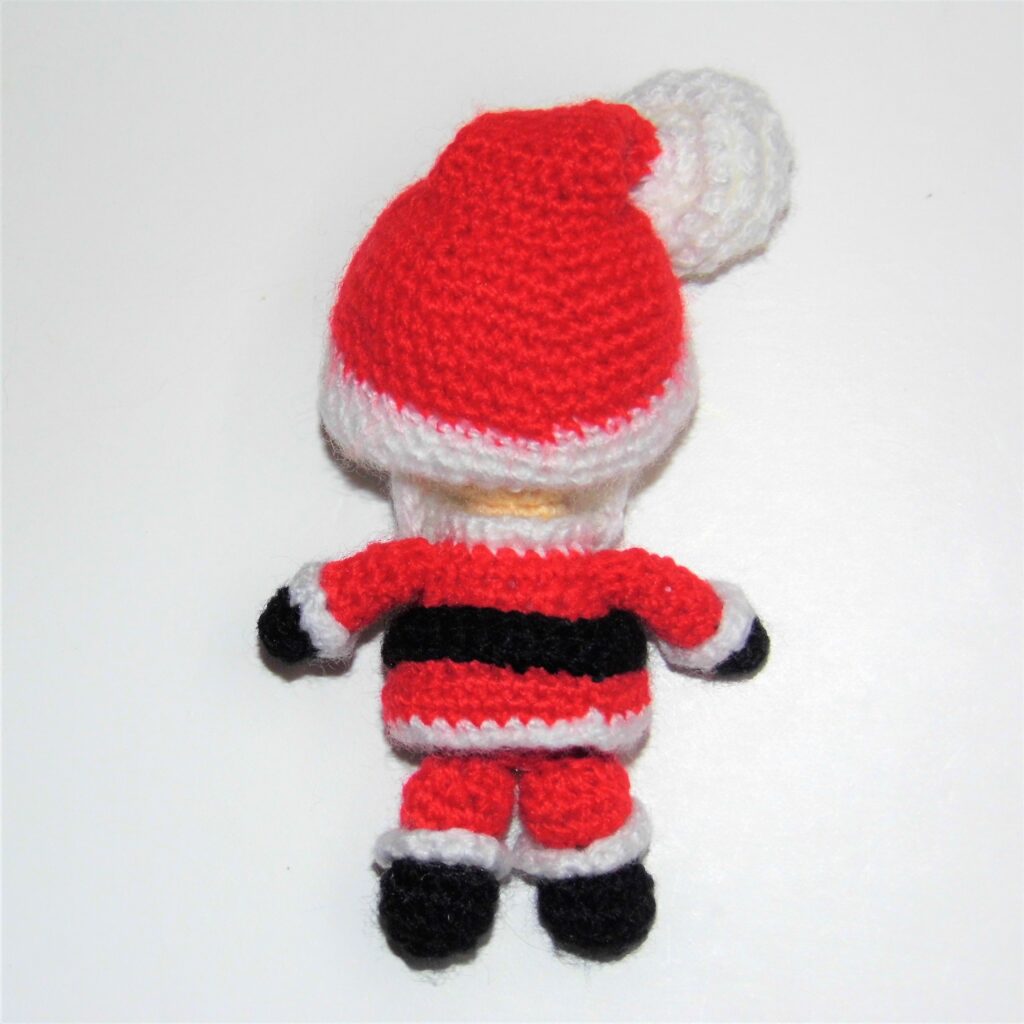
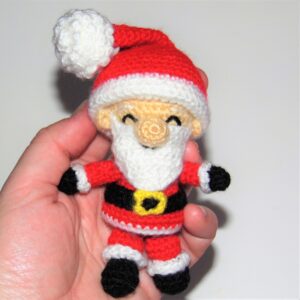
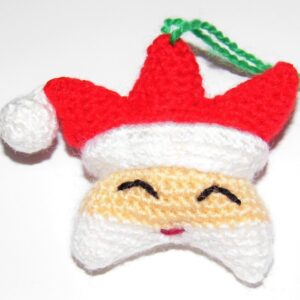
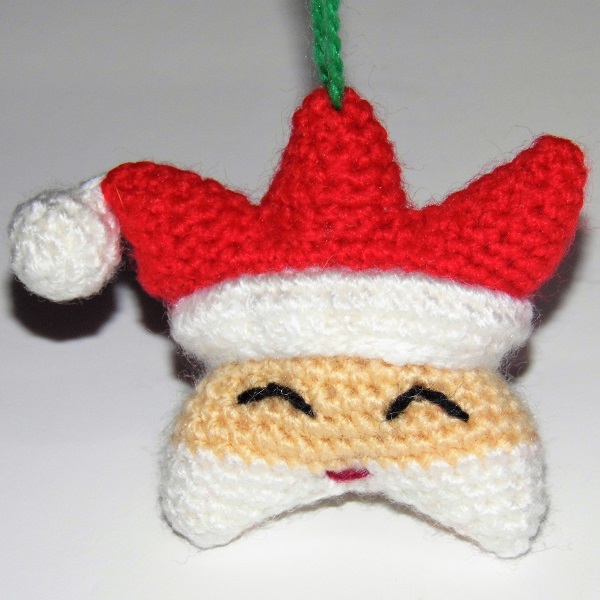
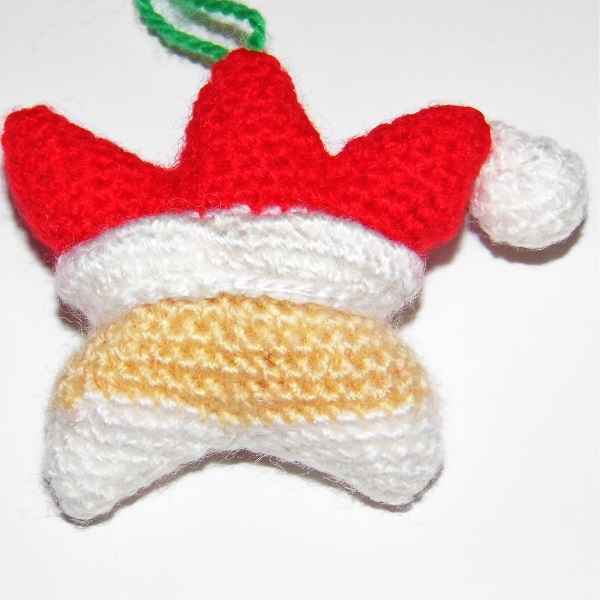
At the end of 2021 I want to wish you a Happy Holidays with the pattern of this little Santa Claus amigurumi that I am sure you will love.
MATERIALS
Yarn of different colors: white, black, skin color, red, yellow.
Thickness of the yarn: 3 mm.
Hook according to the thickness of the yarn.
Yarn needle.
Fiberfill.
ABBREVIATIONS
sc: single crochet
st: stitch
ch: chain
inc: increase
dec: decrease
Fill the doll with fiberfill as you crochet.
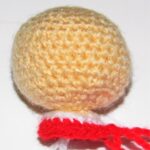
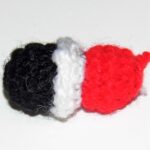
HEAD / BODY
With skin color yarn
1. Work 6 sc in magic ring.
2. Inc in every st (12).
3. “1 sc, inc”, repeat to the end of the round (18).
4. “2 sc, inc”, repeat (24).
5. “3 sc, inc”, repeat (30).
6. to 11. 1 sc in each stitch (30).
12. “3 sc, dec”, repeat (24).
13. 1 sc in each stitch (24).
14. “2 sc, dec”, repeat (18).
15. “1 sc, dec”, repeat (12).
16. Dec in every st (6).
17. Inc in every st (12).
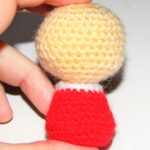
18. Change to White yarn and work “1 sc, inc”, repeat (18).
19. Change to red yarn and work in back loops only 1 sc in each stitch (18). You will return to this round to complete the collar.
20. and 21. 1 sc in each st (18).
22. “2 sc, inc”, repeat (24).
23. “3 sc, inc”, repeat (30).
24. 1 sc in each st (30).
25. Work 1 sc in back loops only (30). You will return to this round to complete the jacket.
26. “3 sc, dec”, repeat (24).
27. “2 sc, dec”, repeat (18).
28. “1 sc, dec”, repeat (12).
29. Dec in every st (6).
Fasten off.
Sew the hole with the yarn needle.
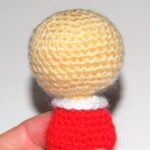
Complete the collar
With white yarn
Return to round 19 and holding the doll with the head pointing down, work in the free loops 1 sc in each stitch (18).
Fasten off.
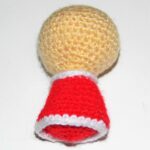
Complete the jacket
With red yarn
1. Return to round 25 and holding the doll with the head pointing down, work in the free loops 1 sc in each stitch (30).
2. 1 sc in each st (30).
3. Change to white yarn and work 1 sc in each st (30).
Fasten off.
ARMS (x2)
With black yarn
1. Work 6 sc in magic ring.
2. and 3. 1 sc in each st (6).
4. Change to red yarn and work in back loops only 1 sc in each stitch (6). You will return to this round to complete the sleeve.
5. to 8. 1 sc in each st (6).
Fasten off.
Complete the sleeve
With white yarn
Return to round 4 of the arm and holding it with the hand pointing down work in the free loops inc in every st (12).
Fasten off.
FEET / LEGS (x2)
With black yarn
1. Work 6 sc in magic ring.
2. Inc in every st (12)
3. and 4. 1 sc in each stitch (12).
5. Dec in every st (6).
6. Change to red yarn and work in back loops only inc in every st (12). You will return to this round to complete the pants.
7. and 8. 1 sc in each stitch (12).
9. Dec in every st (6).
Fasten off.
Complete the pants
With white yarn
1. Return to round 6 of the leg and holding it with the foot pointing up, work in the free loops inc in every st (12).
2. 1 sc in each st (12).
Fasten off.
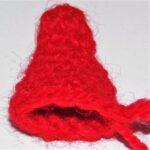
HAT
With red yarn
1. Work 6 sc in magic ring.
2. and 3. 1 sc in each st (6).
4. “1 sc, inc”, repeat (9).
5. and 6. 1 sc in each st (9).
7. “2 sc, inc”, repeat (12).
8. and 9. 1 sc in each st (12).
10. “3 sc, inc”, repeat (15).
11. and 12. 1 sc in each st (15).
13. “4 sc, inc”, repeat (18).
14. and 15. 1 sc in each st (18).
16. “2 sc, inc”, repeat (24).
17. “3 sc, inc”, repeat (30).
18. “4 sc, inc”, repeat (36).
19. “5 sc, inc”, repeat (42).
20. to 22. 1 sc in each st (42).
23. “5 sc, dec”, repeat (36).
24. Change to white yarn and work 1 sc in each st in front loops only (36). You will return to this round to join the edge of the hat.
25. to 30. 1 sc in each st (36).
31. Join with slip stitches the sc from the last round with the loops from round 24.
Fasten off.
Pompom
With white yarn
1. Work 6 sc in magic ring.
2. In back loops only work inc in every st(12).
3. In back loops only work “1 sc, inc”, repeat (18).
4. and 5. In back loops only work 1 sc in each stitch (18).
6. In back loops only work “1 sc, dec”, repeat (12).
7. Dec in all stitches (6).
8. Turn the piece and work in the free loops: 1 slip stitch, ch 3 in the same stitch, 1 slip stitch in that same stitch. In this way you are going to crochet some small waves around the pompom until you reach the beginning of it.
Sew the pompom to the tip of the hat.
EARS (x2)
With skin color yarn
Work 6 sc in magic ring Ring without closing with the slip stitch.
NOSE
With skin color yarn
1. Work 8 sc in magic ring.
2. to 4. 1 sc in each st (8).
Fasten off.
BEARD
With white yarn
1. Ch 13 and work 12 sc on thdm
2. and 3. Ch 1, turn and work 1 sc in each stitch (12).
4. to 8. Don’t ch 1, turn and work 1 sc in each st until you reach the last 2 sc, then dec 1 (10), (8), (6), (4), (2).
9. Place the round marker to start working around the piece with sc: 8 sc + Ch 5 and work 4 sc on the chains and 1 slip stitch to the point of origin of the chains (first sideburn) +Ch 5 and work 4 sc on the chains and 1 slip stitch to the point of origin of the chains (second sideburn) + 8 sc + 2 sc.
Fasten off.
BELT
With black yarn
Ch 31 and work 30 sc on the chains.
Belt buckle
With yellow yarn
Ch 3, 1 slip stitch on the last chain, Ch 3 , 1 slip stitch on the last chain of this group of 3, Ch 3, 1 slip stitch on the last chain of this group, Ch 2, 1 slip stitch on the first chain of all.
Fasten off.
ASSEMBLY
Sew the beard on round 12 of the head.
Centered on it, in that same round, sew the nose.
Underneath, with black yarn embroider the mouth in a V shape and above the beard, that is, on round 12 on both sides of the nose embroider the eyes in a reverse V shape, leaving 2 sc of separation in their open part.
With white yarn, embroider the eyebrows, leaving 1 sc of separation over the eyes and with a length of 3 sc.
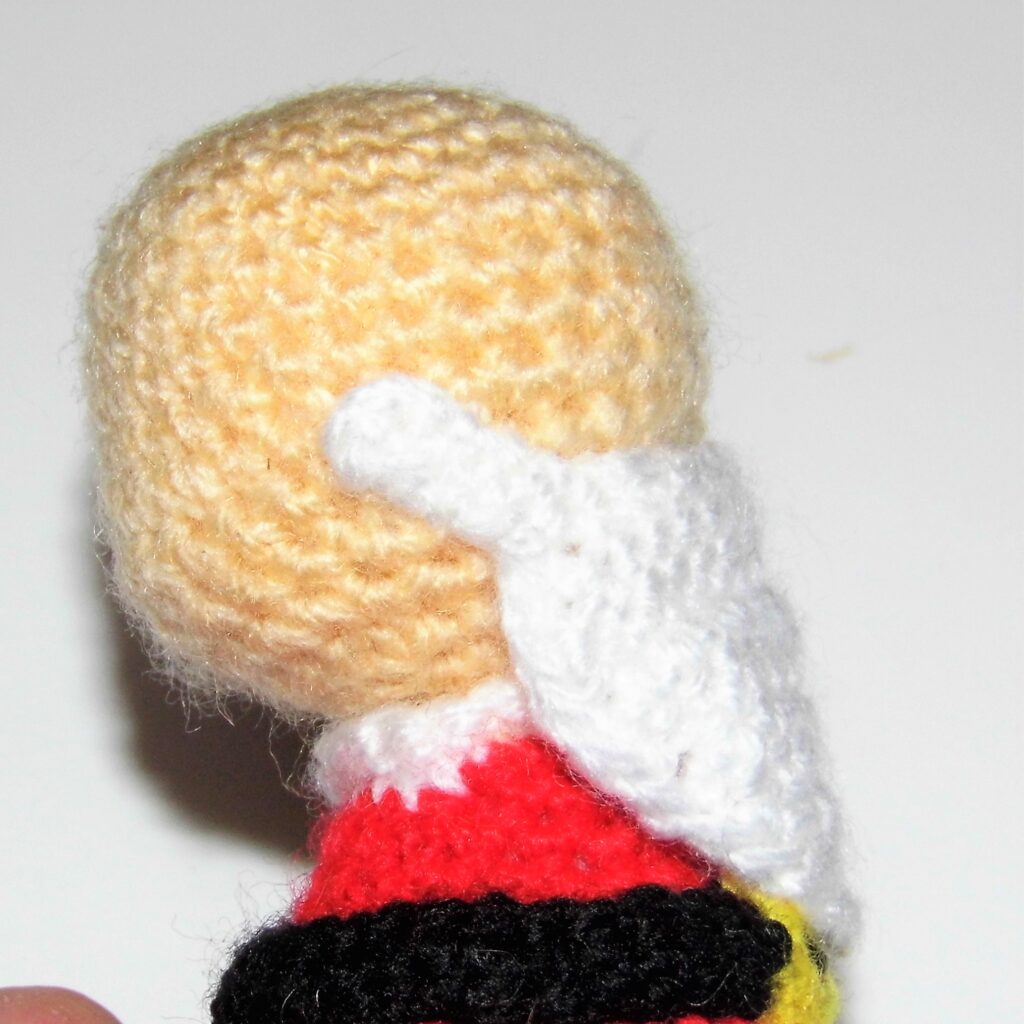
Sew the hat by placing it over the eyebrows and adjusting it behind the head, leaving 4 sc of separation from the neck line. The hat will cover part of the sideburns. Sew the ears over them so that the hat is on top, giving the doll a funny look. Fold the tip of the hat to the side and sew the pompom to it in a hidden way to keep the shape.
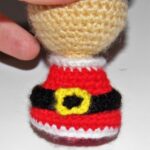
Sew the belt leaving 3 sc of separation from the last round of the jacket and on this, centered the buckle.
Sew the arms in line in relation to the ears under the color change line of the white collar and red jacket.
Finally, sew the legs centered on the lower part of the body, leaving 1 sc of separation from the last round of the body.
Finished your Santa Claus Amigurumi! It was easy, right?
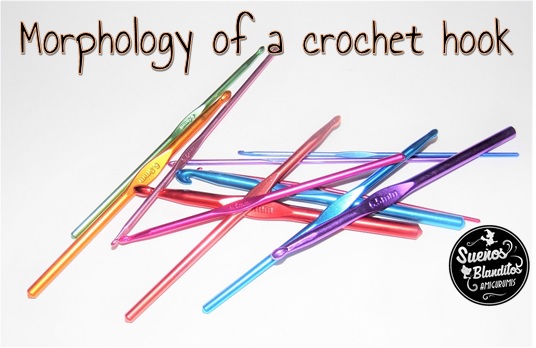
As you know, to crochet amigurumis the hook is of special importance, since a bad choice of the same can lead us to obtain a bad result, hinder our work or even cause injuries.
This time I don’t want to talk to you about the different types of hooks, designs, materials … I will leave that for another moment.
Today we are going to start with the basics, with the parts that make it up and what each one is for.
Can you tell me how many parts a crochet hook has? And their names?
Let’s discover the Morphology of a crochet hook.
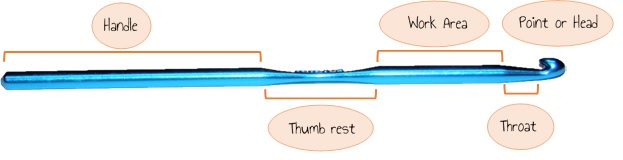
A standard hook is made up of 7 parts. Let’s see what they are:
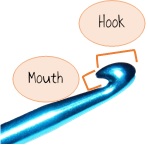
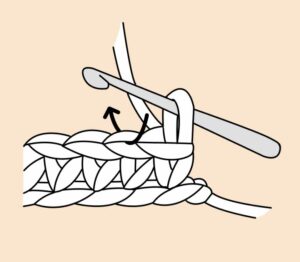
1. Point or Head: It is the end of the hook that we insert into the fabric. We use it to hook the yarn and crochet the stitches.
In turn, it is made up of:
-Mouth: Hold the yarn when crocheting the stitches.
-Hook: Prevents the yarn from coming out of the mouth when crocheting.
2. Throat: Guide the thread into the work area.
3. Work area: It holds the loops and is very important because it determines the size of the stitches. The size of the hook tells us precisely the diameter of the work area.
4. Thumb rest: It is the flat part in which we place the thumb or another finger and thus be able to handle the hook. In this part usually appears the numbering or measurement of the hook.
5. Handle: It is the final end of the hook and is used to manage it with the palm of the hand or the other fingers, depending on the way in which we hold it.
As you can see, each part of the hook has its reason for being and knowing the morphology of a crochet hook will help us to improve our work.
How to know the weight of the yarn quickly and easily is an important matter for all of us who like to crochet.
As you know, one of the most important characteristics of my patterns is that the resulting amigurumis are “totally soft”. I do not use hard elements such as wires, buttons, zippers or even safety eyes. You can crochet them only with wool or yarn, a crochet hook and fiberfill.
Since these are the only materials that I use, it is essential that they be the most suitable to achieve the desired result.
There are many of you who ask me what type of yarn I use and since we are all from different places, sometimes it is difficult for me to explain and talk about centimeters, inches and categories according to their thickness.
Today I am going to talk about yarns, more specifically, how to know the weight of the yarn when you do not have any reference, for example, if you have a mysterious ball of yarn of which you have lost the label that specifies its characteristics.
But first, there are some things you should know about yarns to make it easier for you to choose the right one when crocheting your amigurumis.
Yarns are classified into several categories, but unfortunately, there is no single method to do so.
In general, there are:
• The standards of the CYC (Craft Yarn Council) that represents the most prominent members of the yarn industry in the United States.
Depending on the weight of the yarn, we can classify it into the following categories:
• The classification according to the number of plies that the yarn has. This system is the one used in the United Kingdom, Australia and New Zealand.
The problem with this classification is that it does not determine the thickness of the yarn, but rather the number of strands that are twisted to form it. There is the possibility that a yarn of 5 strands (5 ply) may be thinner than a yarn of 3 (3 ply), by the mere fact that each strand is of a lesser thickness or have been spun with greater tension between them.
• Wraps per inch method (WPI)
As its name suggests, it is about classifying the yarn according to the wraps of the same that fit in an inch or what is the same, in 2.5 cm.
It is a very useful method to determine the weight of that mysterious ball of yarn without a label that you want to use, but you must bear in mind that it is not exact, since there are factors that can alter the measurement.
To use it you need:
• A rule.
• Something to wrap the yarn with uniform thickness. You can use, for example, a pencil or a pen.
It’s easy:
1. You must wrap the yarn so that each strand is next to each other, that is, they do not overlap. Do it carefully, do not tighten too much, or leave it loose, since you could vary the result too much.
2. With the ruler measure 1 inch or what is the same 2.5 cm. That is the length you should wrap.
3. When you have it, count the wraps you have made and guide yourself through this cheat sheet. Depending on the number of wraps, this will be the weight and category to which your yarn belongs.
If you have doubts, first try to do it with a yarn whose weight you know.
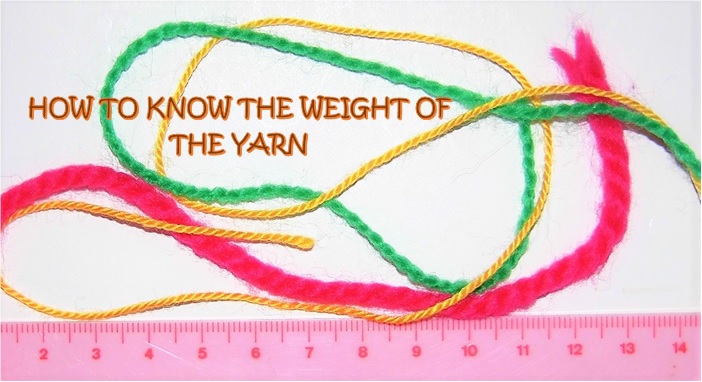
Let’s see some examples:
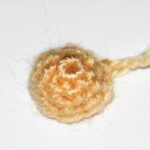
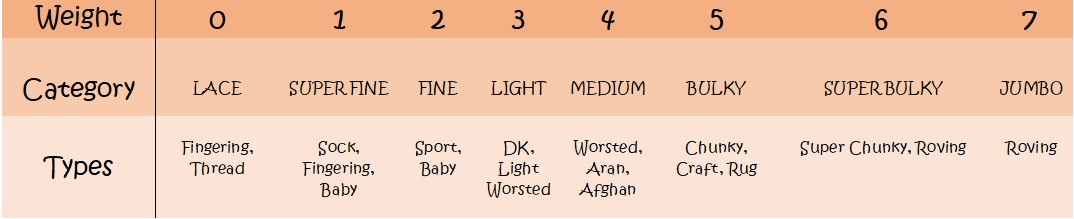
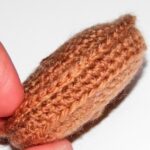
This picture shows the yarn that I normally use in my patterns. Using this method, I have made 17 WPI. That places it in category 2 Fine.
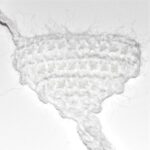
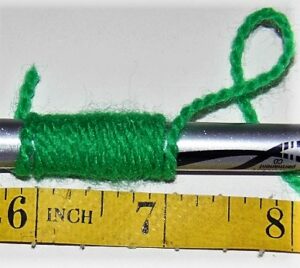
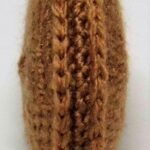
This other, on the other hand, is much thicker and for that reason I have only made 9 WPI. It belongs to category 5 Bulky.
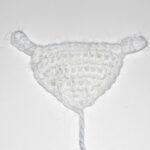
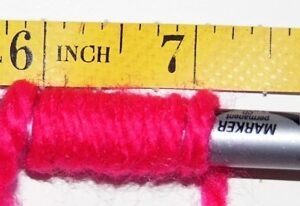
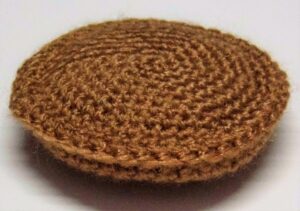
Finally, we have a much finer yarn with which I have managed to make 28 WPI. It belongs to category 0 Lace.
As you can see, it is a very simple method, but remember that it is not exact, but only an aid that will help you guide yourself.
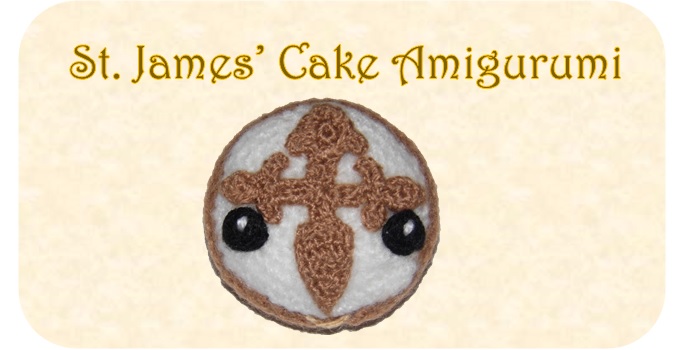
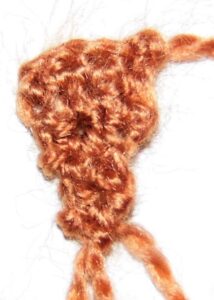
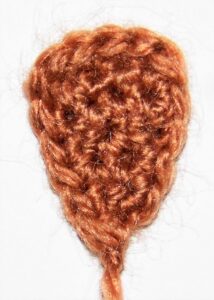
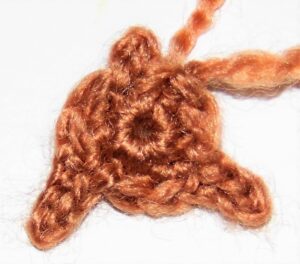
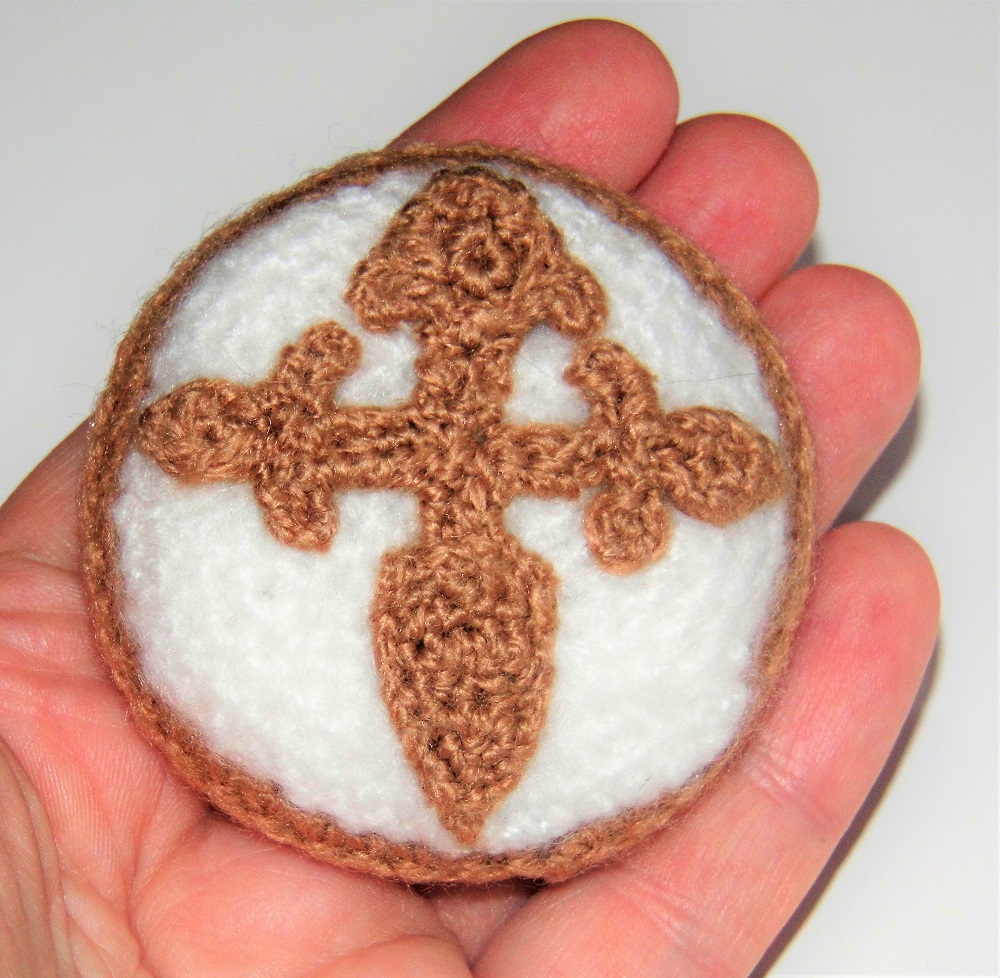
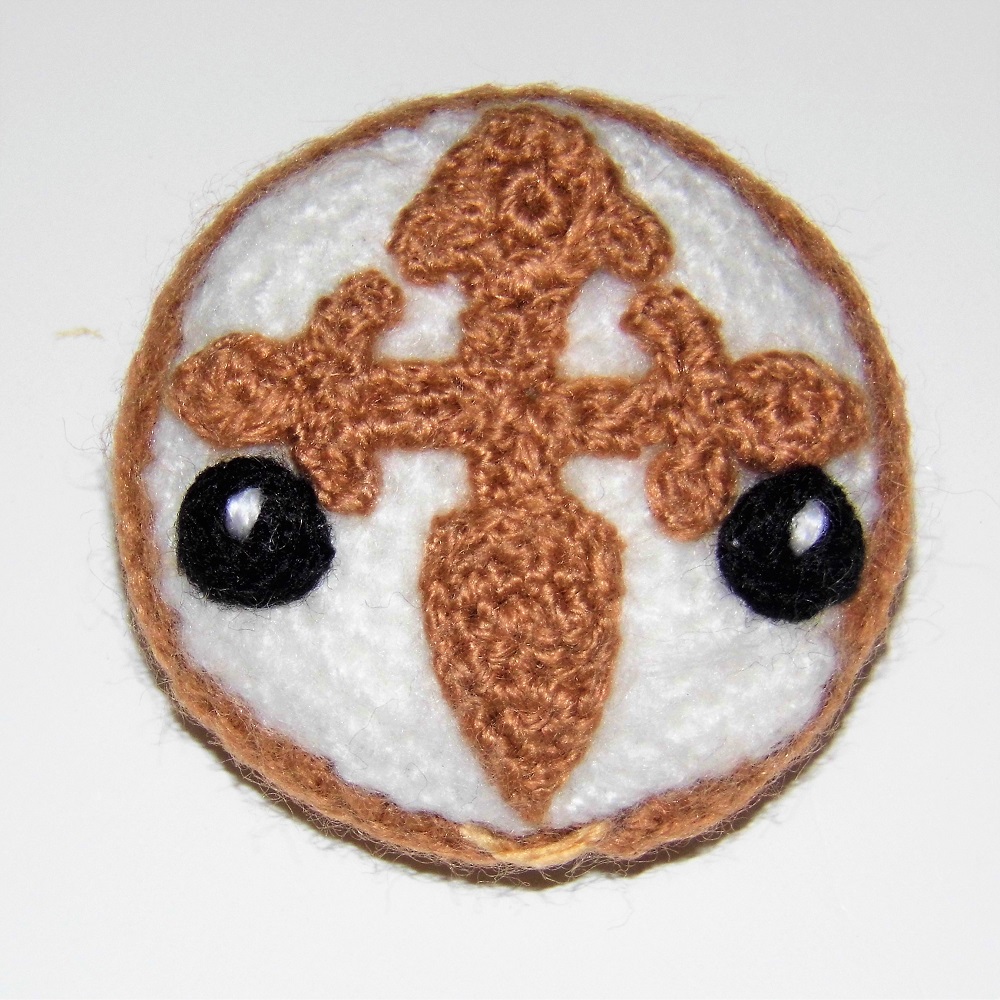
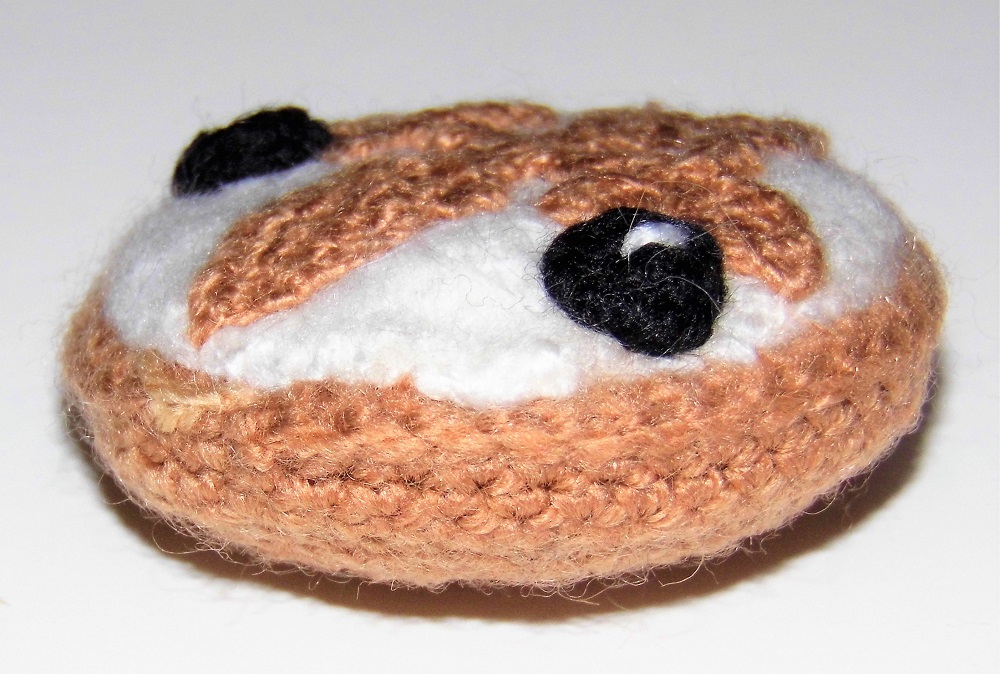
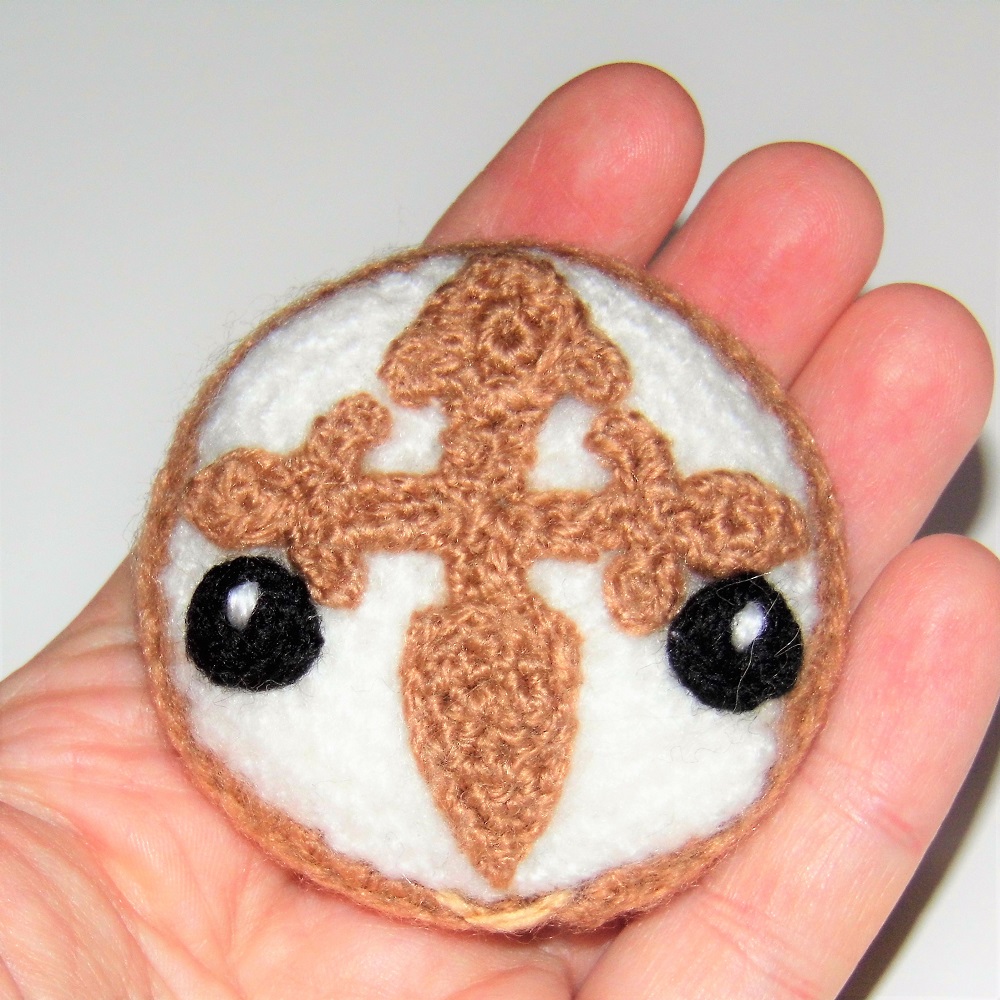
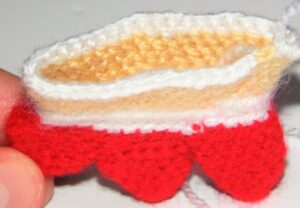
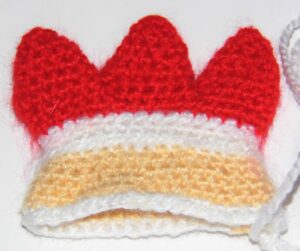
As you know, I am from Galicia and as I have done on previous occasions as in the Galician Octopus Amigurumi Pattern, I want to show you a little bit of my land through the St James Cake Amigurumi Pattern.
I have designed a New collection of “delicious” kawaii-style amigurumis
And I thought I could take advantage of and show you one of the most representative desserts of my land:
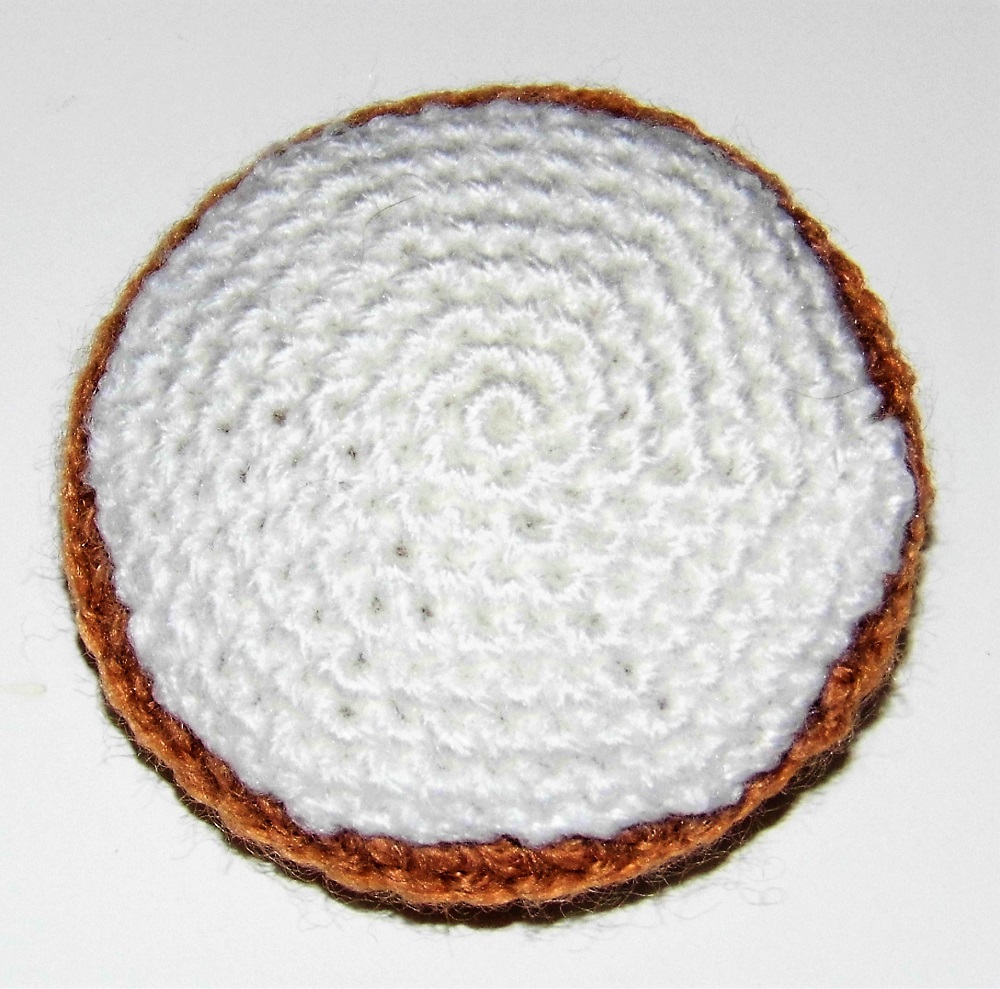
St. James’ Cake (Tarta de Santiago)
Do you know it? It is a very simple recipe since it is made only with almonds, sugar and eggs, with a little bit of cinnamon and lemon zest.
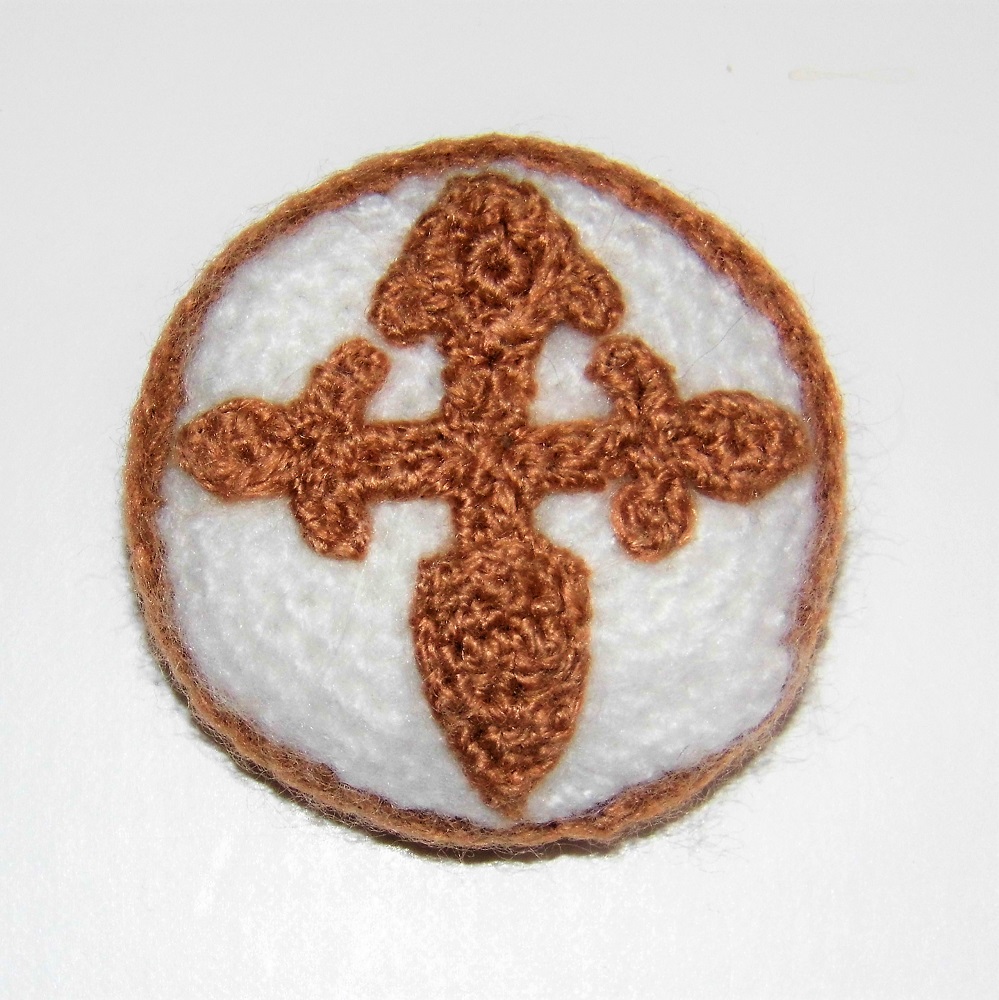
It’s delicious! But what makes it unmistakable is the drawing of St. James’ cross on the surface made with a template on which we sprinkle icing sugar.
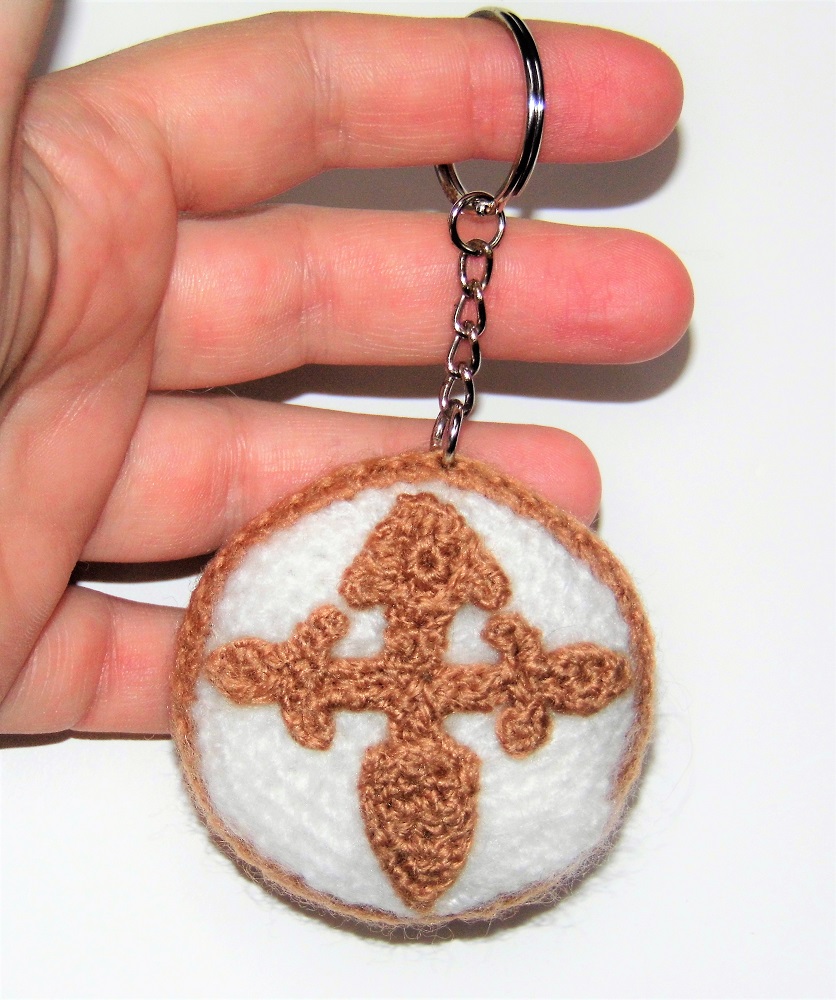
Here you have the St-James’ Cake Amigurumi Pattern that you can also turn into a funny keychain. I hope you like it!
Size: 2,3″ / 6 cm
Difficulty: High
Estimated Time: 8 h
Hook size: 2 mm
MATERIALS
Yarn of different colors: white, black, beige, light beige.
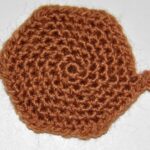
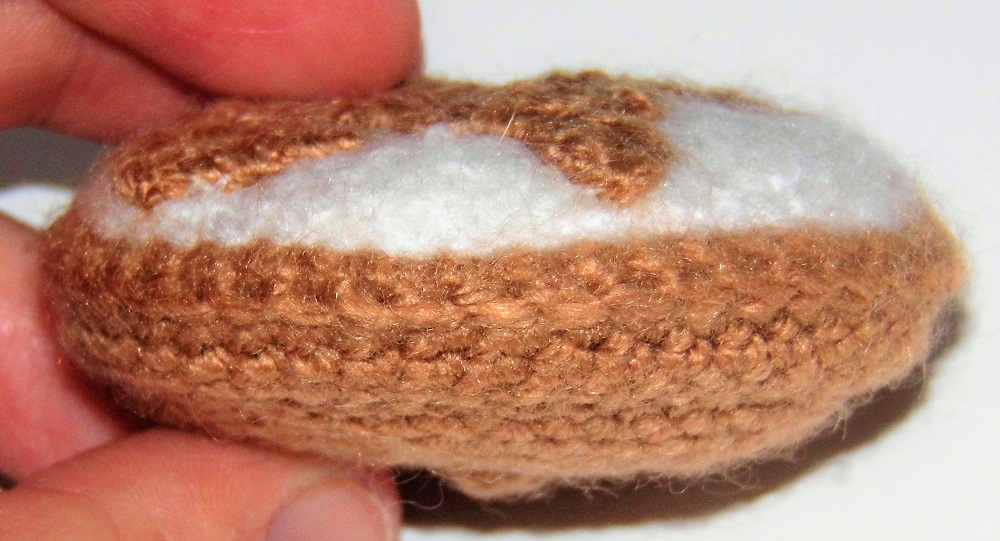
1. Work 6 sc in magic ring. 2. Inc in every st (12). 3. “1 sc, inc”, repeat (18). 4. “2 sc, inc”, repeat (24). 5. “3 sc, inc”, repeat (30). 6. “4 sc, inc”, repeat (36). 7. “5 sc, inc”, repeat (42). 8. 1 sc in each st (42).
9. Work in back loops only 1 sc in each st (42). You will return to this round to complete the cake. 10. and 11. 1 sc in each st (42). 12. Work in back loops only 1 sc in each st (42). You will return to this round to complete the cake.
13. “5 sc, dec”, repeat (36). 14. “4 sc, dec”, repeat (30). 15. “3 sc, dec”, repeat (24). 16. “2 sc, dec”, repeat (18). 17. “1 sc, dec”, repeat (12). 18. Dec in every st (6). Fasten off. Sew the hole with the yarn needle.
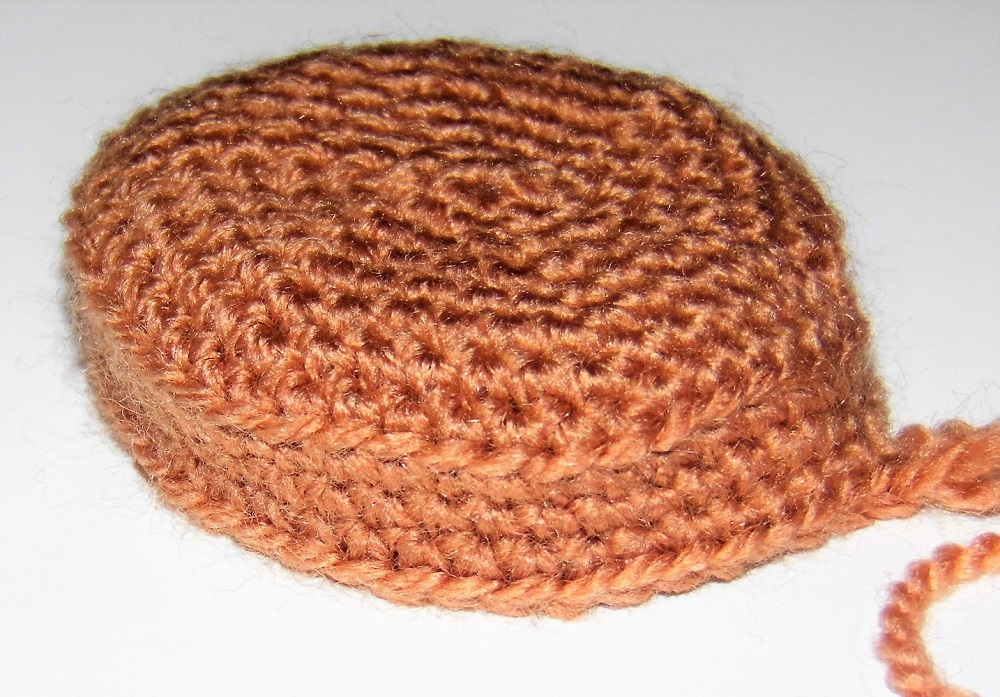
Complete the Cake
With beige yarn
Return to round 9 and holding the piece with the magic ring pointing down, work 1 sc in each st (42). Fasten off
1. Return to round 12 and holding the piece with the last round pointing down, work 1 sc in each st (42). 2. and 3. 1 sc in each st (42).
4. Join with sc the 42 sc of each side (42).
ICING SUGAR PART
With white yarn
1. Work 6 sc in magic ring. 2. Inc in every st (12). 3. “1 sc, inc”, repeat (18). 4. “2 sc, inc”, repeat (24). 5. “3 sc, inc”, repeat (30). 6. “4 sc, inc”, repeat (36). 7. “5 sc, inc”, repeat (42). 8. 1 sc in each st (42). Fasten off.
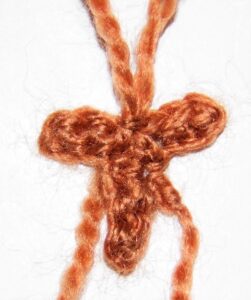
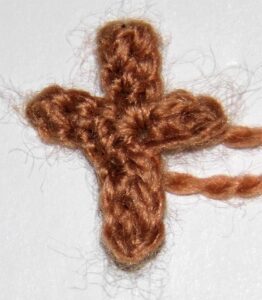
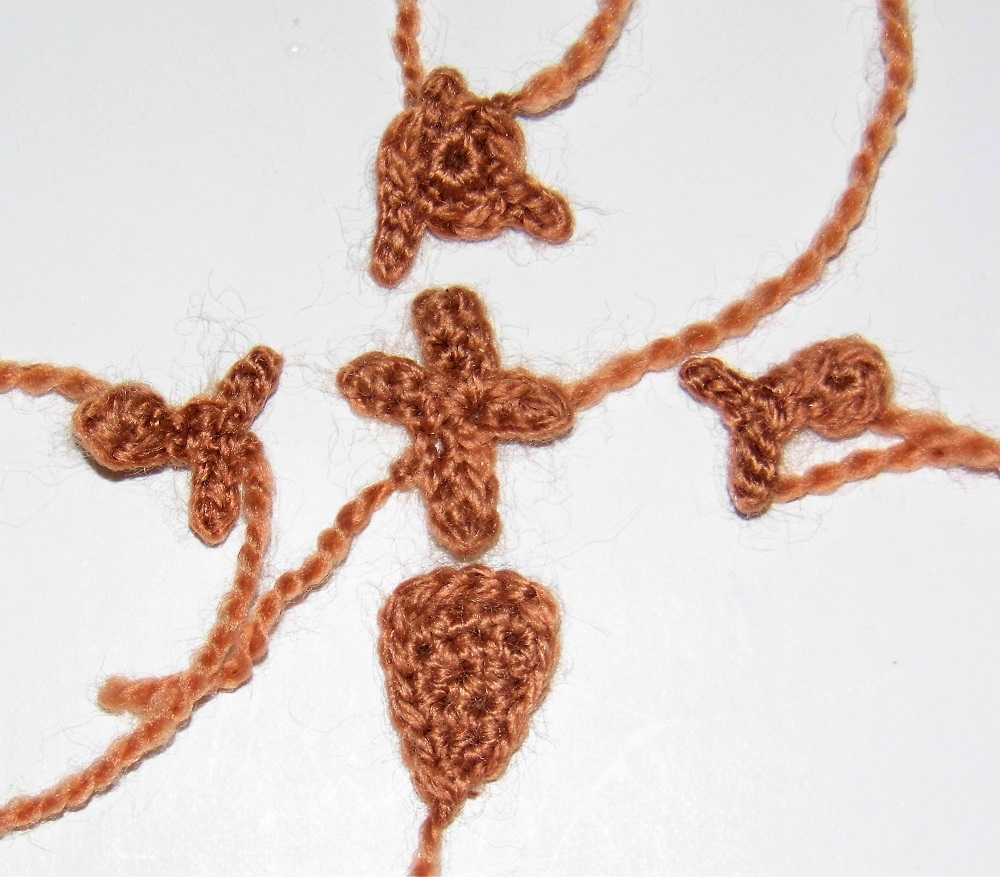
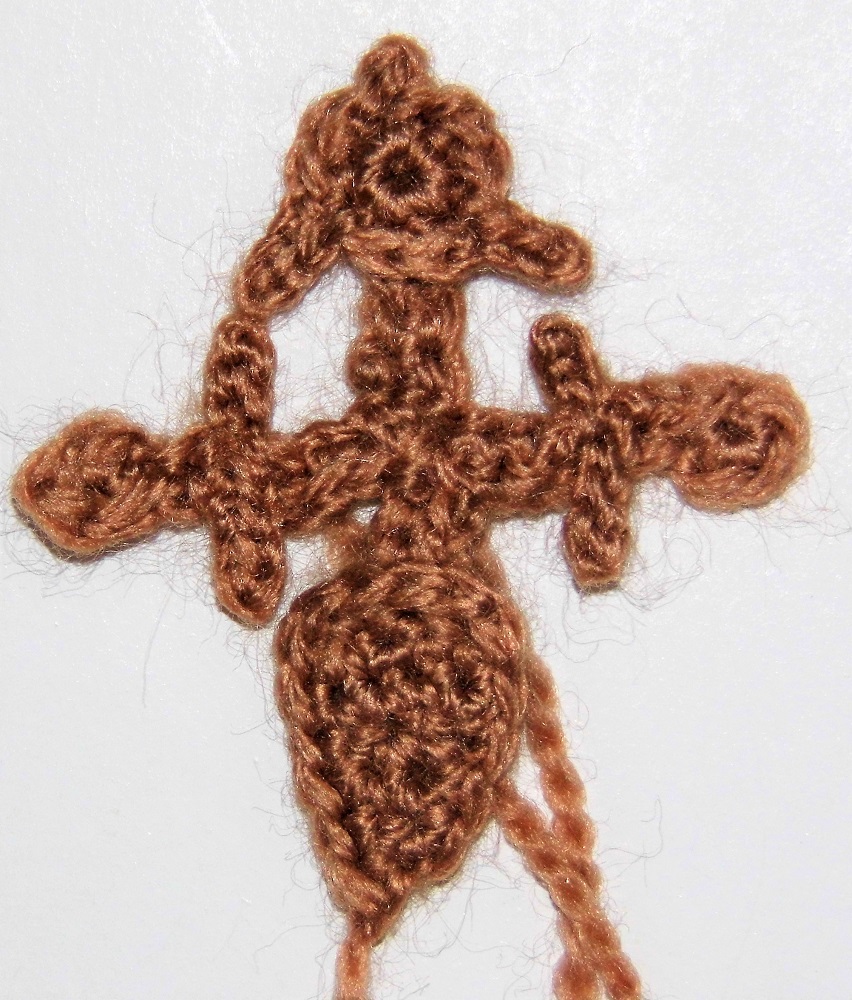
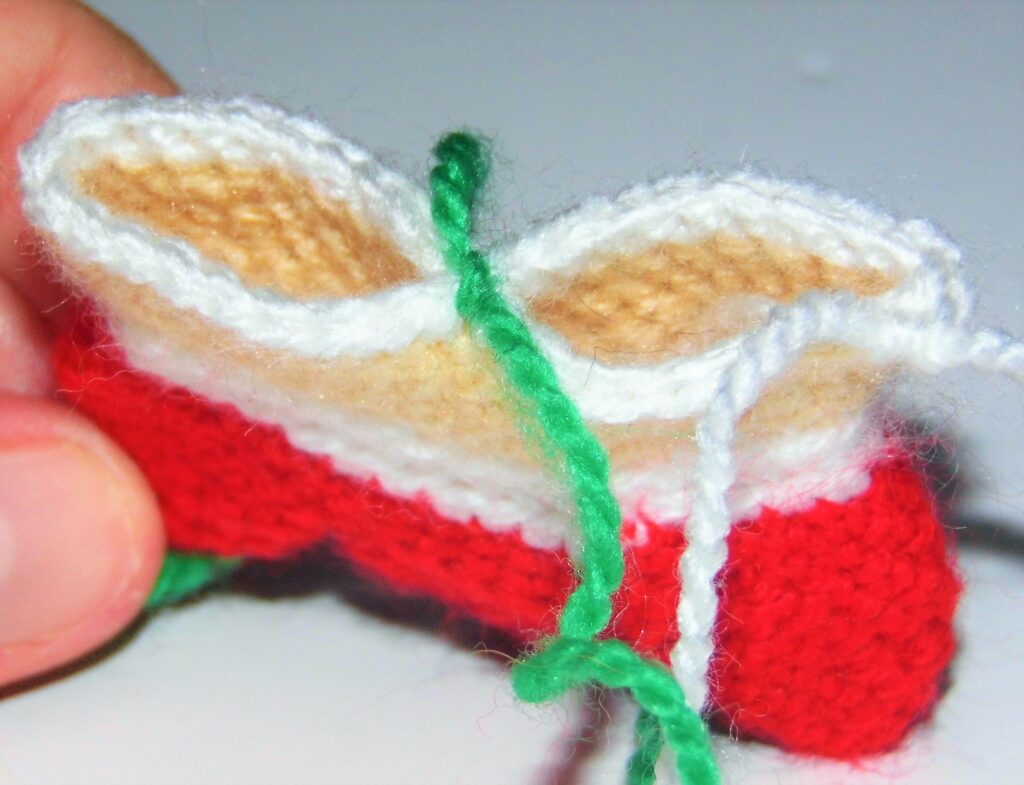
ST. JAMES’ CROSS
Bottom
With beige yarn
1. Ch 5 and work 4 sc on the chains. 2. Ch 1, turn and work 1 sc in each st (4). 3. Don’t ch 1, turn, work 1 sc in each st until you reach the last 2 sc, then dec 1 (2). 4. Ch 1, turn and work 1 sc in each st (2). 5. Don’t ch 1, turn and work 1 sc.
6. Place the round marker to work around the piece with sc. Work: 5 sc + 4 sc + 5 sc + 1 sc. Fasten off.
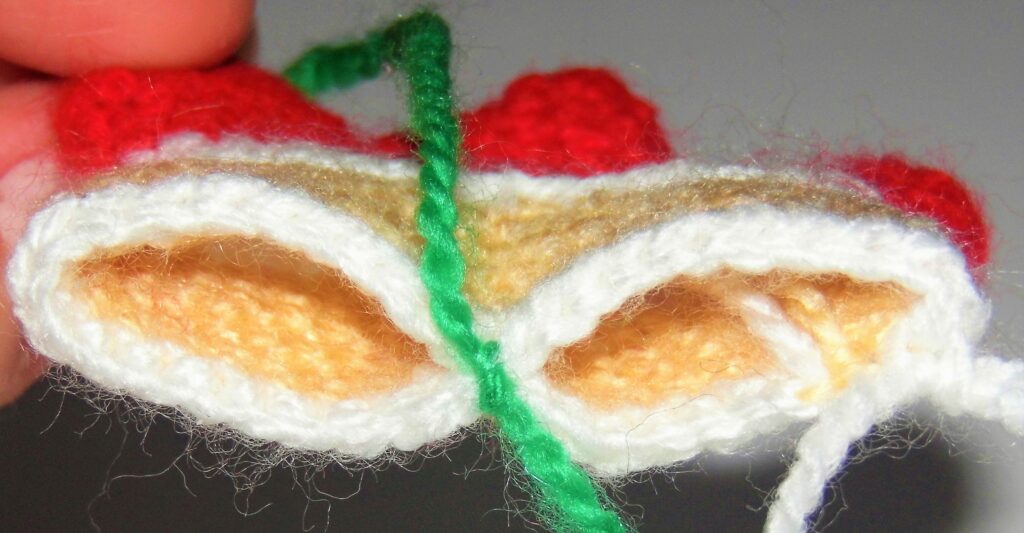
Cross
With beige yarn
Work “Ch 4, 3 sc in the chains” 2 times, 1 slip st in the middle, “Ch 4, 3 sc in the chains, 1 slip st in the middle” 2 times. Fasten off.
Top
With beige yarn
1. Work 6 sc in magic ring. 2. Ch 2, 1 slip st in the chains, 1 slip st in the st beginning of the chains, 2 sc in the magic ring, Ch 4, 3 slip stitches in the chains, 1 slip st in the st beginning of the chains, 2 sc in the magic ring, Ch 4, 3 slip stitches in the chains, 1 slip st in the st beginning of the chains, 1 sc in the magic ring, 1 final slip st. Fasten off.
Sides (x2)
With beige yarn
1. Work 4 sc in magic ring. 2. Ch 1, 1 sc, Ch 4, 3 slip stitches in the chains, 1 slip st in the middle, Ch 4, 3 slip stitches in the chains, 1 slip st in the middle. Fasten off.
EYES (x2)
With black yarn
Work 6 sc in magic ring. Fasten off. With white yarn embroider the twinkle.
Final Details
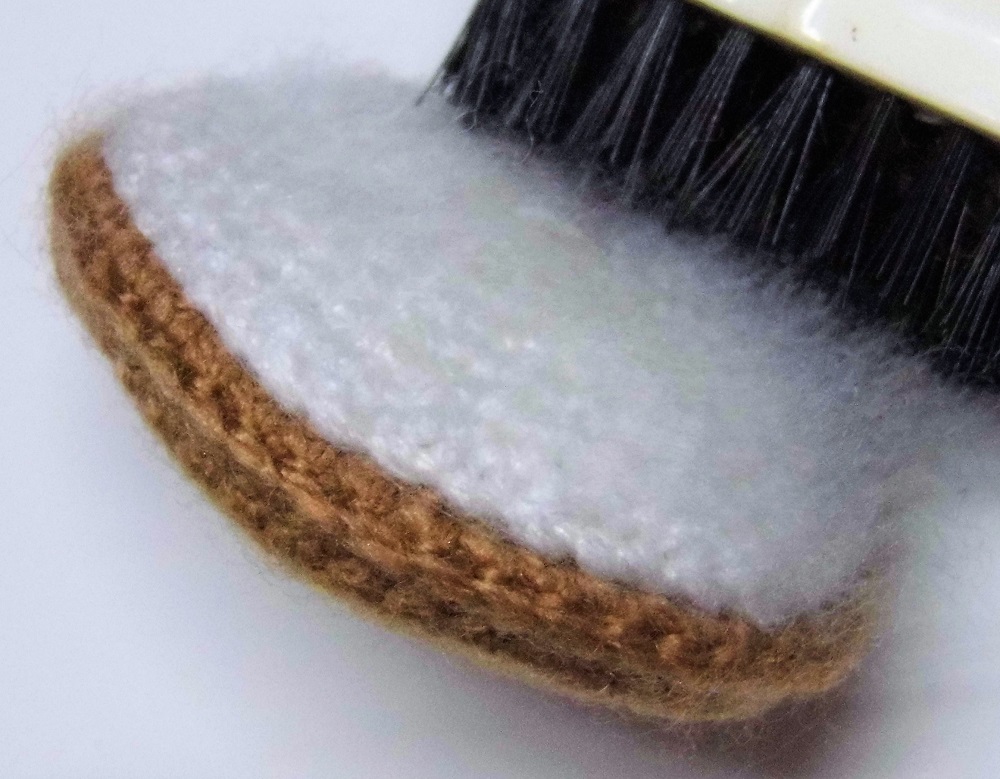
Sew the icing sugar part on the piece of cake. To give a cottony look, lightly brush the wool once it is sewn.
Sew the bottom, top and sides over the cross above this piece and once you have the complete Cross, sew it onto the cake. The piece of the cross that you have crocheted does not have a well-defined shape, but it will help you so that once sewn, you can embroider around it, outlining the edges. This is the trickiest part of the pattern. Do it carefully, taking the thread of the piece and sewing over it in short lengths.
Finally, sew the eyes under the sides of the cross and embroider with light beige yarn the mouth at the bottom, leaving a little beige to show between it and the white part.
Finished!
I hope you have enjoyed the St James Cake Amigurumi Pattern
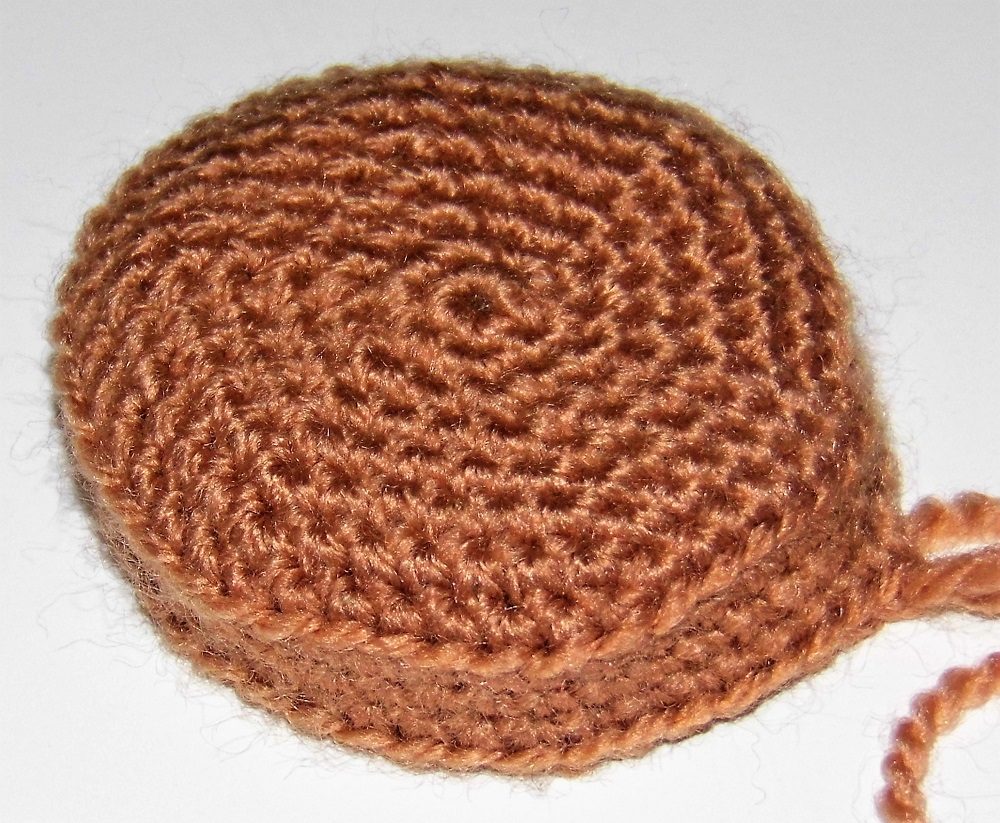
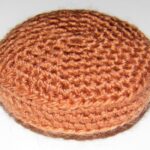
The two sides of the fabric. The right and wrong side in amigurumis
Amigurumis are my passion and unsurprisingly, I love seeing the creations of other designers. There are true works of art worthy of admiration. However, on some occasions the appearance of the fabric, the stitches, has caught my attention. At first I didn’t know what it was until crocheting one of my amigurumis I realized: those amigurumis were with the inside out. In this tutorial we will see the right side and wrong side in amigurumis
Crocheting the amigurumis, shaping the pieces with stitches, increases, decreases, came about in such a natural way for me that I had never considered using the wrong side of the fabric. It just wasn’t aesthetic to me.
The truth is that, when crocheting an amigurumi in rounds, in continuous spiral, the fabric curves to the wrong side, so it is not difficult for inexperienced crocheters to get confused.
However, although we may think that this is not important, the fabric of an amigurumi is not reversible. There are details that can turn the wrong side into an aesthetically unwanted side, although many designers prefer it.
The appearance
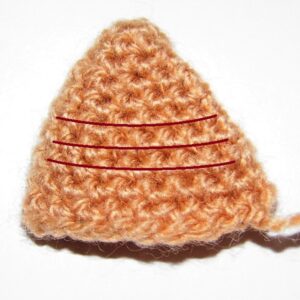
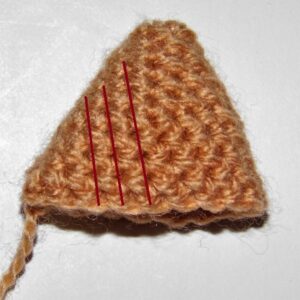
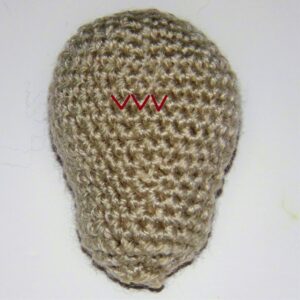
At first sight, on the right side of the fabric you can perfectly see each of the rounds and even count them easily.
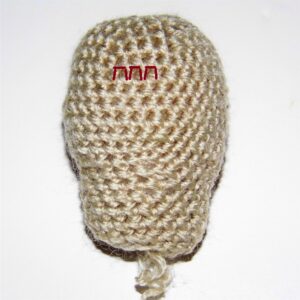
In the wrong side, the vertical lines between the stitches stand out, the increases or decreases are marked and there are crowded or displaced stitches that can affect the design.
On the right you can see the rounds and count them easily
On the wrong side the vertical lines between the stitches stand out
In practice
But not everything is negative and using the wrong side of the fabric can be interesting to give a different look to a certain piece and make it highlight from the rest.
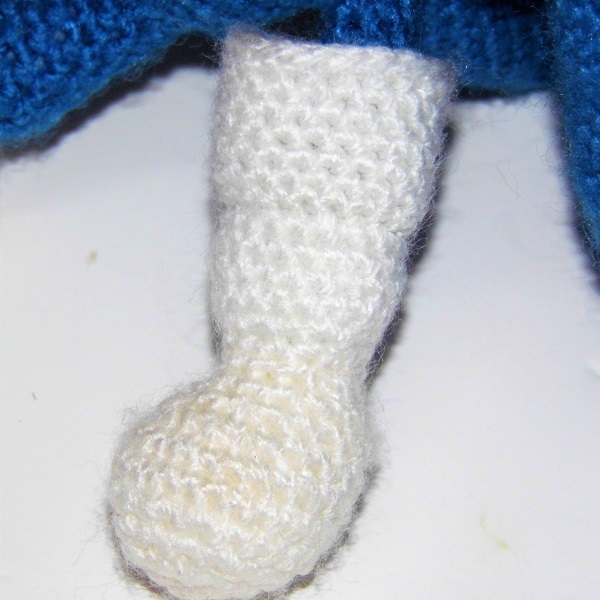
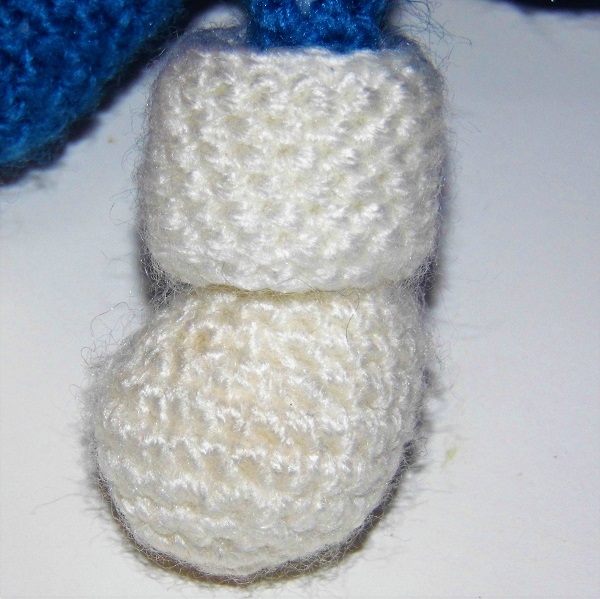
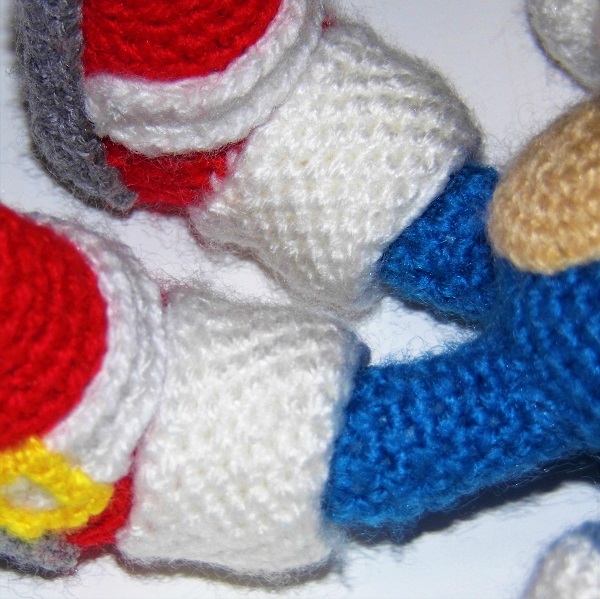
Look at Sonic’s gloves and socks. When folding the piece, the stitch is reversed and distinguish against the cuffs and legs and feet, giving an original look to the whole.
Piece on the right sideFolded pieceContrast right & wrong side
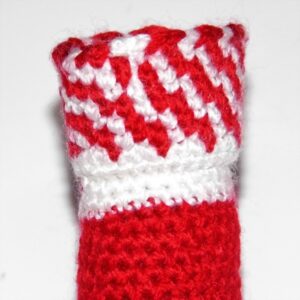
Another example is found in the color change of this Christmas sock. When you turn it over, the drawing changes and in my opinion, it looks more beautiful.
Right sideWrong side
How do we differentiate the sides of the fabric?
To differentiate the right side from the wrong side you must look at the stitches.
On the right you can see the V shape of the stitches, while on the wrong side the straight lines stand out.
Right side V shapeWrong side straight shape
Another way to differentiate the Right side and wrong side in amigurumis is by observing the way and direction in which you work.
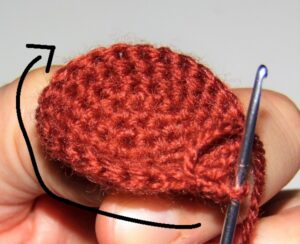
The right side will be the one where you work from the outside rim to the left, moving the hook away from you as you go. You move from near to far.
On the right side we move to the left from near to far
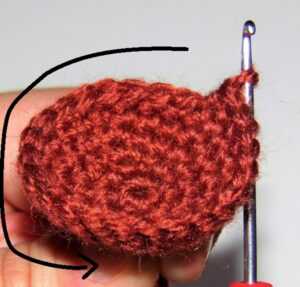
The wrong side, on the other hand, is the one in which you crochet from the inside rim of the piece to the left, bringing the hook towards you as you go. You move from far to near.
On the wrong side we move to the left from far to near
It’s easy to differentiate them, right?
What about you, which side do you like the most? You can give me your opinion in the comments 😉
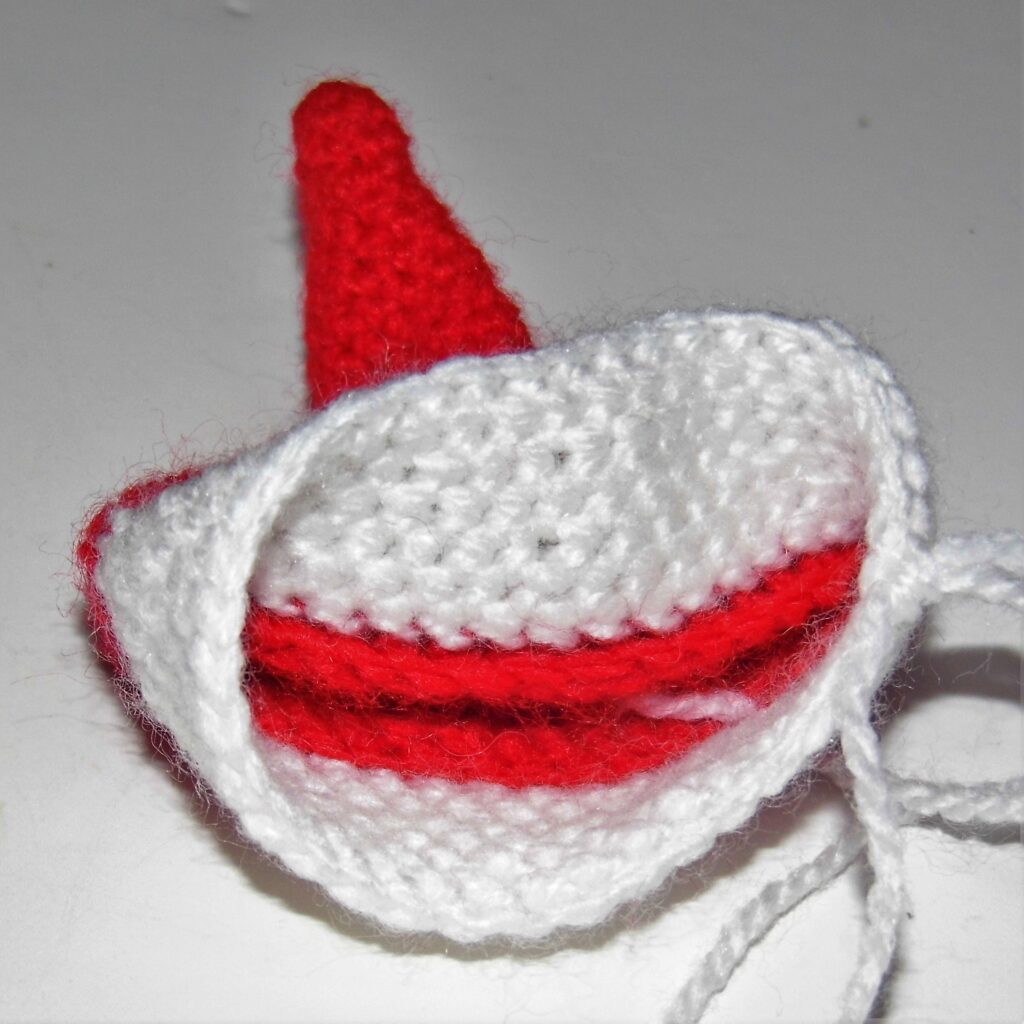
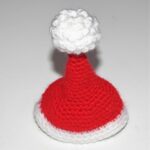
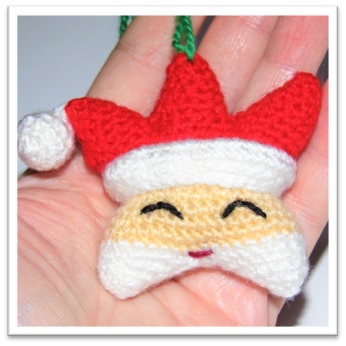
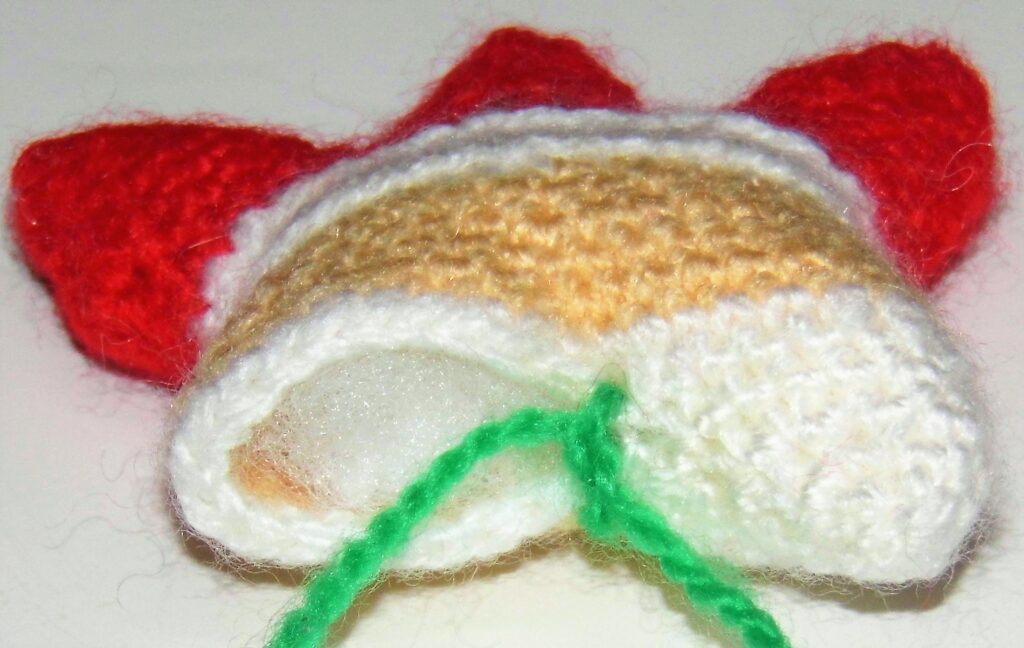
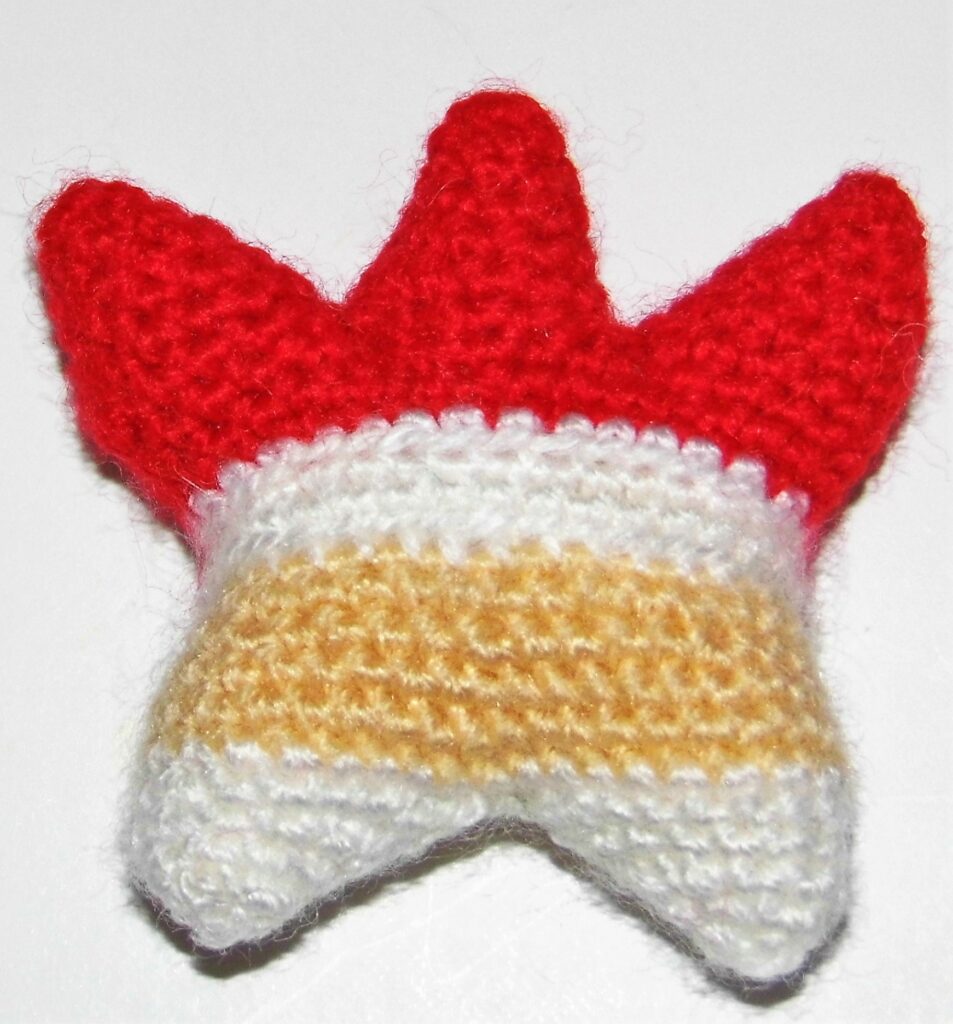
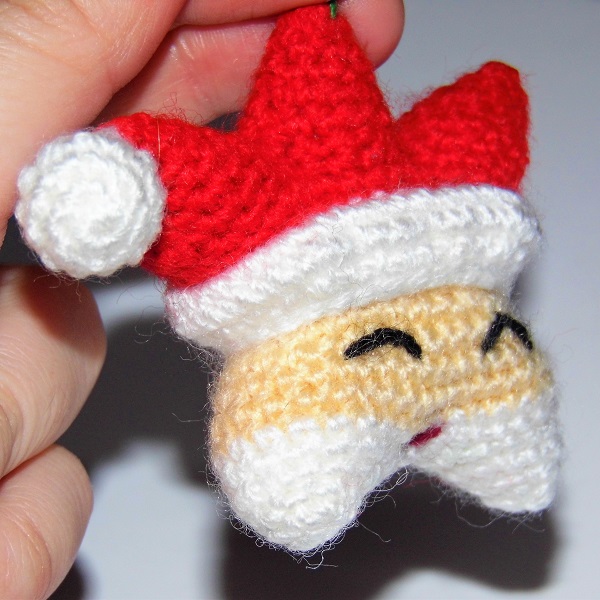
We are about to celebrate a different Christmas but that is not a reason we should stop enjoying the little things that we like, as crocheting our beloved amigurumis. This time I bring you the Santa Claus Star amigurumi Pattern
Let’s crochet a nice Christmas ornament!
I hope you like it and enjoy crocheting this Santa Claus Star. (You can download the pattern below)
MATERIALS
Yarn of different colors: white, black, skin color, red, dark red.
Thickness of the yarn: 3 mm.
Hook according to the thickness of the yarn.
Yarn needle.
Fiberfill.
ABBREVIATIONS
sc: single crochet st: stitch ch: chain inc: increase dec: decrease Fill the doll with fiberfill as you crochet.
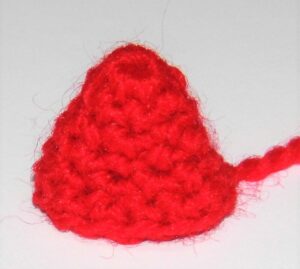
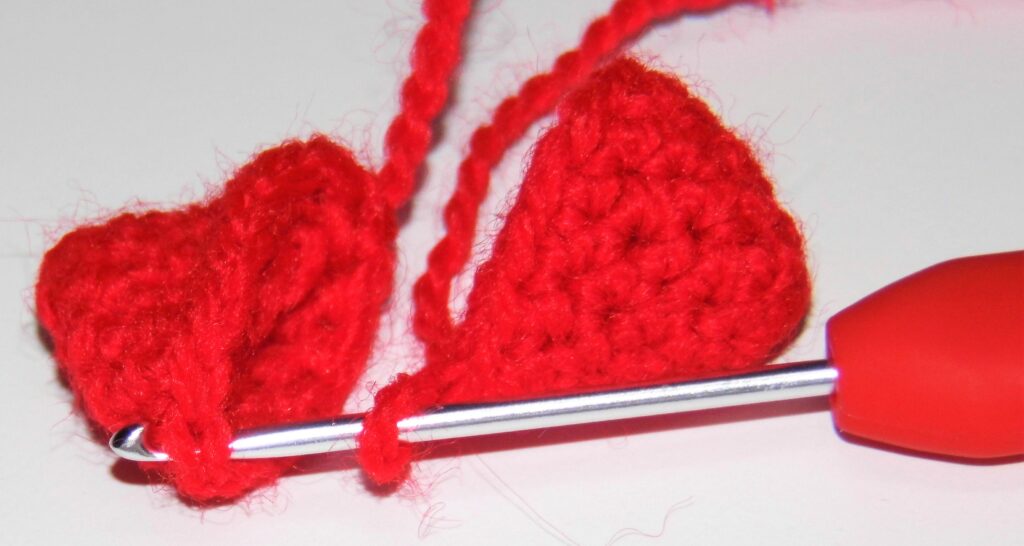
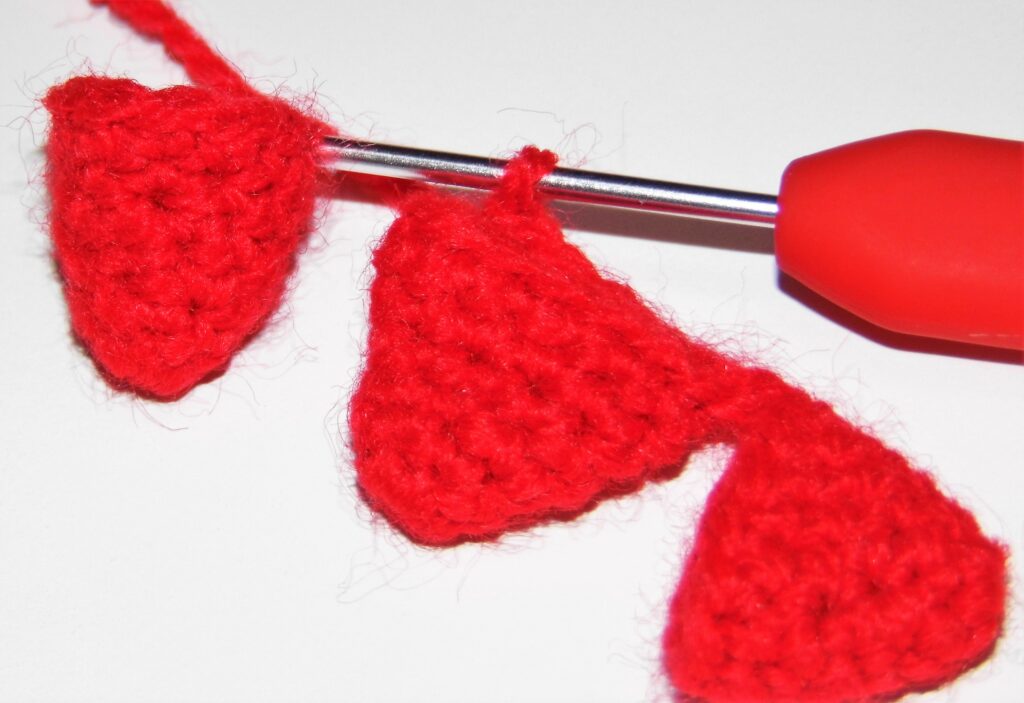
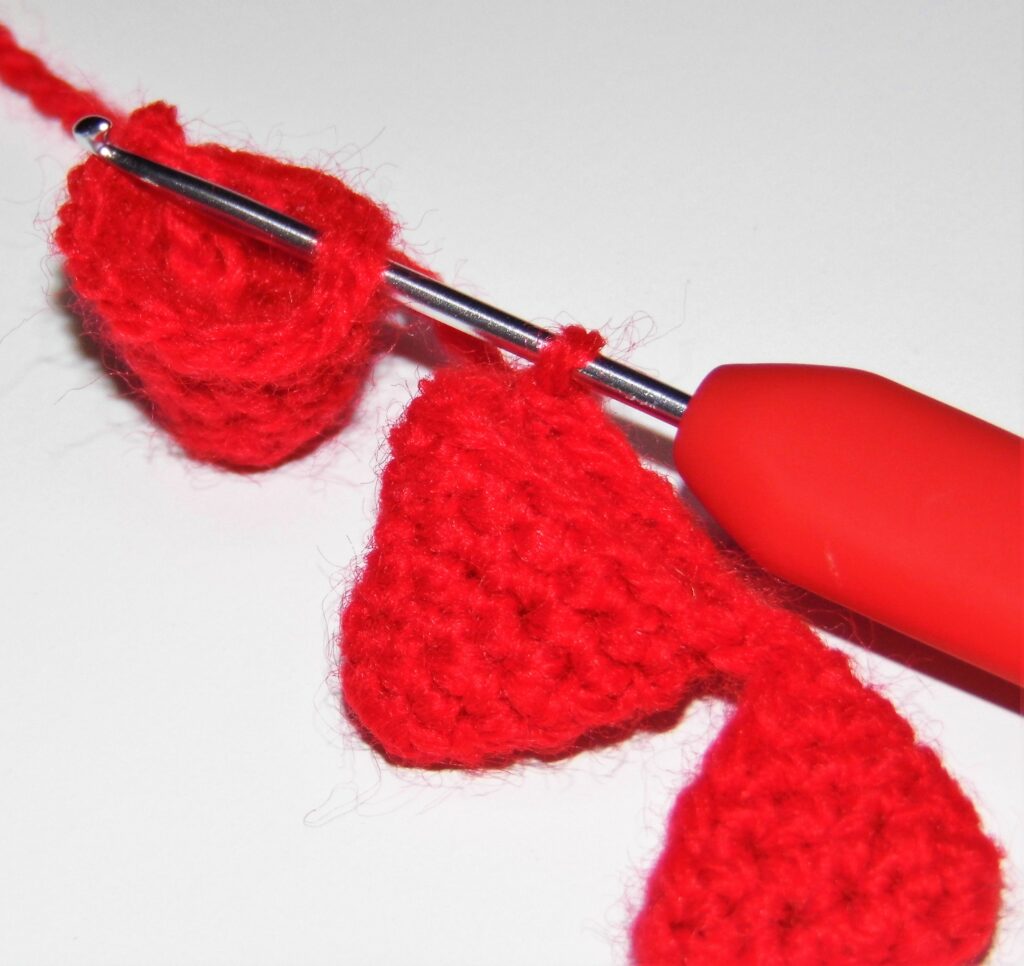
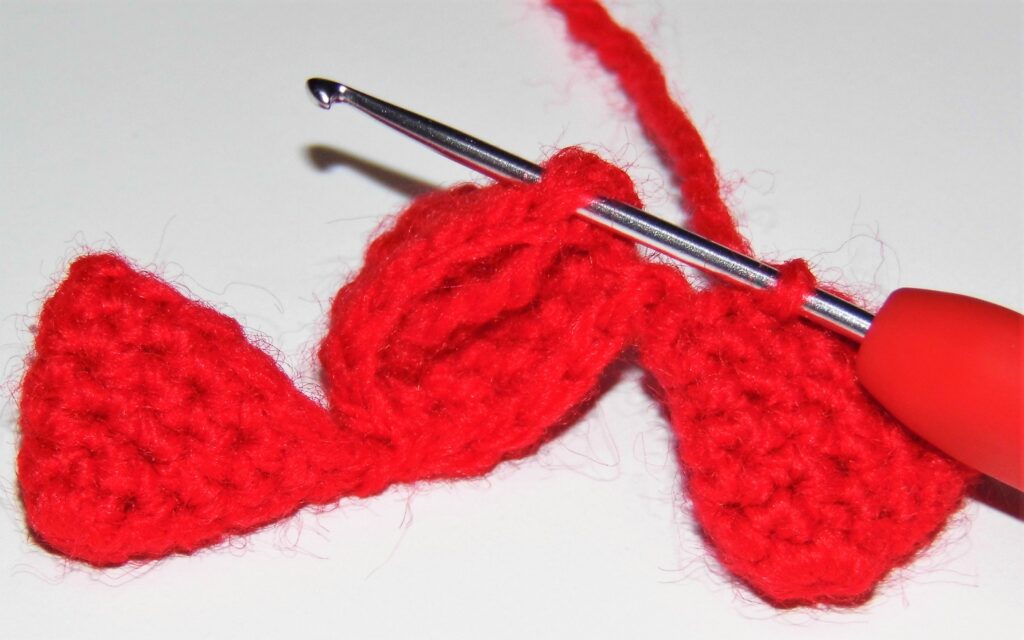
STAR Points (x3)
With red yarn
1. Work 6 sc in magic ring.
2. 1 sc in each st (6).
3. “1 sc, inc”, repeat (9).
4. 1 sc in each st (9).
5. “2 sc, inc”, repeat (12).
6. 1 sc in each st (12). Fasten off.
Work and fasten off 2 points. Work and don’t fasten off the last point to start
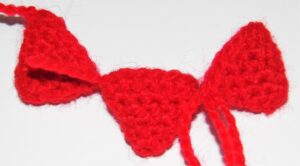
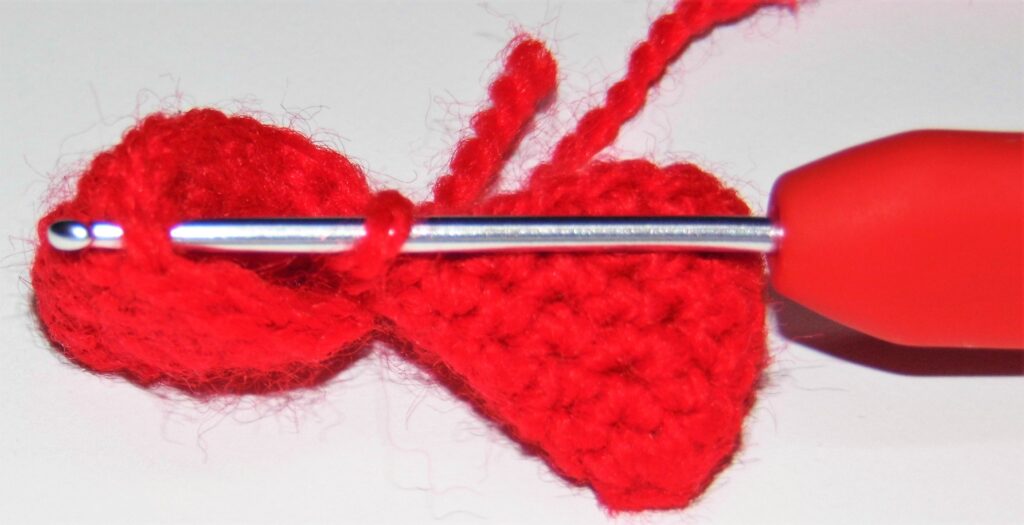
Joining the Points:
1. Starting from the point that you didn’t fasten off, work 1 sc in the next point, but join on the inside. Then crochet 5 more sc.
Then work 1 sc in the last point, this time from the outside and continue around this point crocheting 11 more sc until completing the 12 sc that form it.
Continue working in the central point again on the inside another 6 sc and finish in the first point by crocheting 12 sc from the outside. In this way you will have joined the 3 points, but, to crochet the central one on the inside and the sides on the outside, you will gain space between them to shape the star. You will have 36 sc in all (3 points x 12 sc)
2. Start crocheting the central part of the star, in rounds and from the outside, 1 sc in each st (36).
3. 1 sc in each st (36).
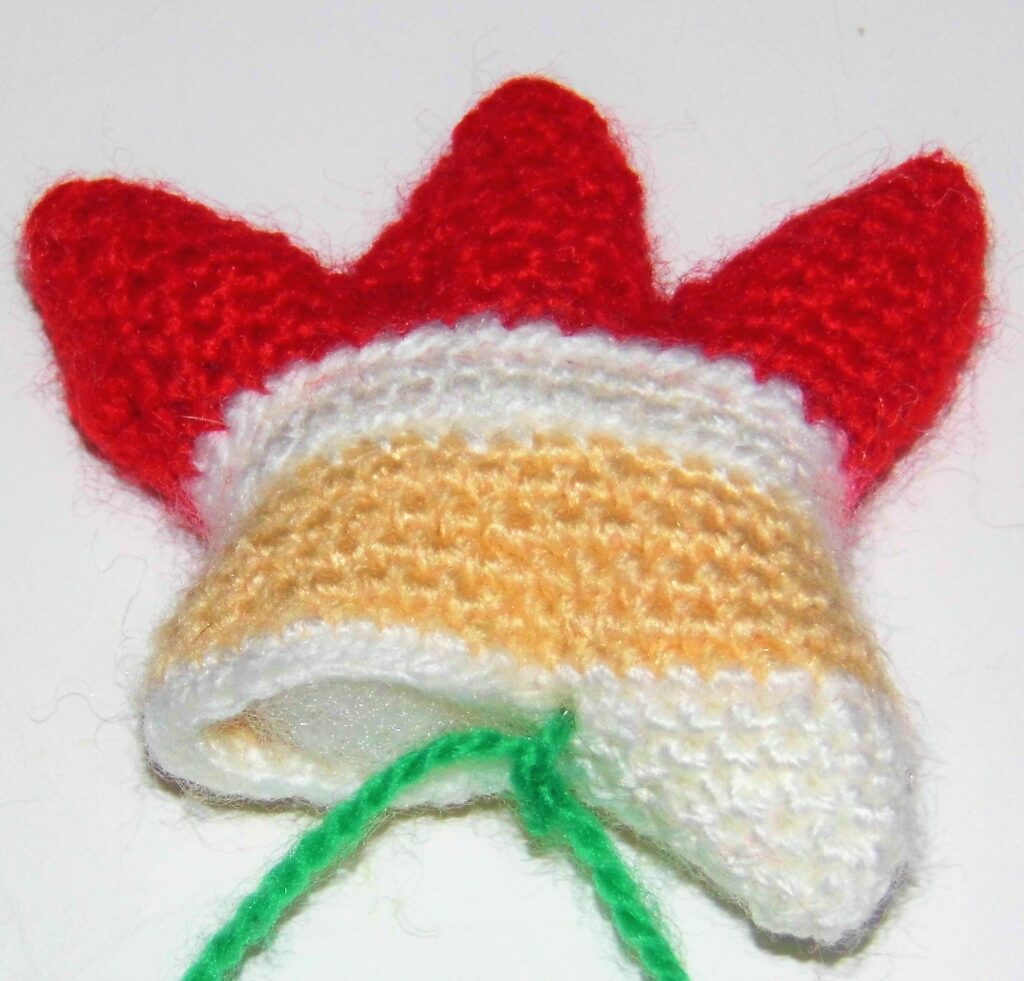
4. Change to white yarn and work “4 sc, dec”, repeat (30).
5. Work in back loops only 1 sc in each st (30). You will return to this round to complete the hat.
6. 1 sc in each st (30).
7. Change to skin color yarn and work in back loops only 1 sc in each st (30). You will return to this round to complete the hat.
8. 1 sc in each st (30).
9. “4 sc, inc”, repeat (36).
10. and 11. 1 sc in each st (36).
12. Change to white yarn and work 1 sc in each st (36).
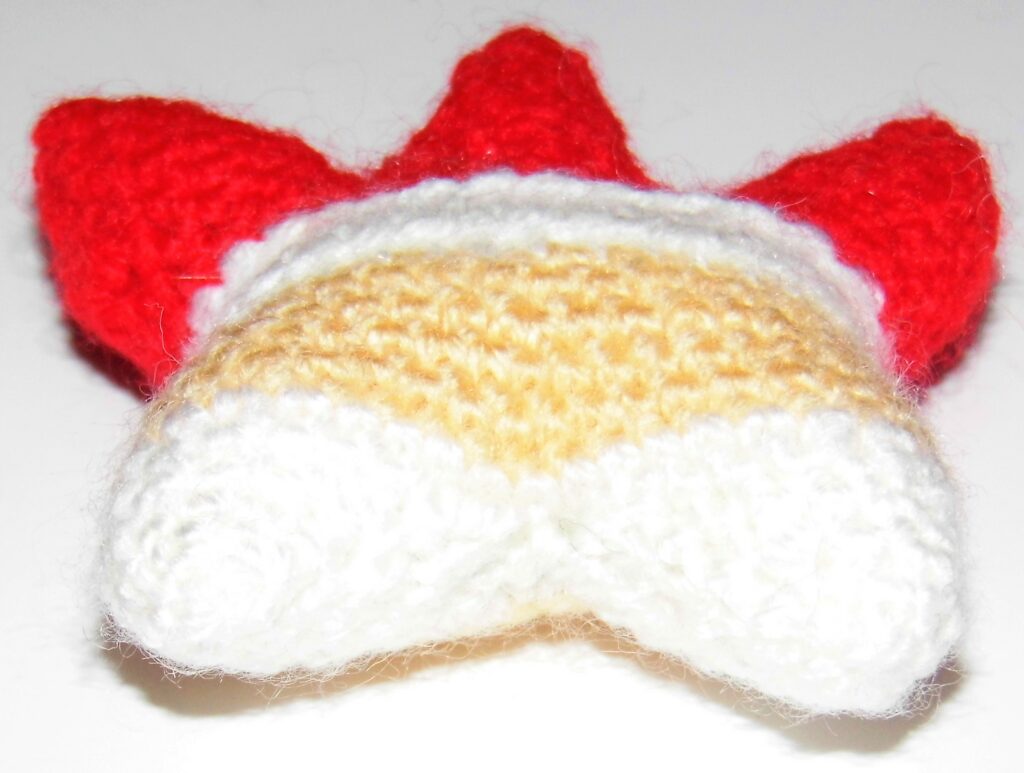
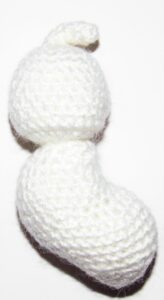
Let’s start crocheting the 2 lower points:
To do this you will divide the 36 sc into 2 halves of 18 sc that you will join in the central part. Place a mark (for example a piece of wool) so as not to get confused when you crochet.
Once you are clear on which stitches you should crochet, continue from where you left off, crocheting 1 sc in each st until you reach the first marked central st. Work 1 sc in the opposite side st and place the round marker to start crocheting the point.
1. 1 dec, 12 sc, 2 dec (15).
2. 1 dec, 9 sc, 2 dec (12).
3. 2 dec, 6 sc, 1 dec (9).
4. 1 dec, 3 sc, 2 dec (6). Fasten off. Close the hole with the yarn needle.
Begin to stuff the star since you only have the last point to crochet. With the point that you have just finished placed to the left, work 1 sc in the next stitch, then work another sc in the opposite stitch and place the round marker. Follow the same pattern that you used to crochet the previous point. Finish stuffing, fasten off and close the hole with the yarn needle.
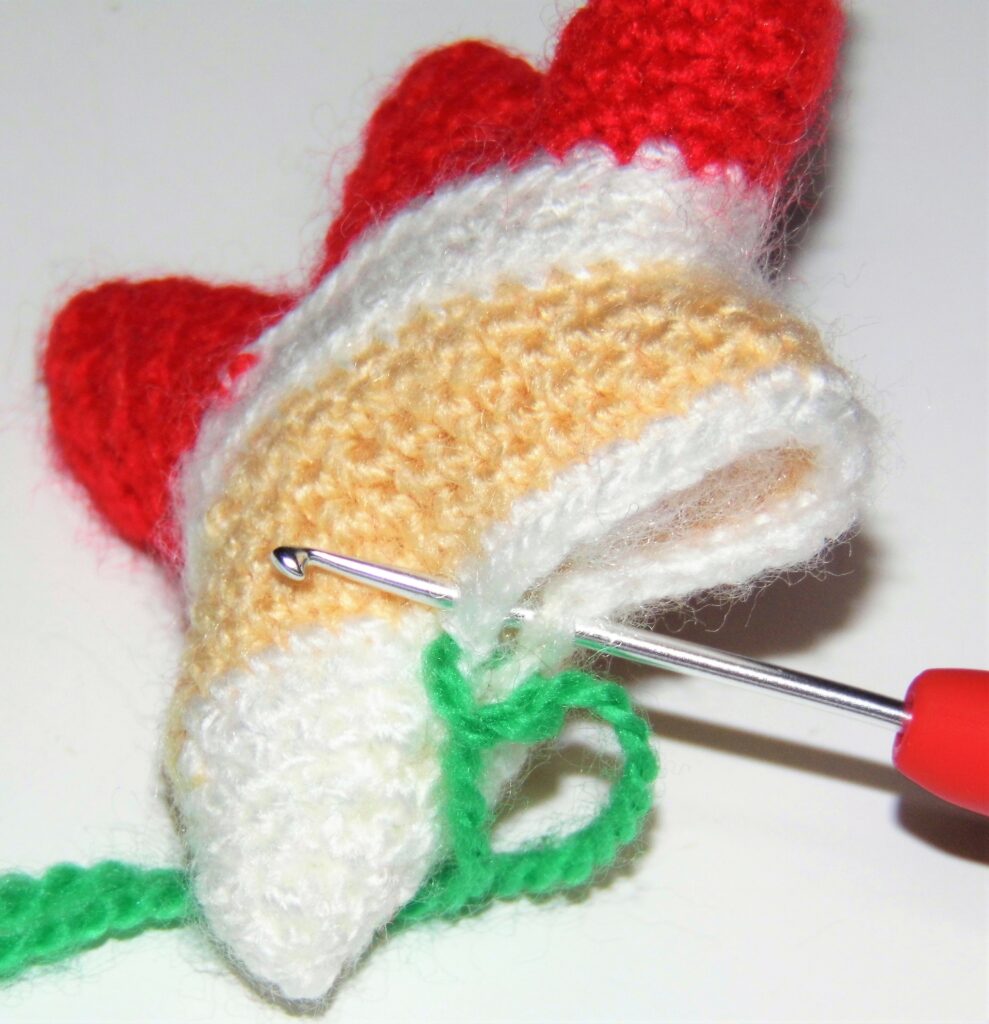
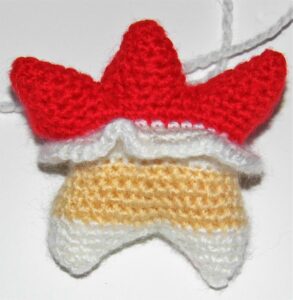
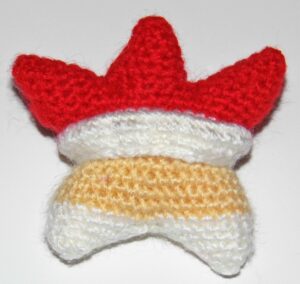
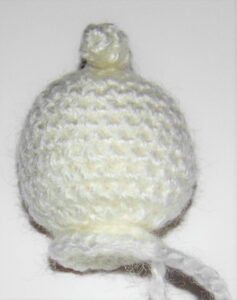
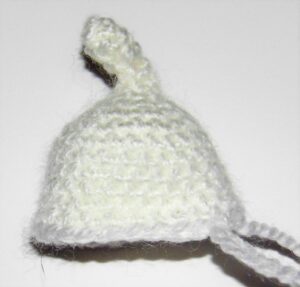
COMPLETE THE HAT
With white yarn
1. Return to round 5 and holding the star with the red points pointing down, crochet in the free loops 1 sc in each st (30).
2. Inc in every st (60).
3. 1 sc in each st (60).
4. Dec in every st (30).
5. Work slip stitches joining the sc of this last round with the free loops of round 7. (30).
Fasten off.
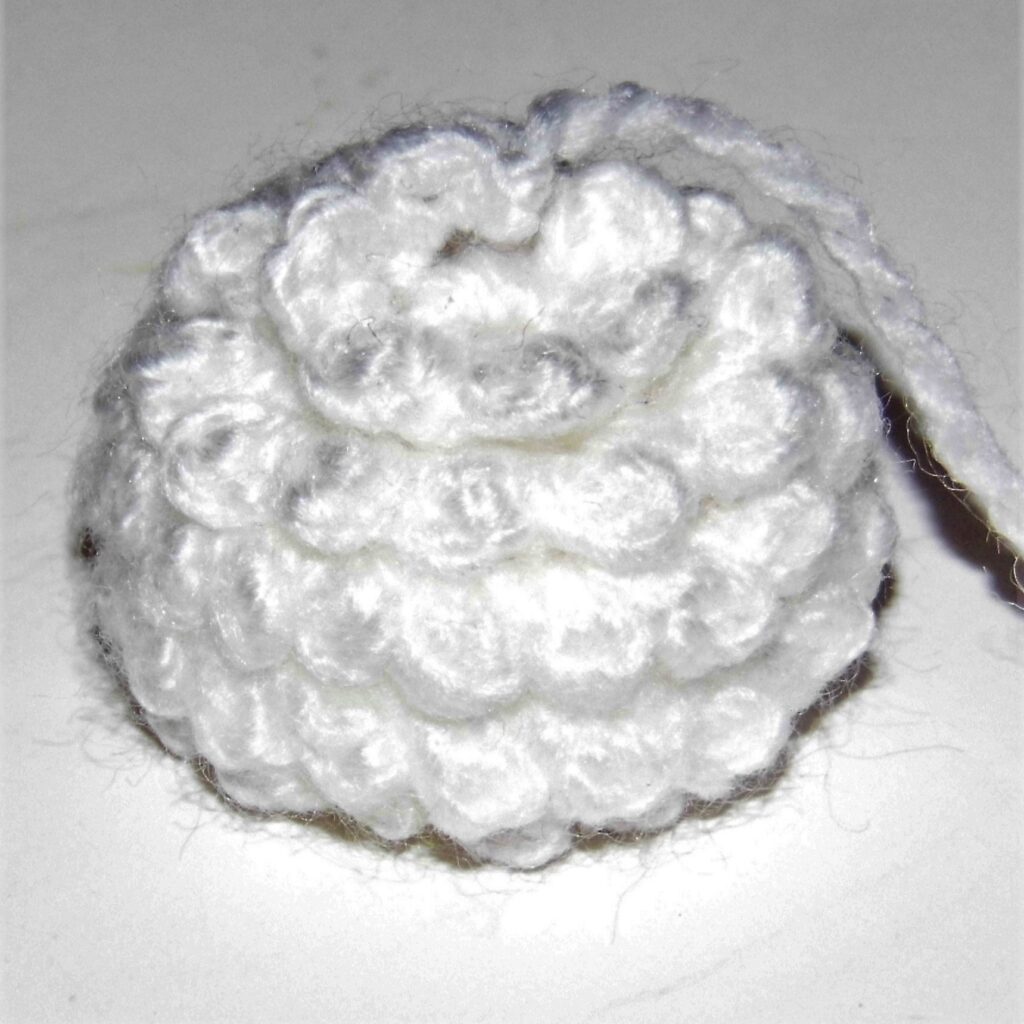
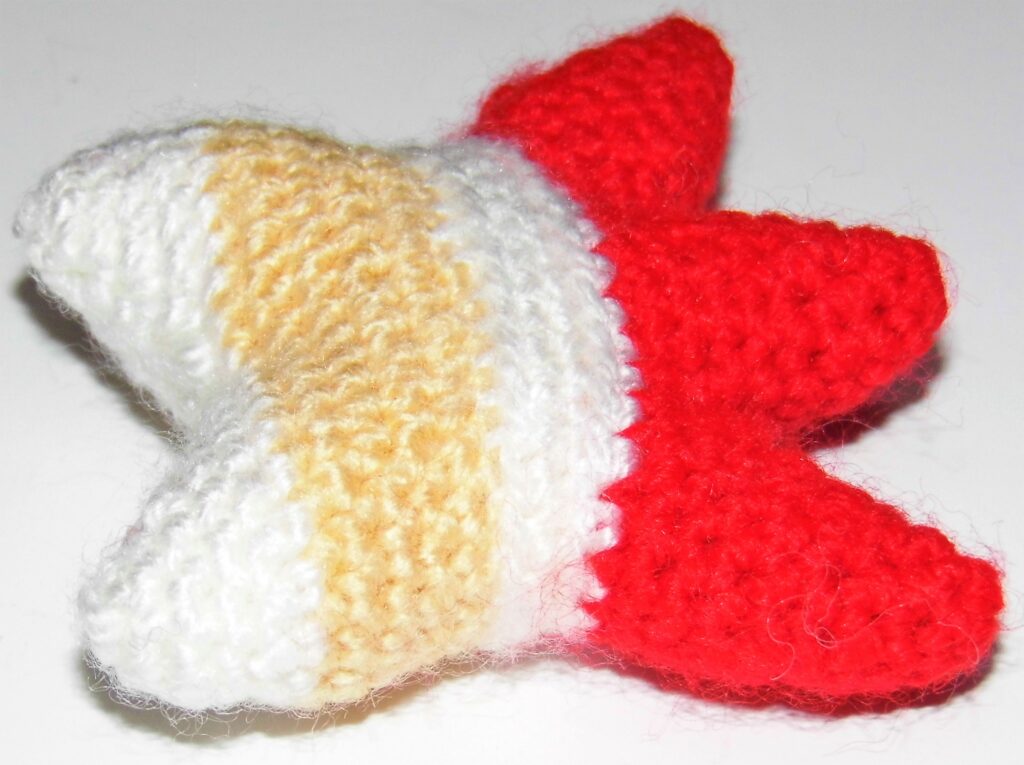
POMPOM
With white yarn
1. Work 6 sc in magic ring.
2. Inc in every st (12).
3. and 4. 1 sc in each st (12).
5. Dec in every st (6). Fasten off. Close the hole with the yarn needle. Sew on the side of one of the points.
FINAL DETAILS
Eyes Embroider them with black yarn, leaving 1 sc o separation from the hat and 3 sc between them. Mouth Embroider it with dark red yarn between the white points, on the color change line.
You already have it! A cute Santa Claus Star amigurumi!
If you have crocheted the Santa Claus Star amigurumi pattern and you liked it, you can send me the photo and I will post it in the gallery for everyone to see.
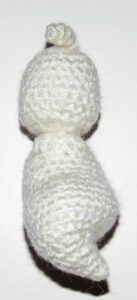
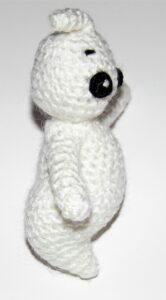
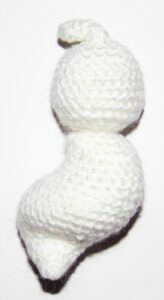
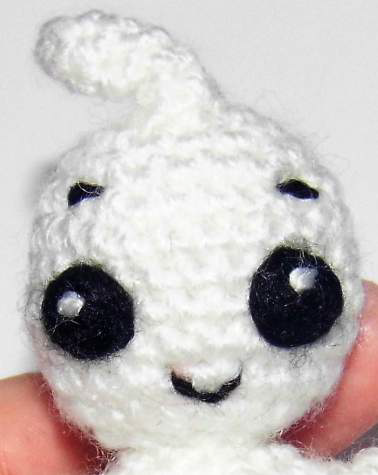
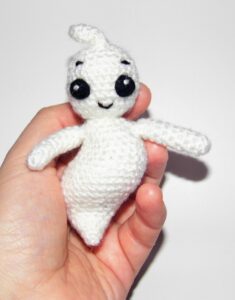
Halloween is coming and what better way to celebrate this unusual year than with the ghost amigurumi pattern to get a cute little ghost that I’m sure you are going to love.
Let’s begin to crochet our little ghost (If you want to download the pattern you can do it below):
Size: 4″/10 cm Difficulty: Low Estimated time: 1 h Hook size: 2 mm
MATERIALS
Yarn: white and black
Thickness of the yarn: 3 mm.
Hook according to the thickness of the yarn.
Yarn needle.
Fiberfill.
ABBREVIATIONS
sc: single crochet st: stitch ch: chain inc: increase dec: decrease Fill the doll with fiberfill as you crochet.
38. 1 sc in each st (6). Fasten off. Sew the hole with the yarn needle.
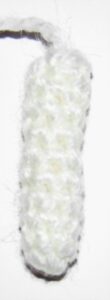
ARMS (x2)
With white yarn
1. Work 6 sc in magic ring.
2. to 10. 1 sc in each st (6). Fasten off. Sew them leaving 3 sc of separation from the neck line.
EYES (x2)
With black yarn Work 4 sc in magic ring. With white yarn embroider the twinkle.
FACE
To find out where you have to place the ghost’s face, you must look at the tips of the head and the end of the body. Our ghost seen from the front will have the tip of the head to the left and back, while the tip of the body will go to the right and forward.
Once you are sure about where you should place the face, start placing its elements: Sew the eyes from round 13 t o 15, embroidering around them with the black yarn to soften the rounded shape. Leave 3 sc of separation between them in their central part.
2 sc over the eyes, embroider with black yarn the eyebrows 2 sc long. Centered under the eyes embroider the mouth. It will have a separation of 1 sc in relation to these in its upper part and 2 in the low part and a length of 3 sc.
You already have it! A cute little amigurumi ghost!
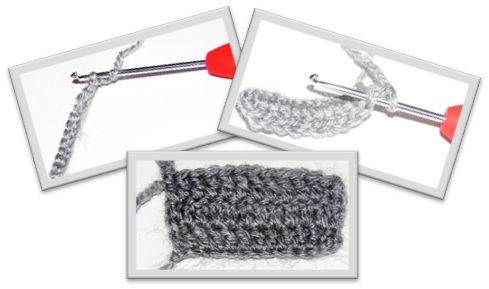
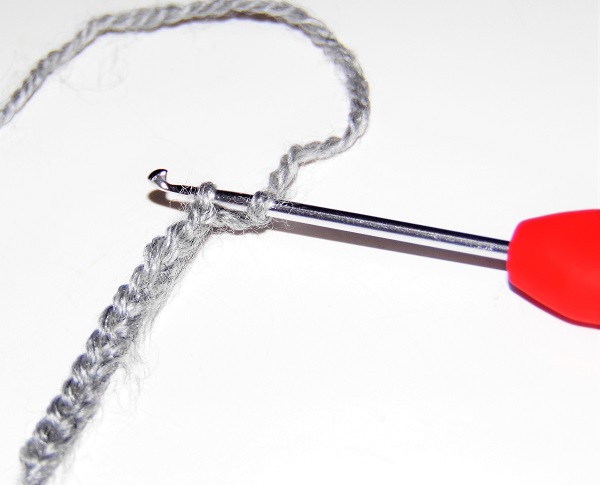
Whether you are a beginner or if your level is more advanced, it is important that you have some basic crochet knowledge. This will help you easily follow a pattern or even adapt it to your needs. In today’s tutorial: Straight Edges: Importance of Turning Chains, I want to talk to you about one of the basic stitches: The chain, more specifically The Turning Chain and the importance of its correct use when making the pieces of our amigurumis straighter.
Many of you have asked me about this stitch that I use frequently in my patterns when crocheting in rows. Let’s see what it is:
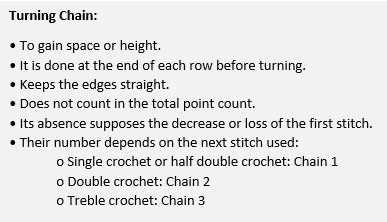
A turning chain is just that, a chain that we crochet before turning and starting a new row. Its function is to provide us with a certain gap or height so that we can start crocheting at the first stitch in the row and thus keep the edge straight. Their presence does not count when determining the total count of stitches in the row, but their absence does mean the decrease of one of the points in the row: the first.
You will see it more clearly with an example:
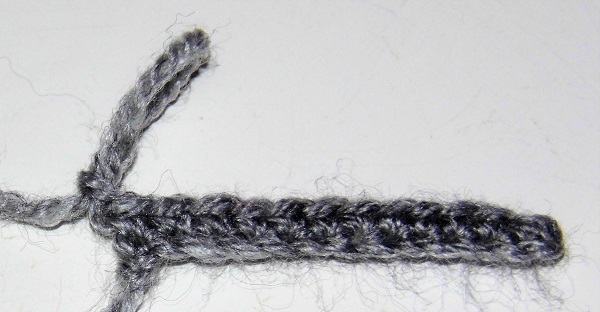
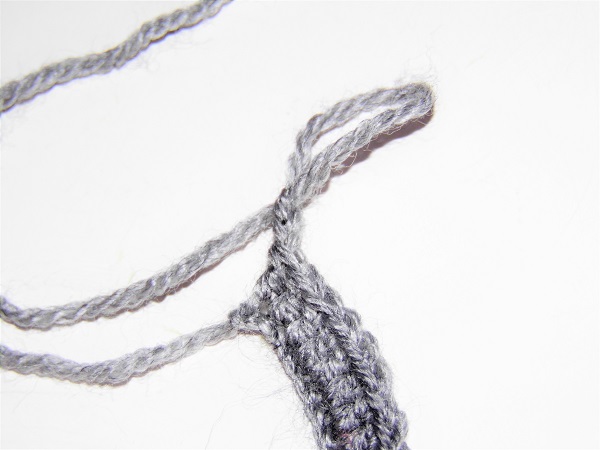
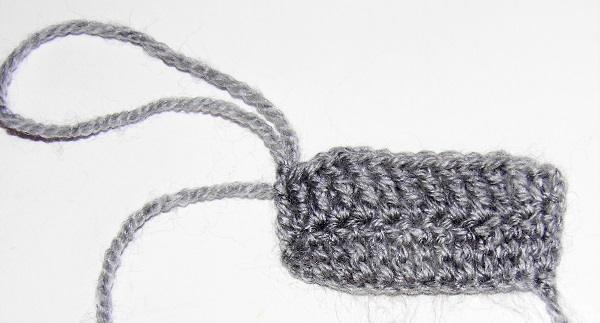
We need to crochet a straight piece 12 sc long. For this we start with 12 chains?
If we work 12 chains, when we return crocheting sc over the chains, we will not be able to start in the first chain, there is no space to do it, so we must crochet over the second and when completing the row we will have 11 sc instead of 12.
To have the row of 12 sc, we must start with 13 chains and use the last of them to gain that space we need. This last chain will therefore be a Turning Chain.
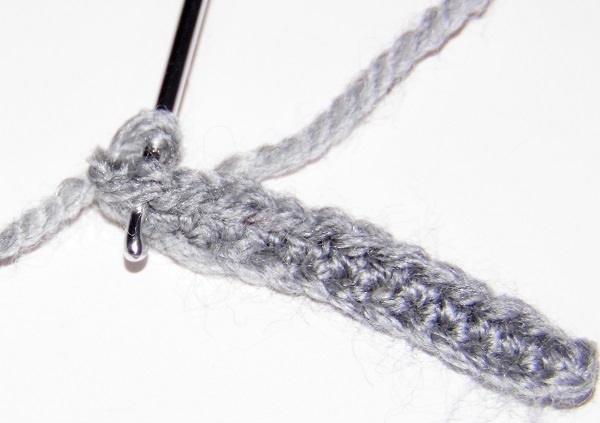
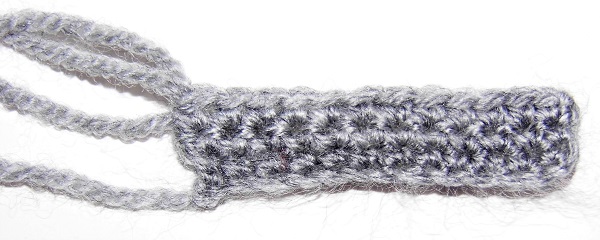
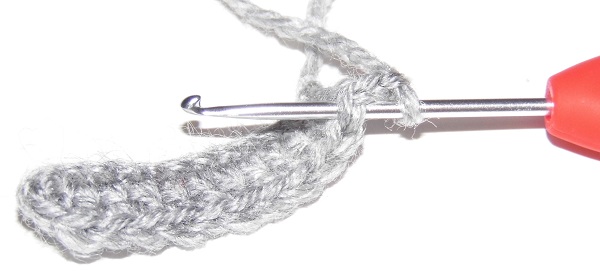
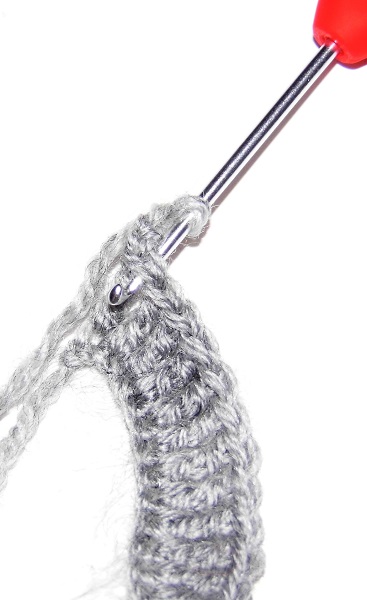
When crochet consecutive rows, if we want to keep the edges of our piece straight, we must use the turning chain in the same way, that is, when we reach the end of the row, we make a chain that allows us to turn and start crocheting in the first sc.
Turning chain at the end of the row
Turn and start crocheting in the first single crochet
With turning chain
Without turning chain
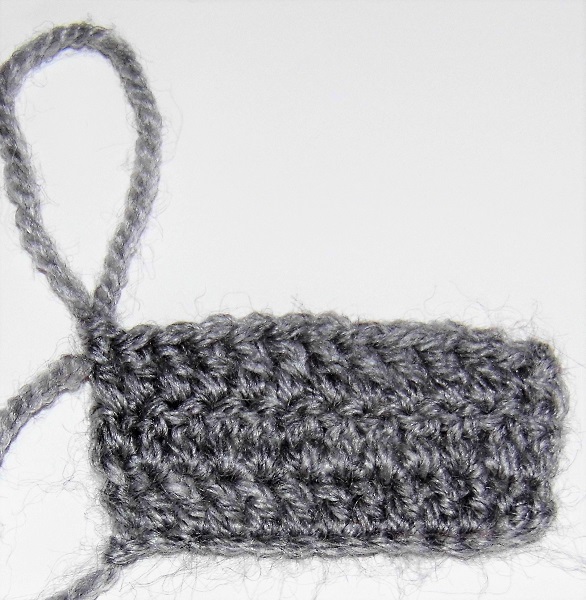
In our example, we have used single crochets, but what if the rows we need have to be worked with other points? In these cases, we have to take into account the height of these stitches when using the turning chains to gain the necessary space and not fall short or excess.
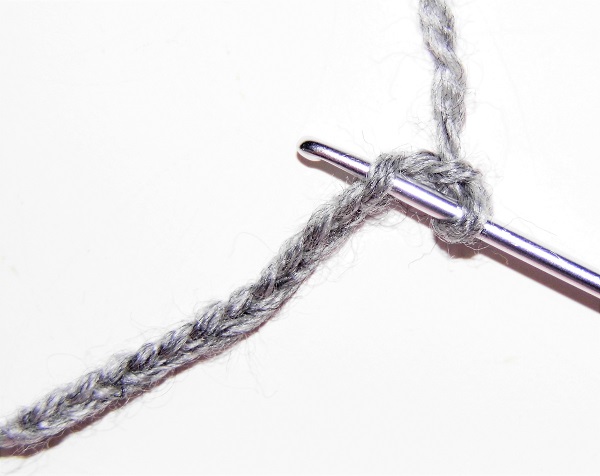
We have already seen that 1 turning chain is used for a row crocheted with single crochets. The next stitch in height is the half double crochet. For it we will continue using 1 chain.
With the double crochet, on the other hand, it will be necessary to add a turning chain. Before turning and starting a new row, we will have to chain 2.
Chain 2, turn and start crocheting in the third chain
Following our example:
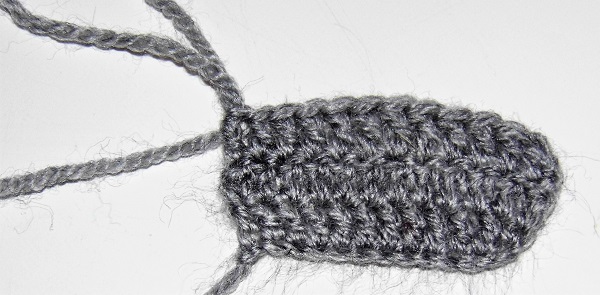
If we need to work a 12 double crochet piece, we will have to chain 14 and start crocheting in the third chain, using the last 2 chains as if they were the first double crochet in the row.
In the same way, when we continue crocheting rows, we must continue using 2 chains as a double crochet in the corners to keep the edges straight.
Chain 2 as a first double crochet
Chain 2, turn and begin in the first stitch
With 2 turning chains and double crochet
Without turning chains
If with the double crochet we have to use 2 chains, with a treble crochet we will have to use 3 and crochet in the same way: Chain 15 to have a row of 12 treble crochet and 3 turning chains in the following rows.
Chain 3, turn and begin in the fourth chain
Chain 3, turn and begin in the first stitch
With 3 turning chains and treble crochet
Without turning chains
Recap:
As you can see, to get straight edges you need to take into account the importance of the turning chains.
The importance of details when crocheting amigurumis is something you should keep in mind because making an amigurumi goes far beyond crocheting pieces of yarn, stuff them and sewing them together.
Adding small embroideries, accessories, contrast in color, parts that adapt, sink… are some things you should consider if you want your amigurumi to have personality.
Today I want to talk to you about the importance of Details and give you some tips that I apply myself in my patterns so that you can make your amigurumi really special.
Let’s go!
Most of the details are incorporated into the design in a simple way, at the end, during assembly or even after the doll is finished, and serve to give your amigurumi more realism.
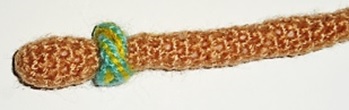
An example of this are Asterix’s water bottle and sword, the tie on the Beast’s mane or Elena’s of Avalor accessories (bracelet, earrings and flowers)
These are small objects that you can quickly crochet and add at the end. If you don’t like them and decide not to incorporate or replace them with others, the essence of the amigurumi will not be affected.
Although these examples are of characters, details are important in any type of amigurumi.
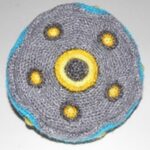
The contrast in the color change can turn a simple piece into a more attractive one.
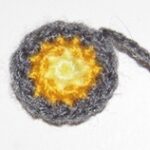
Look at the dark gray edge of the UFO lights. Adding them to the main piece that is lighter color makes them highlight more in the set.
Using several shades of the same color can also be interesting.
The color change from light yellow to darker yellow in those same lights gives them a more realistic effect.
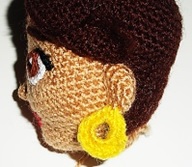
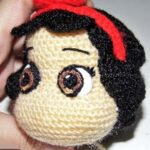
Incorporating details on the faces of our amigurumi is also something to keep in mind. They serve to add expressiveness and personality to designs.
For example, in Snow White’s eyes we can see several details: The use of a gradient brown color for the iris that gives liveliness to the gaze, the white twinkle on the pupil to fix it, a black border around it that gives it more strength and the top line with eyelashes framing the eye.
However, giving importance to the details does not mean adding the more, the better. Sometimes something simpler can reflect the expression we seek for our amigurumi. Some lines embroidered as eyes like those of the children of Communion give them the seriousness that the act implies.
However, there are details that don’t consist of additions, but rather to modify and adapt the shape of a piece according to our needs. Don’t forget that after all, amigurumis are made of yarn and fiberfill. We can take advantage of the characteristics of the materials to get that detail that can make a difference.
Using yarn of the same color as that of your piece and with the help of the yarn needle you can alter its shape.
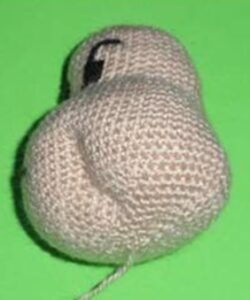
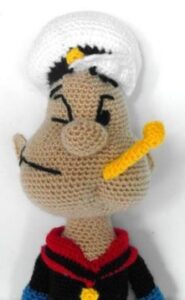
Popeye’s face, for example, would not be the same if we had not sunk the left side. That allows us to give it its characteristic expression with the pipe.
It’s something as simple as introducing the needle with the yarn in the area you want to sink. Then, hook on the fabric and remove it on the other side, pulling hard. Repeat the operation as many times as necessary until the piece and the stuff have the desired shape. Easy, right?
Sinking the area of the eyes, the mouth, accentuating the cheeks … these are details that can totally change the expression of our amigurumis.
We can not only modify the faces, but any part and thus give it a more beautiful appearance.
Look at this tie. By sinking the sides, we can improve its appearance, don’t you think?
These are just some examples of the importance of details when making our amigurumis.
I hope you have been inspired to add your own details to your creations.
If you want, you can tell me about it in the comments.