Posted on Leave a comment

Straight edges: Importance of turning chains

Whether you are a beginner or if your level is more advanced, it is important that you have some basic crochet knowledge. This will help you easily follow a pattern or even adapt it to your needs. In today’s tutorial: Straight Edges: Importance of Turning Chains, I want to talk to you about one of the basic stitches: The chain, more specifically The Turning Chain and the importance of its correct use when making the pieces of our amigurumis straighter.

Many of you have asked me about this stitch that I use frequently in my patterns when crocheting in rows. Let’s see what it is:

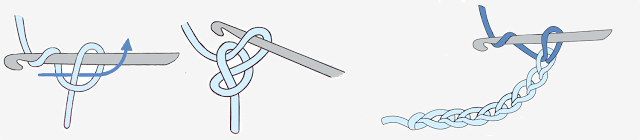
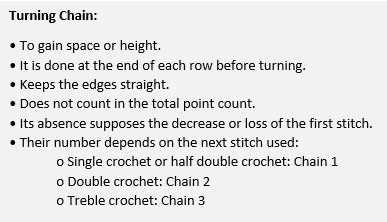
A turning chain is just that, a chain that we crochet before turning and starting a new row. Its function is to provide us with a certain gap or height so that we can start crocheting at the first stitch in the row and thus keep the edge straight. Their presence does not count when determining the total count of stitches in the row, but their absence does mean the decrease of one of the points in the row: the first.

You will see it more clearly with an example:

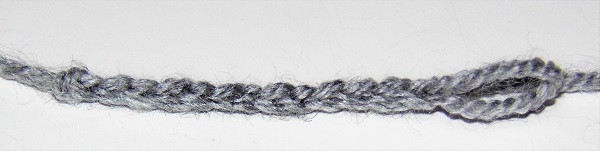
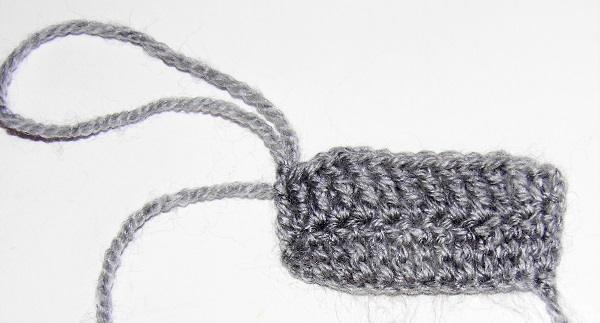
We need to crochet a straight piece 12 sc long. For this we start with 12 chains?

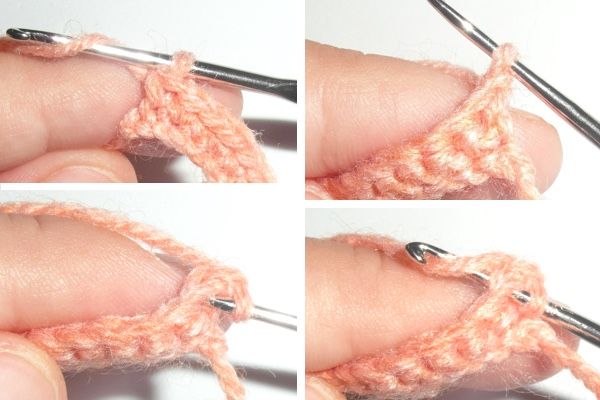
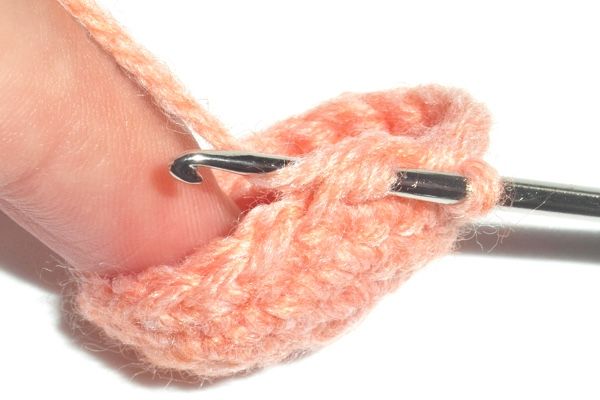
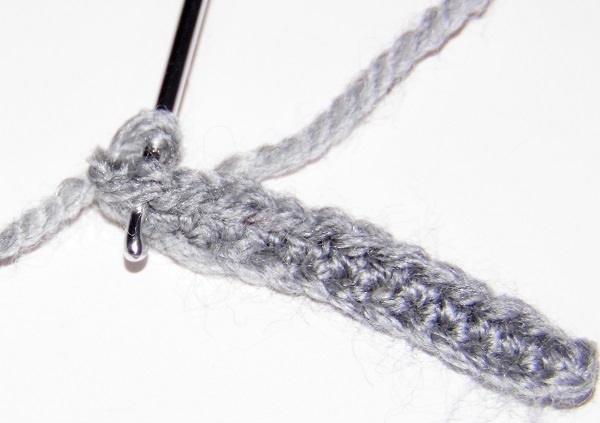
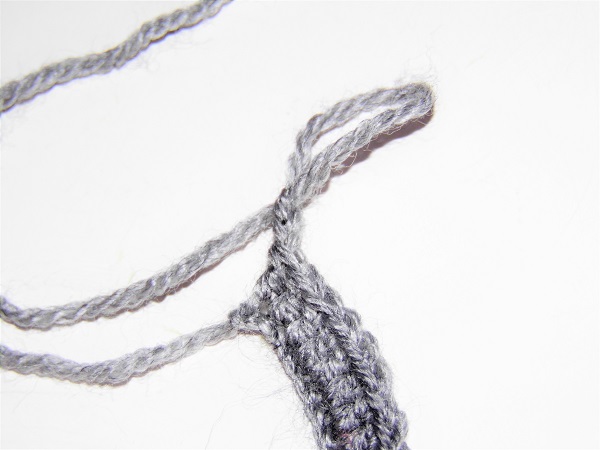
If we work 12 chains, when we return crocheting sc over the chains, we will not be able to start in the first chain, there is no space to do it, so we must crochet over the second and when completing the row we will have 11 sc instead of 12.

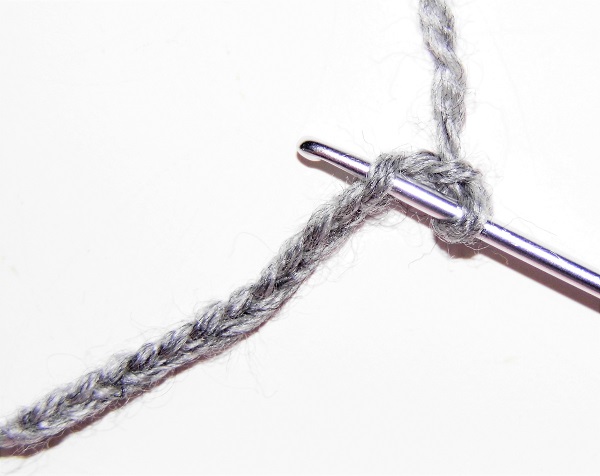
To have the row of 12 sc, we must start with 13 chains and use the last of them to gain that space we need. This last chain will therefore be a Turning Chain.

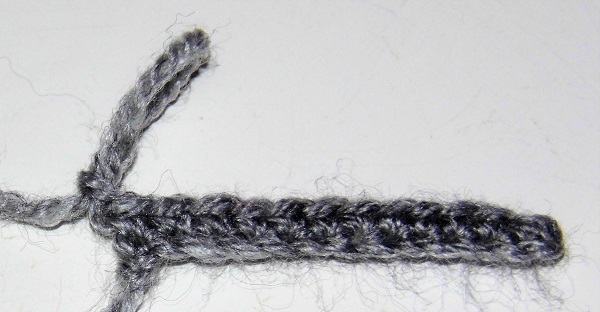
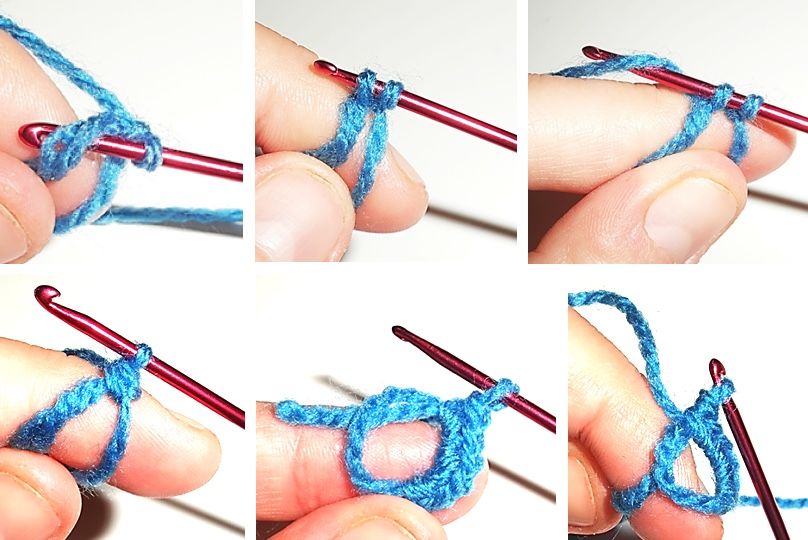
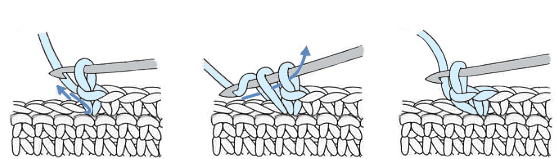
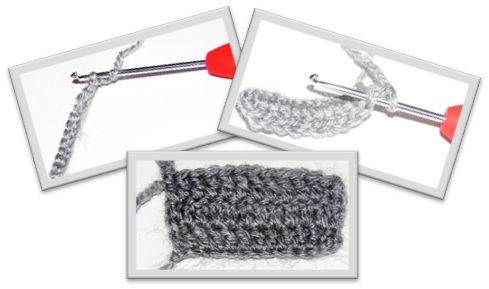
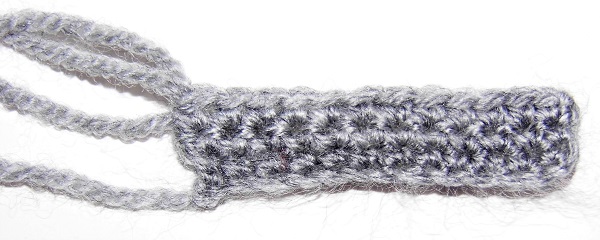
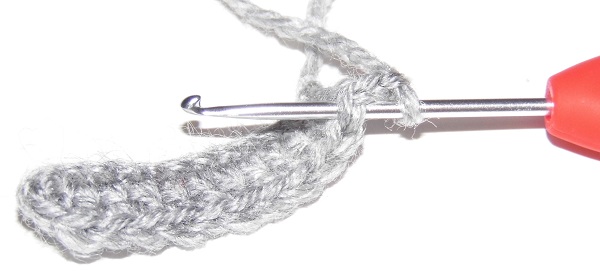
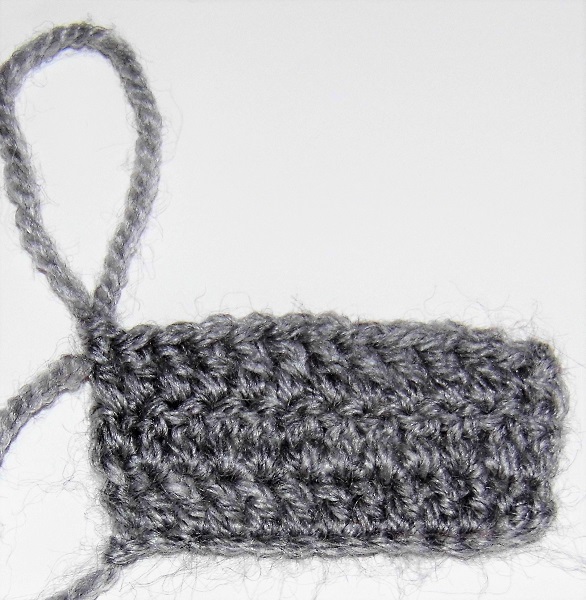
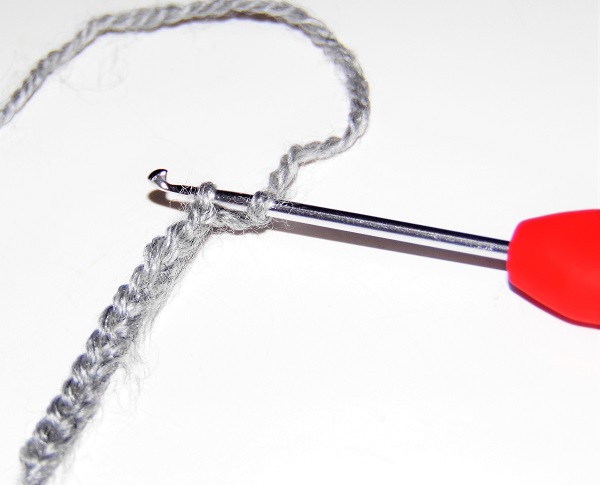
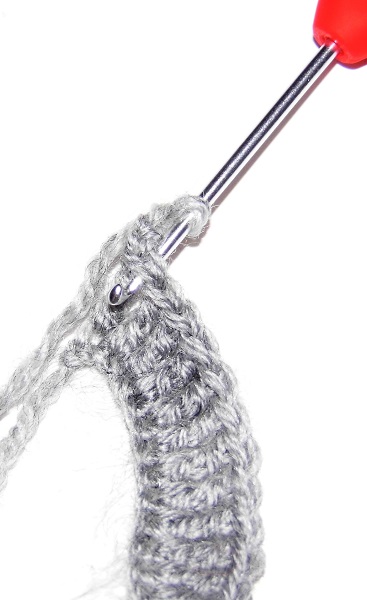
When crochet consecutive rows, if we want to keep the edges of our piece straight, we must use the turning chain in the same way, that is, when we reach the end of the row, we make a chain that allows us to turn and start crocheting in the first sc.

Turning chain at the end of the row
Straight edges: Importance of turning chains
Turn and start crocheting in the first single crochet
Straight edges: Importance of turning chains
With turning chain
Without turning chain

In our example, we have used single crochets, but what if the rows we need have to be worked with other points? In these cases, we have to take into account the height of these stitches when using the turning chains to gain the necessary space and not fall short or excess.

We have already seen that 1 turning chain is used for a row crocheted with single crochets. The next stitch in height is the half double crochet. For it we will continue using 1 chain.

With the double crochet, on the other hand, it will be necessary to add a turning chain. Before turning and starting a new row, we will have to chain 2.

Chain 2, turn and start crocheting in the third chain

Following our example:

If we need to work a 12 double crochet piece, we will have to chain 14 and start crocheting in the third chain, using the last 2 chains as if they were the first double crochet in the row.

In the same way, when we continue crocheting rows, we must continue using 2 chains as a double crochet in the corners to keep the edges straight.

Chain 2 as a first double crochet
Straight edges: Importance of turning chains
Chain 2, turn and begin in the first stitch
Straight edges: Importance of turning chains
With 2 turning chains and double crochet
Without turning chains

If with the double crochet we have to use 2 chains, with a treble crochet we will have to use 3 and crochet in the same way: Chain 15 to have a row of 12 treble crochet and 3 turning chains in the following rows.

Chain 3, turn and begin in the fourth chain
Straight edges: Importance of turning chains
Chain 3, turn and begin in the first stitch
Straight edges: Importance of turning chains
With 3 turning chains and treble crochet
Without turning chains

Recap:

Straight edges: Importance of turning chains

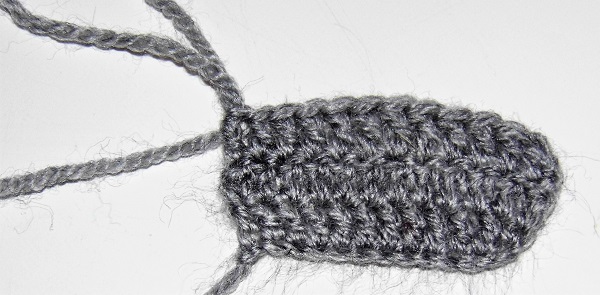
As you can see, to get straight edges you need to take into account the importance of the turning chains.

Did you like it? It’s not difficult, is it?

Until next time! ?

Posted on 3 Comments

How to Crochet a Magic Ring Step by Step (Beginner’s Guide)


The magic ring Is the stitch that allows us to begin crocheting in the round and therefore most of amigurumis.

It consists of forming a sliding circle that we will close after crocheting on it the beginning stitches of our fabric.

Being a basic element, it is also the first great difficulty with which you find yourself when starting to crochet the amigurumis, even becoming a cause of frustration and abandonment before you start.

There are different ways to make the magic ring, adjustable ring or magic circle.

Next I will show you mine and you can check with this simple step by step that it is not as difficult as you thought.

Continue reading How to Crochet a Magic Ring Step by Step (Beginner’s Guide)

Posted on 2 Comments

Are there Holes in the Fabric? Try this…

A very common problem  that we have when crocheting amigurumis is that sometimes the stitches open and you see the filling inside, which is not very aesthetic.

This can happen for several reasons:

1.- Size of the hook:

It is possible that the crochet hook is not the most suitable for the thickness of yarn that you use and crocheting with it, the stitches remain more separated than they should.

Try crocheting with a smaller needle.

Continue reading Are there Holes in the Fabric? Try this…

Posted on 7 Comments

Use of Chains and Stitches in Amigurumi

This time I will talk about the different uses that we can give to the chains and single crochets depending on where we use them and how we crochet on them.

We will see:

  • Initial Chain
  • Separation chain
  • Crochet all around the piece with single crochets
  • Complete the piece by taking only one free loop

Are practices that you can find frequently in my amigurumi patterns, so it is possible that you are familiar with them

If you are starting, I recommend you that first learn the basic stitches to crochet amigurumis.

Continue reading Use of Chains and Stitches in Amigurumi

Posted on Leave a comment

Amigurumi Increases and decreases

After seeing the basic stitches to crochet our amigurumis, we need to learn to use them in the right way and at the right time to give them the desired shape.

Let’s see two simple ways through which we can give form to all the necessary figures to create our amigurumis.

INCREASES

Amigurumi Increases and decreases

Amigurumi Increases and decreases

They consist in making two stitches on the same stitch, first one and then another.

This will allow us to increase the weave surface, this is, make it wider.
Continue reading Amigurumi Increases and decreases

Posted on 1 Comment

Basic Stitches to Crochet Amigurumis

Let’s start learning the basic stitches we must crochet to give life to our amigurumis:

CHAIN

It is the basic stitch par excellence and give rise to many of our creations.

It consists of forming a slipknot that, as its name indicates, “we will chain” several times until we achieve the length that we are interested in obtaining.

In my amigurumi patterns you can find it to start the fabric in straight, or form various elements such as thick eyebrows, hair strands, horns, etc.

In this video you can see how it’s done:

Continue reading Basic Stitches to Crochet Amigurumis