
Being a basic element, it is also the first great difficulty with which you find yourself when starting to crochet the amigurumis, even becoming a cause of frustration and abandonment before you start. Here you will learn How to Crochet a Magic Ring Step by Step (Beginner’s Guide)
The magic ring Is the stitch that allows us to begin crocheting in the round and therefore most of amigurumis.
It consists of forming a sliding circle that we will close after crocheting on it the beginning stitches of our fabric.
There are different ways to make the magic ring, adjustable ring or magic circle.
Next I will show you mine and you can check with this simple step by step that it is not as difficult as you thought.
Let’s go:
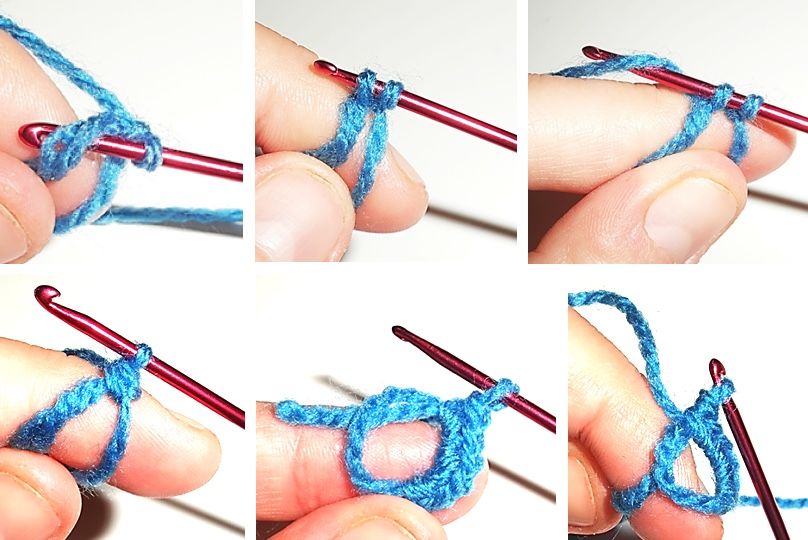
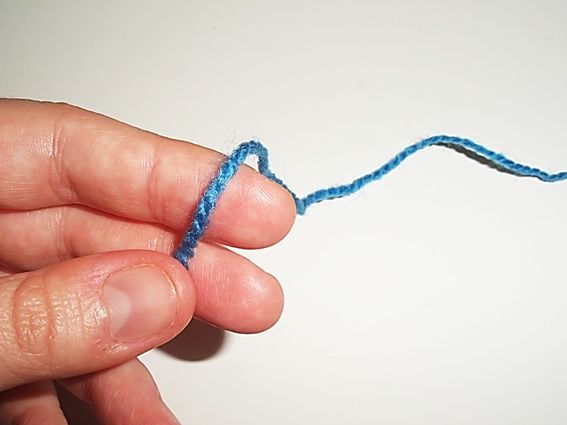
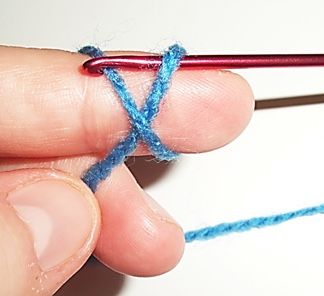
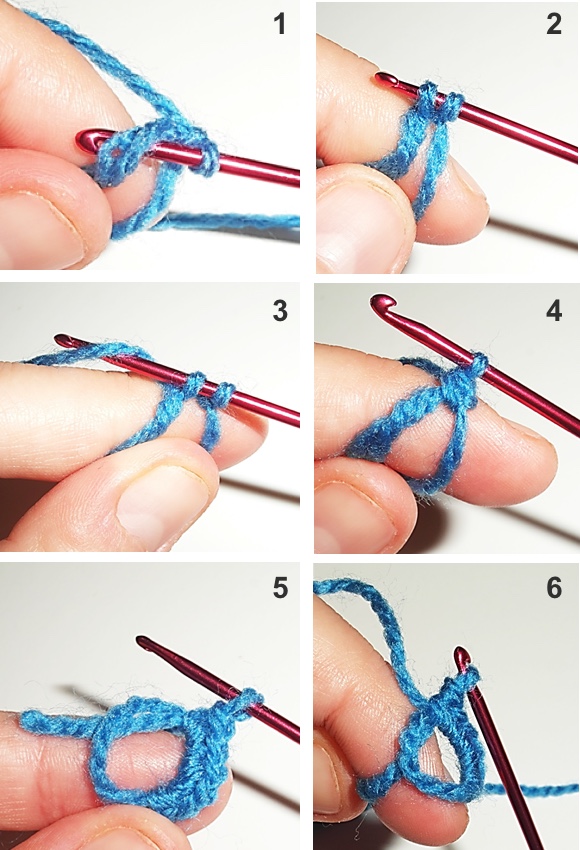
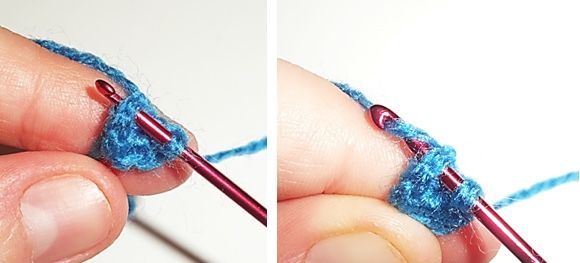
1.- Place the thread on your index finger by holding the end with your thumb
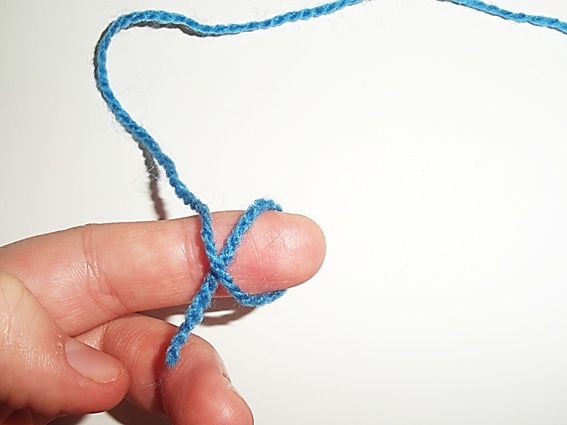
2.- Take the long part of the thread and pass it over it forming an “X” on your index finger.
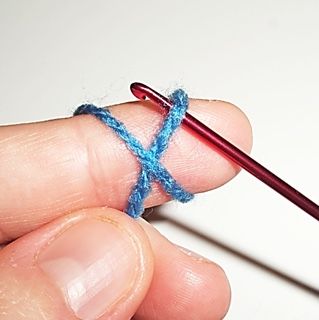
3.- Now you are going to start crocheting on the “X”. Notice that is formed by the short end that you will still holding with the thumb and the long end passing over it. Introduce the needle under the short end.
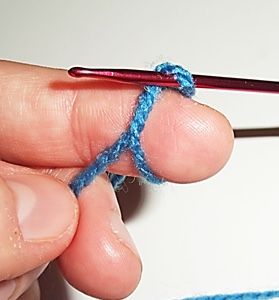
4.- Hook the long end and return again underneath.
5.-
You will have a loop on the needle.
6.- Still holding the short end, hook with the needle the long thread to make a fastening chain.
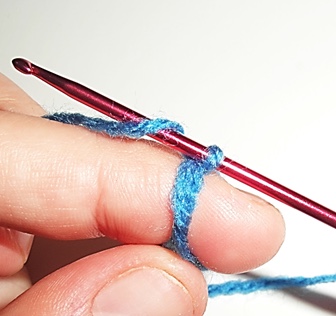
7.- In order to make the chain, insert the thread through the loop that is in the needle.
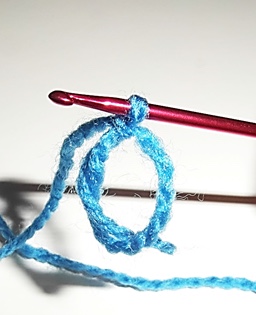
8.- This small chain will serve to keep the shape of the circle.
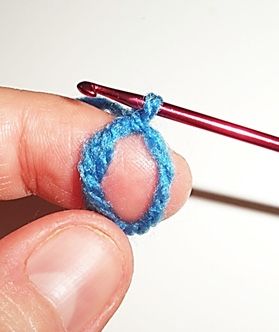
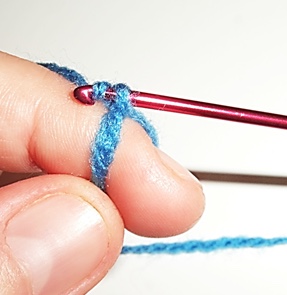
9.- Look at its shape. On the left side you have two threads, the main forming the ring and rolled on it, the short end that you have been holding and that will close the ring later.
10.- You will start to crochet the stitches that will begin your fabric. You must do it on the left side, on the 2 threads, still holding the short end with the thumb.

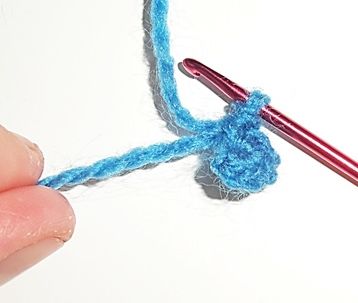
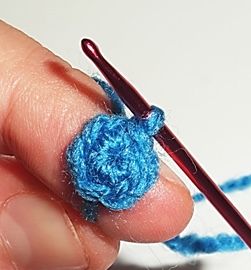
11.- Hook the thread and start working single crochets on the ring. The number of stitches needed may vary, but will normally be 6.
12.- Once you have crocheted all the stitches you can close the ring. In order to do that, pull the short end. By doing this, the stitches will fold in round.
13.- To complete the ring you must join the last stitch where the needle is with the first one with a slip stitch. WARNING: Be careful not to confuse the first stitch with the fastening chain. To avoid mistakes, count the 6 stitches from the needle backwards.
14.- Your magic ring is finished so you can start crocheting wonderful amigurumis.
It’s not that difficult … right?
You can watch the video of how to make the magic ring and the other stitches to crochet amigurumis in this post: Basic stitches to crochet amigurumis
Share this Tutorial:
[addthis tool=”addthis_inline_share_toolbox_djcd”]


 amigurumi pattern")


Excelente! Me doy cuenta que no hago un nudo deslizado al final, igual estoy conforme con mis amigurumis. Pero de todas formas voy a probar de cerrarlo con un nudo deslizado. Bajé el patrón de los animalitos pero todavía no lo hice. Vos cerrás cada vuelta con un nudo deslizado también? Gracias por la explicación, muy clara y detallada, hasta para los que llevamos un tiempito en esta pasión amigurumi
Gracias a ti!
No, no cierro cada vuelta con un punto deslizado salvo que se trate de disimular un cambio de color. La mayoría de mis amigurumis son tejidos en espiral, es decir, en vueltas continuadas, usando un marcador para establecer el final de una vuelta y el comienzo de la siguiente.
Saludos.
Esta respuesta me ha sido de ayuda, pues tenia la misma duda. Gracias.
Saludos.
Lourdes-