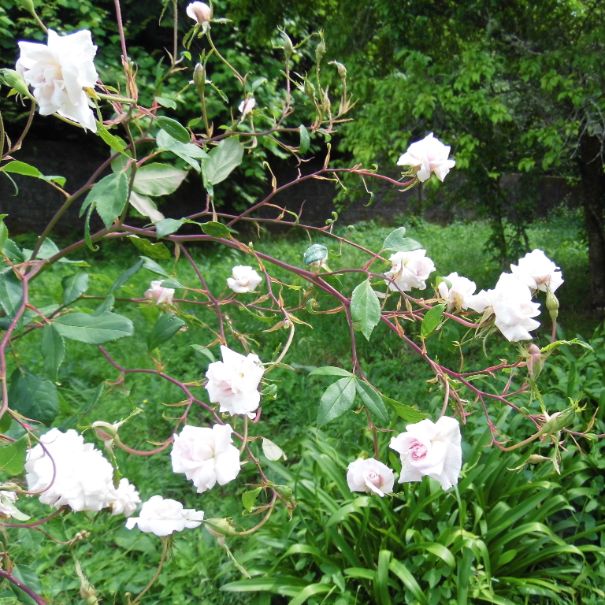
The month of June begins and my garden is filled with my favorite roses, pale pink in color and an unmistakable aroma that takes me back to childhood. It would be fun to crochet one, but how?
Designing an amigurumi: Rose
Once I am sure about what I want to design, I need to have a visual model, drawing, photo or even the object itself. In this case, a rose.
It must be clear that our model must be just that, a reference to follow, but not something fixed that limits us. In my opinion, if amigurumis have something, it is that we can give wings to our imagination and capture our own tastes in them, without distorting the object they reflect.
If I’m strict, this time it’s not an amigurumi itself, I’ll explain why: I wanted to do it in a different way, without fiber fill but with volume, using the basic crochet stitches, without changing color and except for a small part, crochet in rows.
But let’s start at the beginning:
Materials:
- Very light pink and olive green yarns.
- 2 mm crochet hook.
- Yarn needle.
- Scissors.
- Paper and pen.
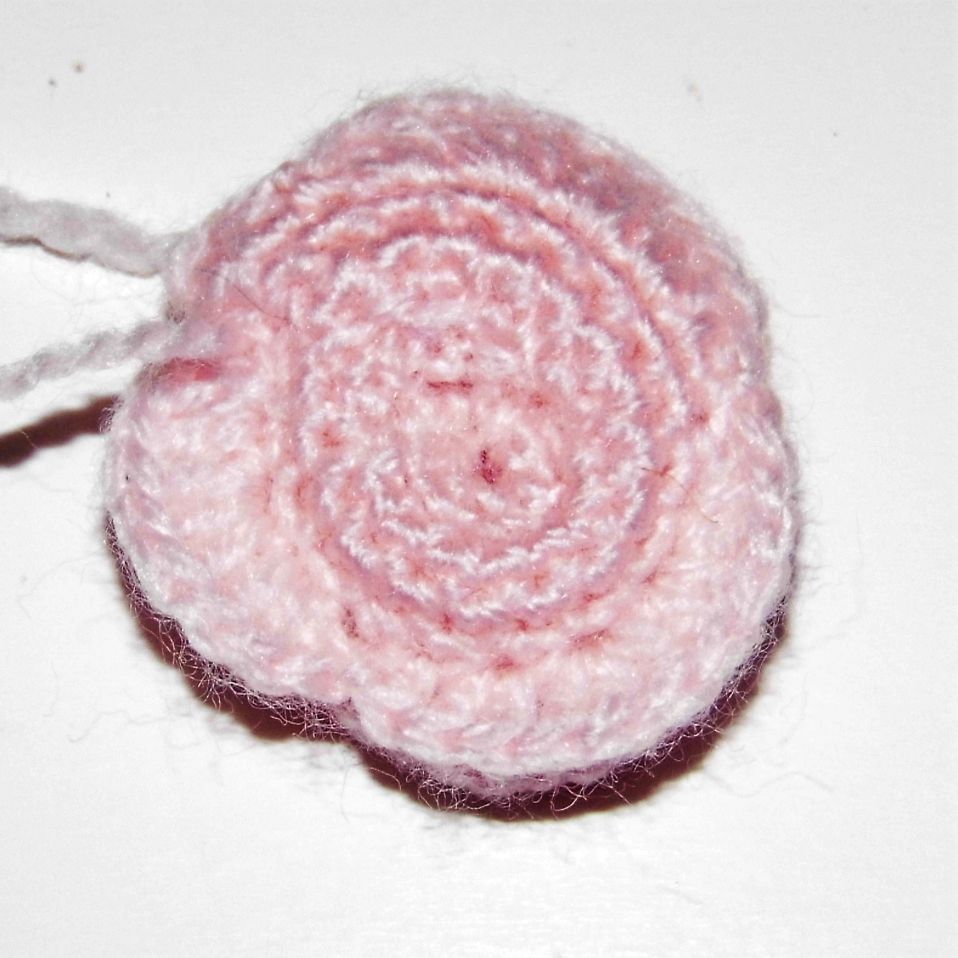
Start with the main part, the body of the rose with the petals.
I want to work straight, in rows, but to give shape and volume to my rose I need the fabric to be crocheted to roll around itself.
I really admire the work of other colleagues, but one cannot limit oneself to seeing other amigurumi crocheters. There are true artisan artists whose techniques are worthy of admiration and, why not, extrapolated to our field.
I remember seeing some molds for making fondant roses to decorate cakes in a well-known online store. With them an elongated piece was formed with waves on the sides that had to be folded and wrap. It was different from what I had seen in crochet and it was worth trying.
I start the pattern:
PALE PINK ROSE AMIGURUMI PATTERN
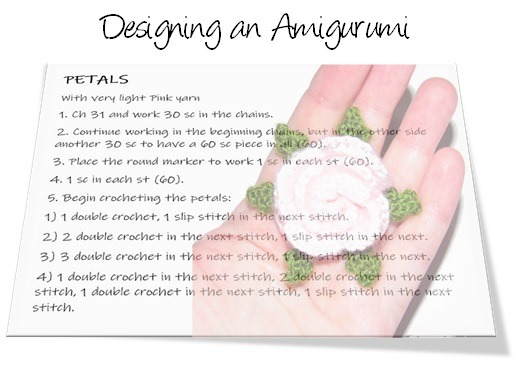
PETALS
With very light Pink yarn
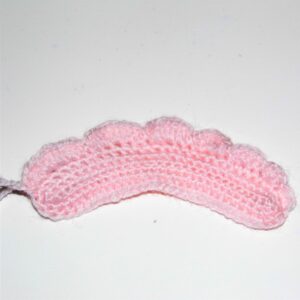
The first row will determine the width of the flower, while the total number of rows will determine its height. A 60 sc piece, in addition to having the size I need, makes things easier when dividing the petals, as there are both 30 and 60 even numbers and divisible by 3.
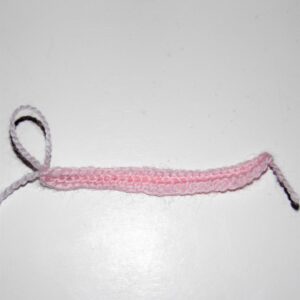
1. Ch 31 and work 30 sc in the chains.
2. I Continue working in the beginning chains, but in the other side another 30 sc to have a 60 sc piece in all (60).
I already have the piece, but it needs to be wider.
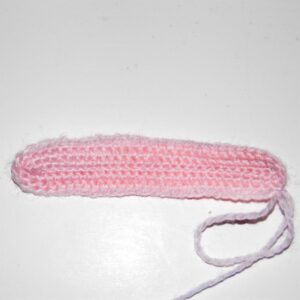
3. I Place the round marker to work 1 sc in each st (60).
4. 1 sc in each st (60).
5. It’s time to start crocheting the petals:
The shape of the rose determines the size of the petals. When having to roll it, they have to go from smaller to larger size, since their position will be from the inside to the outside. To separate the petals from each other I use the slip stitch and to gain height and size of the petals I work several stitches into one and use more stitches from the piece to crochet each petal.
1) 1 double crochet, 1 slip stitch in the next stitch.
2) 2 double crochet in the next stitch, 1 slip stitch in the next.
3) 3 double crochet in the next stitch, 1 slip stitch in the next.
So far I have occupied 6 sc of the 30 that form half of the piece.
4) 1 double crochet in the next stitch, 2 double crochet in the next stitch, 1 double crochet in the next stitch, 1 slip stitch in the next stitch.
5) 2 double crochet in the next one, 3 double crochet in the next stitch, 2 double crochet in the next one, 1 slip stitch in the next stitch.
6) 3 double crochet in the next one, 3 double crochet in the next stitch, 3 double crochet in the next one, 1 slip stitch in the next stitch.
With these three petals I have occupied 12 more sc, so I have crocheted 18 sc in all. I have 12 sc left to crochet over.
The simplest thing is to make 2 final petals of the same size, each occupying 6 sc.
7) 1 double crochet in the next stitch, 2 double crochet in the next stitch, 3 double crochet in the next stitch, 3 double crochet in the next stitch, 2 double crochet in the next stitch, 1 slip stitch in the next stitch.
8) 1 double crochet in the next stitch, 2 double crochet in the next stitch, 3 double crochet in the next stitch, 3 double crochet in the next stitch, 2 double crochet in the next stitch, 1 slip stitch in the next stitch.
I have already crocheted over the 30 sc that form half of the piece.
Now I have to work over the other half following the same pattern, but in reverse, that is, when I have to roll the piece, I must start with this last petal up to the first.
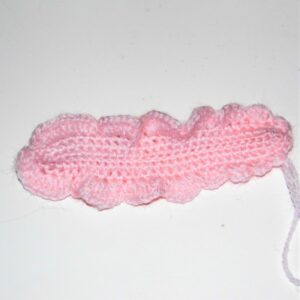
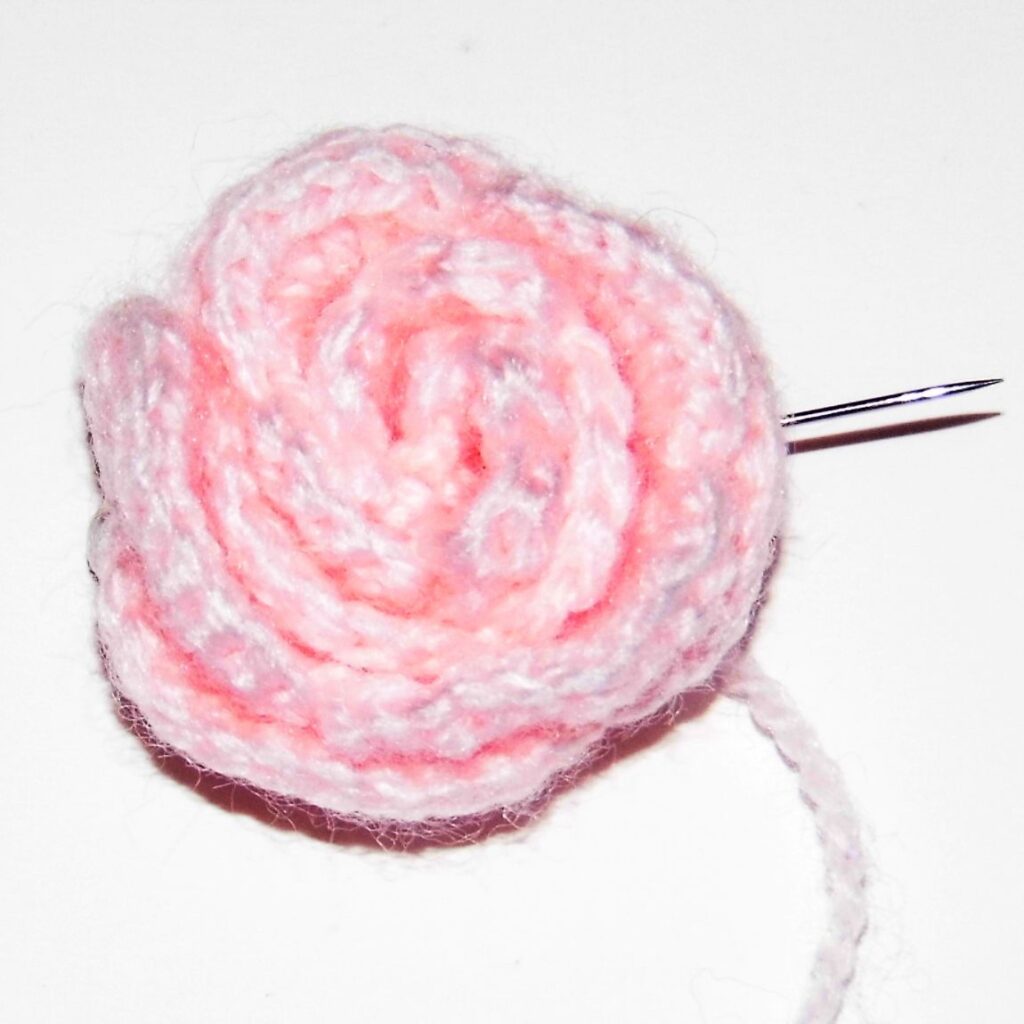
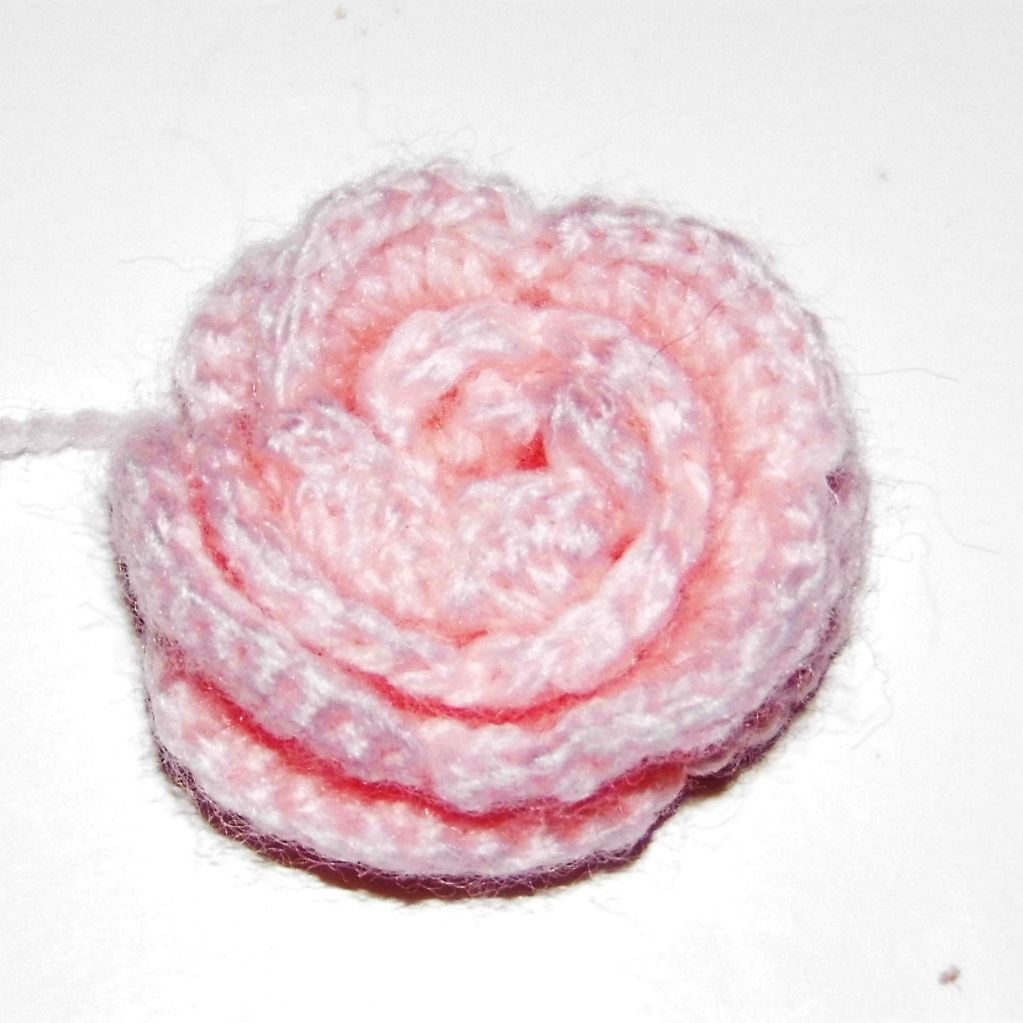
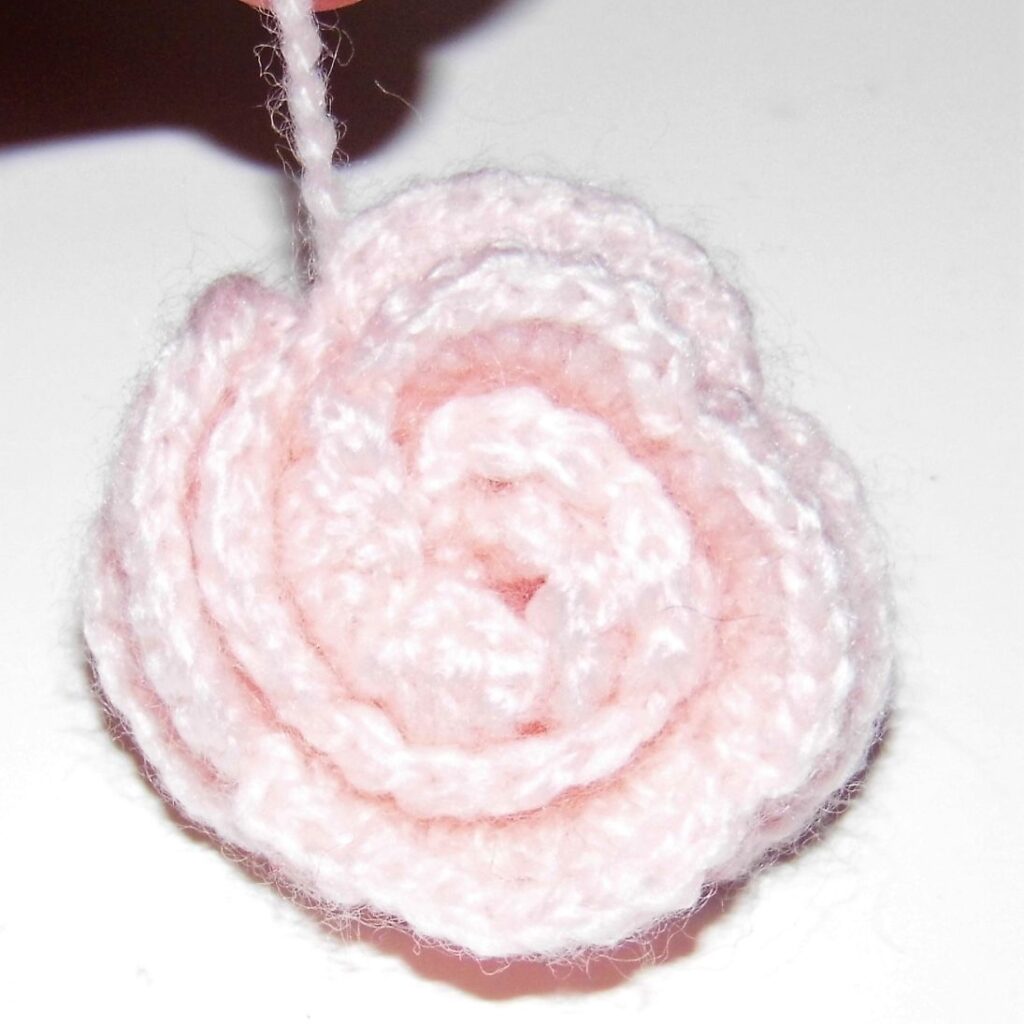
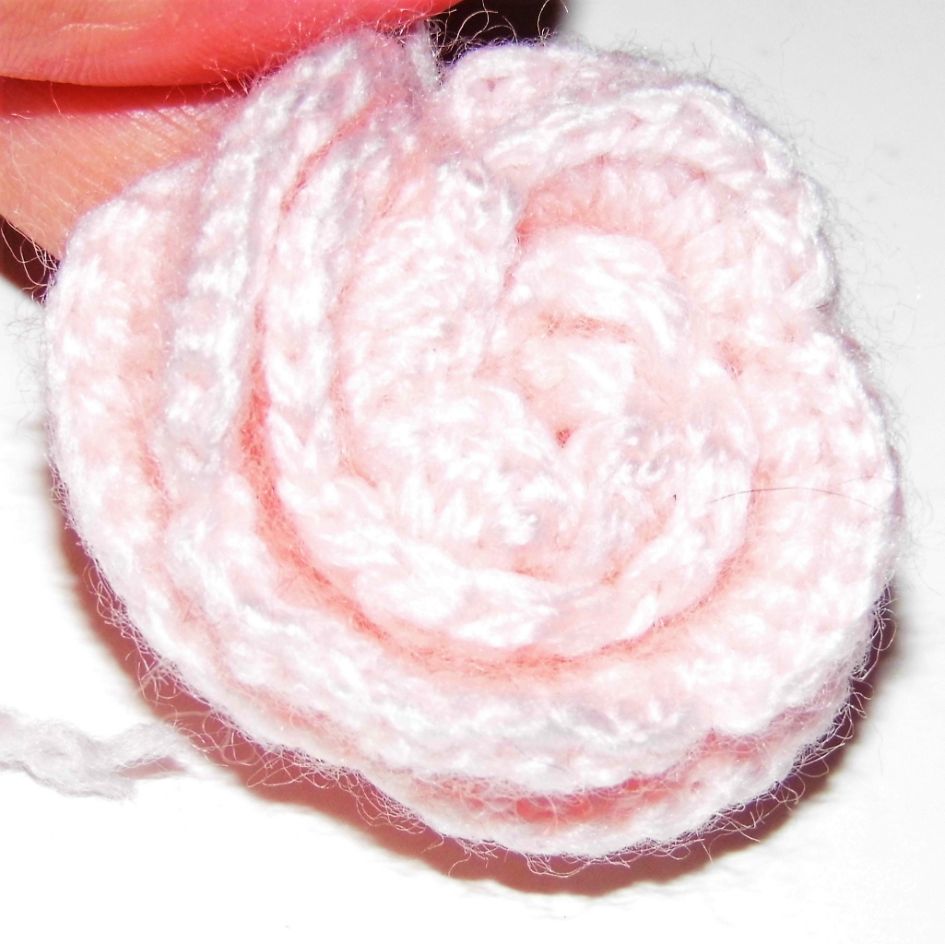
Once the 8 petals are completed, I fasten off leaving a long thread to be able to sew the rose when giving it shape.
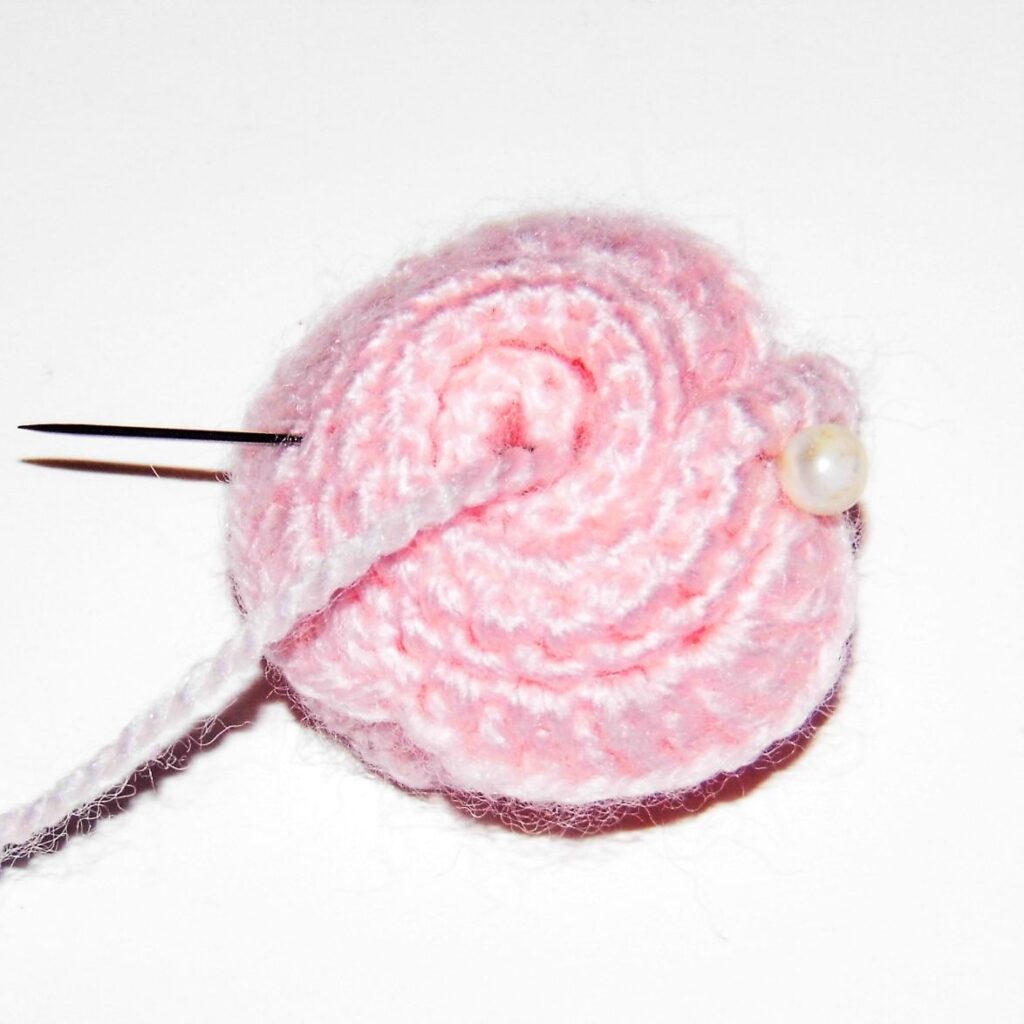
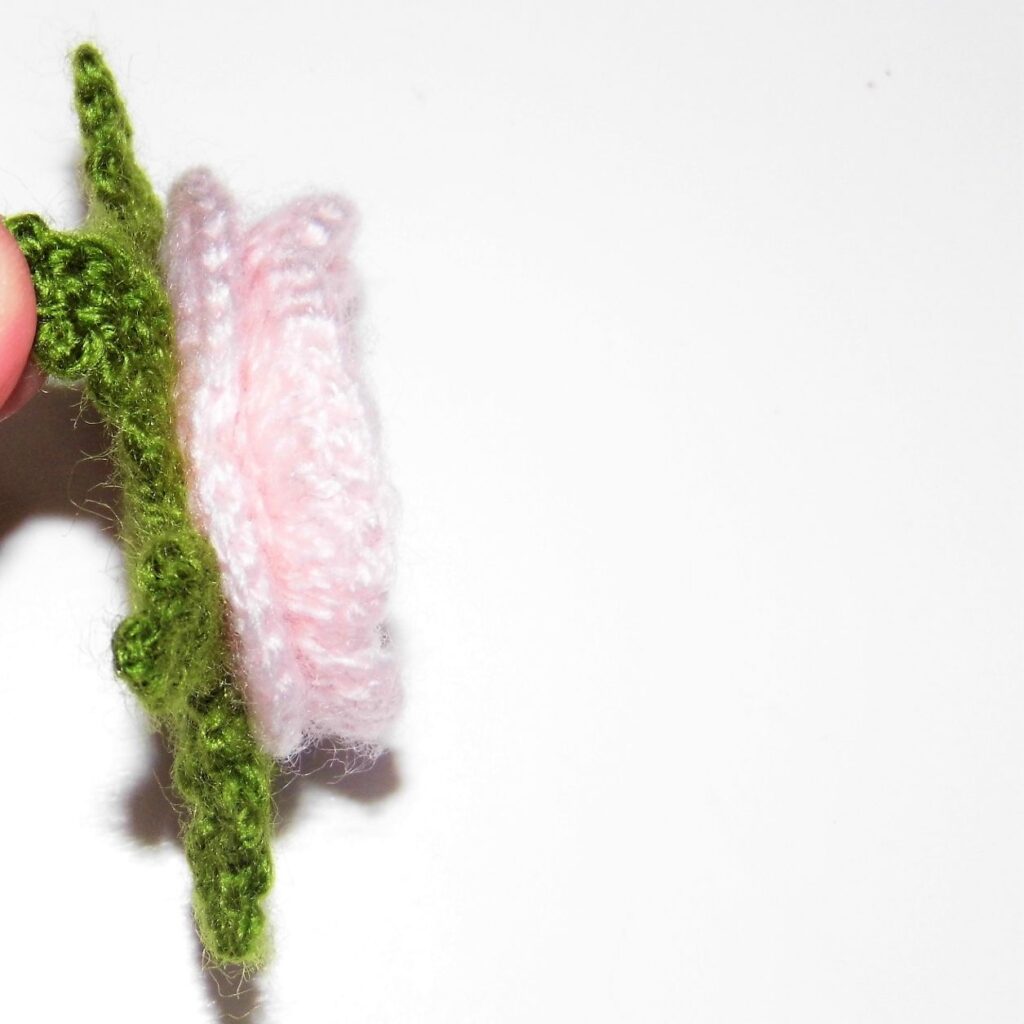
For that, I fold the piece in half and roll it.
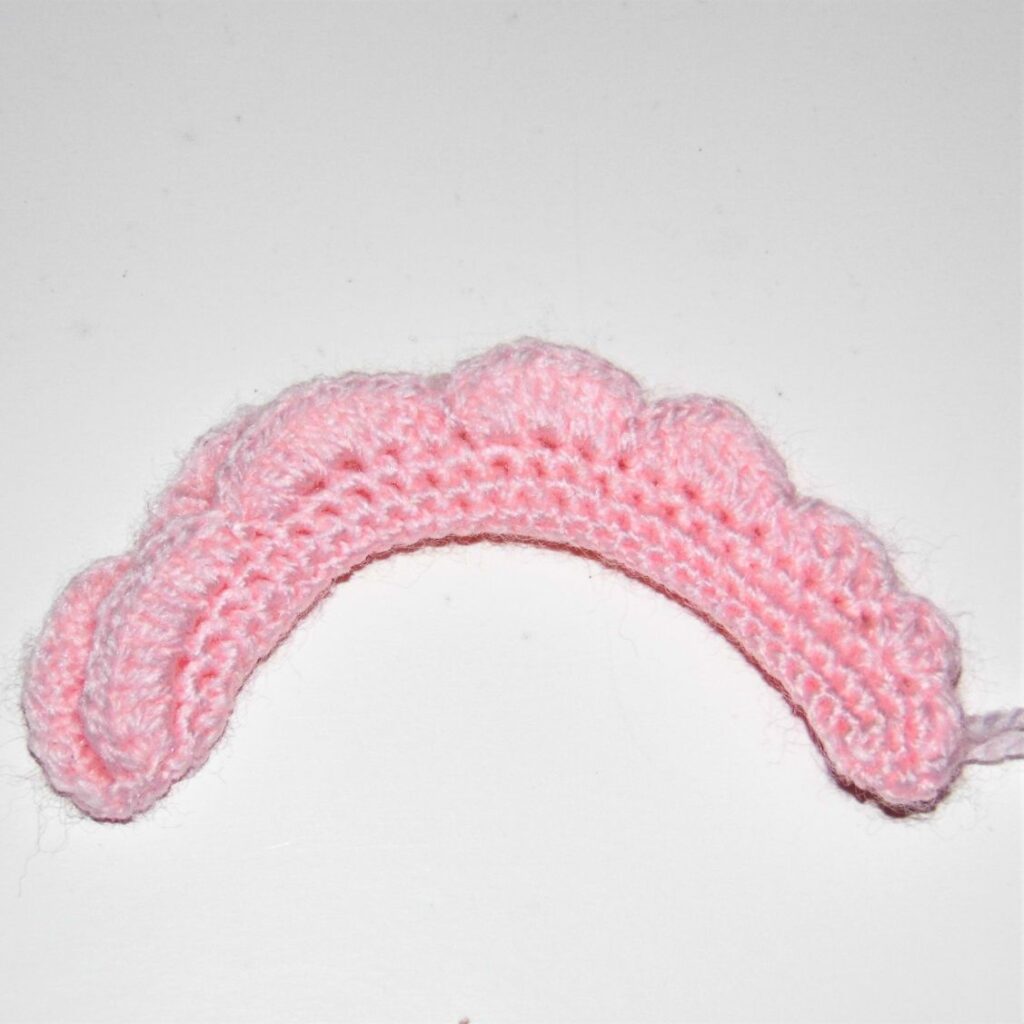
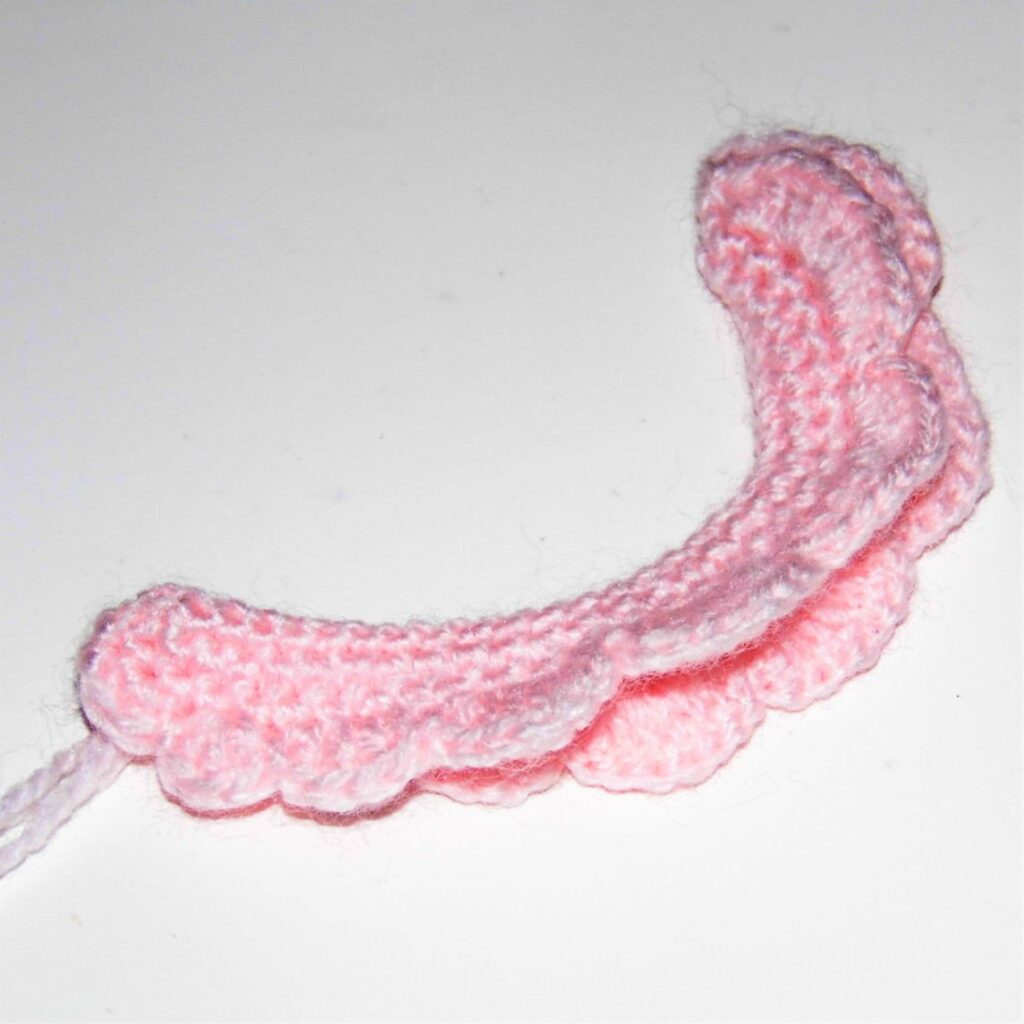
Once it’s the shape I like, I pin it in place. I sew along the back, holding the loops carefully so they don’t separate, but leaving the petals loose.
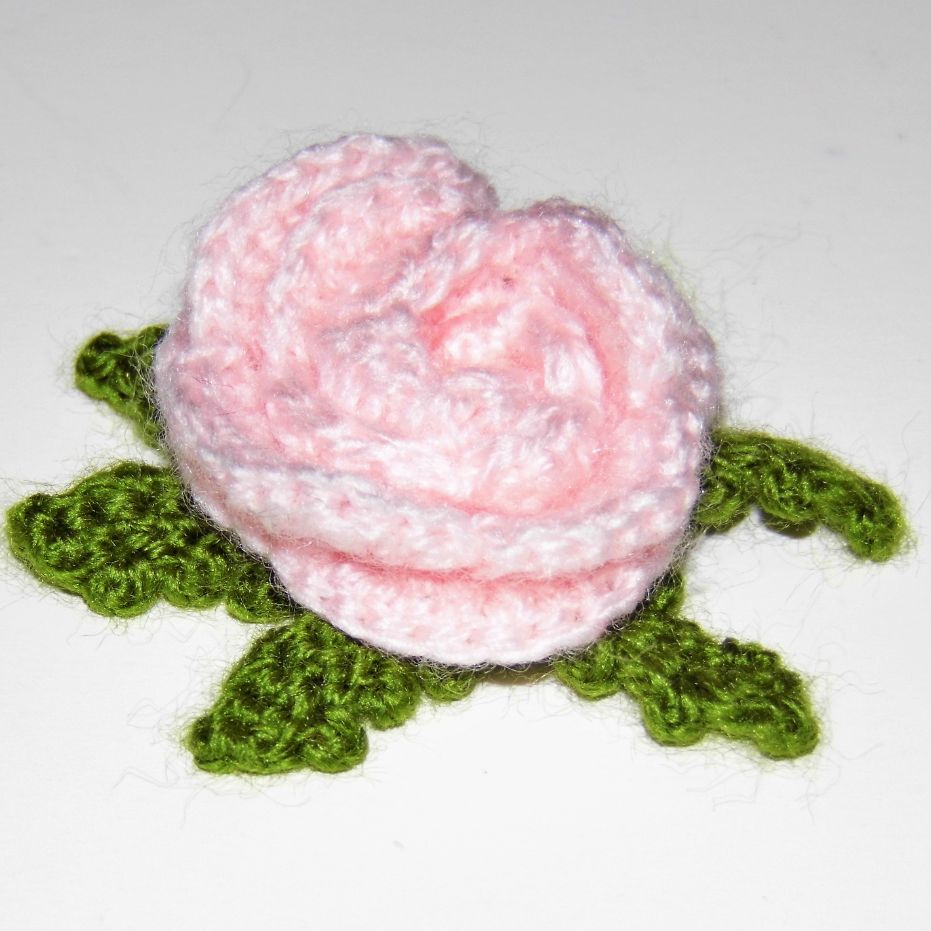
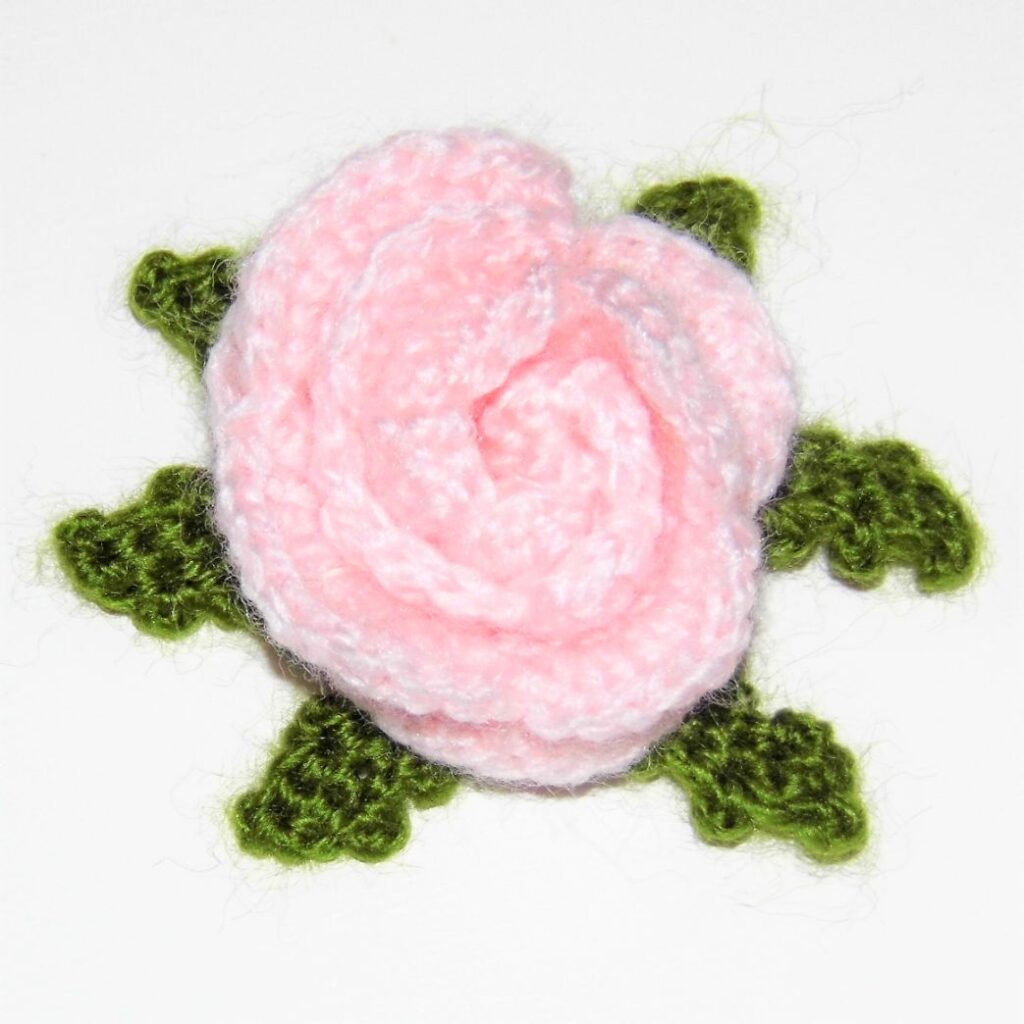
Once the flower is finished, it is time to complete it with some leaves.
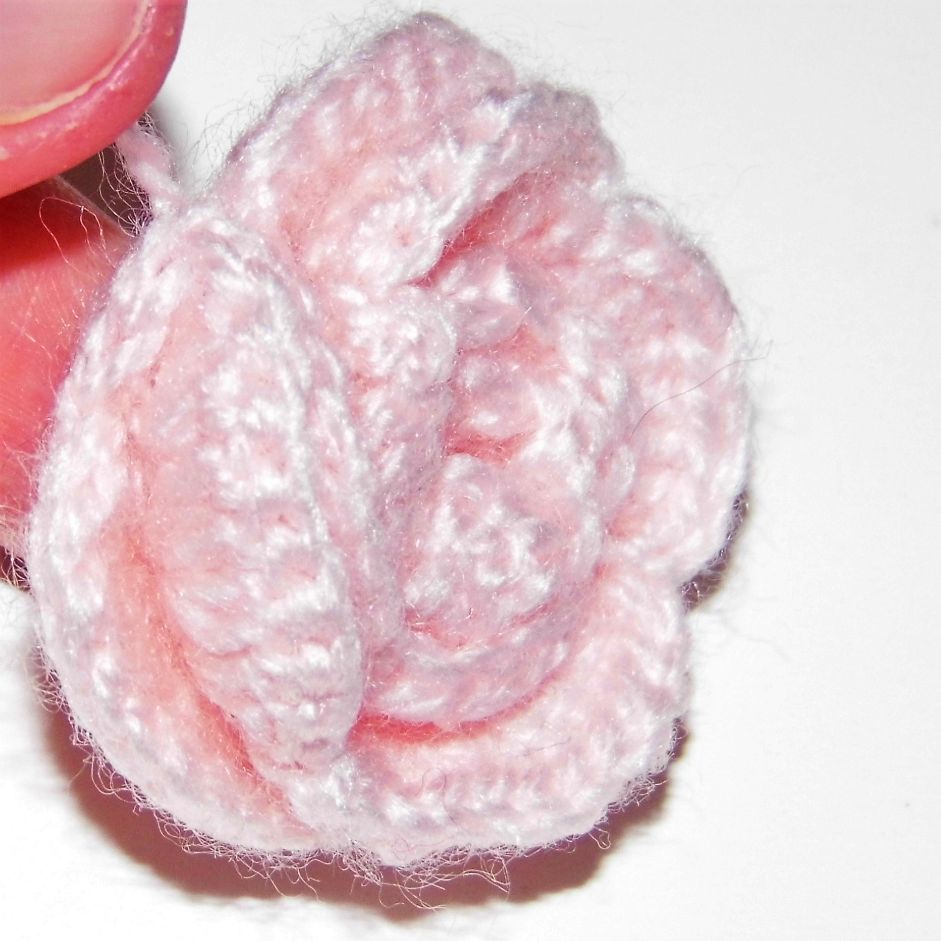
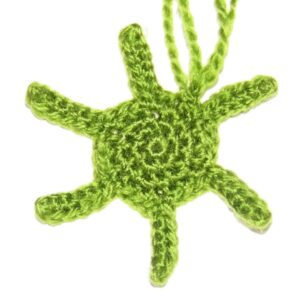
I want to cover the back of the rose, but since I don’t use fiberfill, a flat circular piece is best. Around it I will crochet the leaves. Again I am going to use even numbers divisible by 3. In this case starting with a 6 sc magic ring.
LEAVES
With olive green yarn
1. I Work 6 sc in magic ring.
2. Inc in every st (12).
3. “1 sc, inc”, repeat (18).
These 18 sc are enough to cover the back.
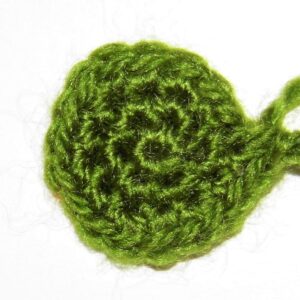
It is time to start crocheting the leaves. The idea is to do it in rows in one time. For this, I’ll use a combination of chains and sc around the main 18 sc piece. The number of chains will determine the length of the leaves and the stitches that occupy in the piece their total number. Each one will occupy 1 sc, so this time it will be the separation stitches between them that will determine the number of leaves. Being 18 sc the total stitches to crochet the leaves, the easiest thing is to make 6 leaves occupying 3 sc each, that is, 1 sc for the leaf and 2 sc separating them.
4. 1 sc, ch 7, 6 sc in the chains, 1 slip stitch over the origin point of the chains. “3 sc on the base piece, ch 7, 6 sc in the chains, 1 slip stitch over the origin point of the chains” 5 times, 2 sc.
I have already part of the 6 leaves.
The leaves need to be shaped by incorporating some detail such as irregular edges. For this I am going to continue working around the piece, bordering the leaves adding something as simple as some chains.
5. 1 sc, I work in the side of the chains: “1 slip st + ch 2 + 1 slip st, 1 slip st in the next chain” 3 times. I Continue crocheting in the other side of the leaf following the same pattern. 3 sc on the base piece to work on the next leaf following the same pattern. I Repeat until completing the 6 leaves and the round.
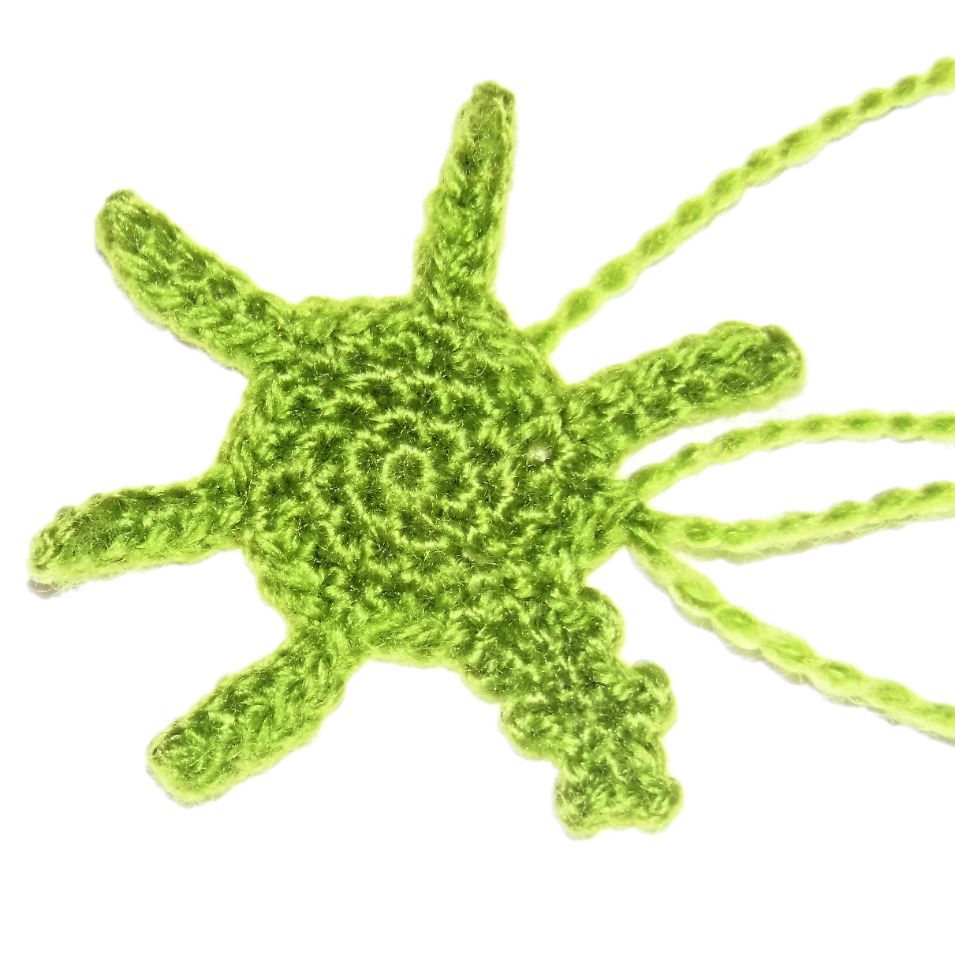
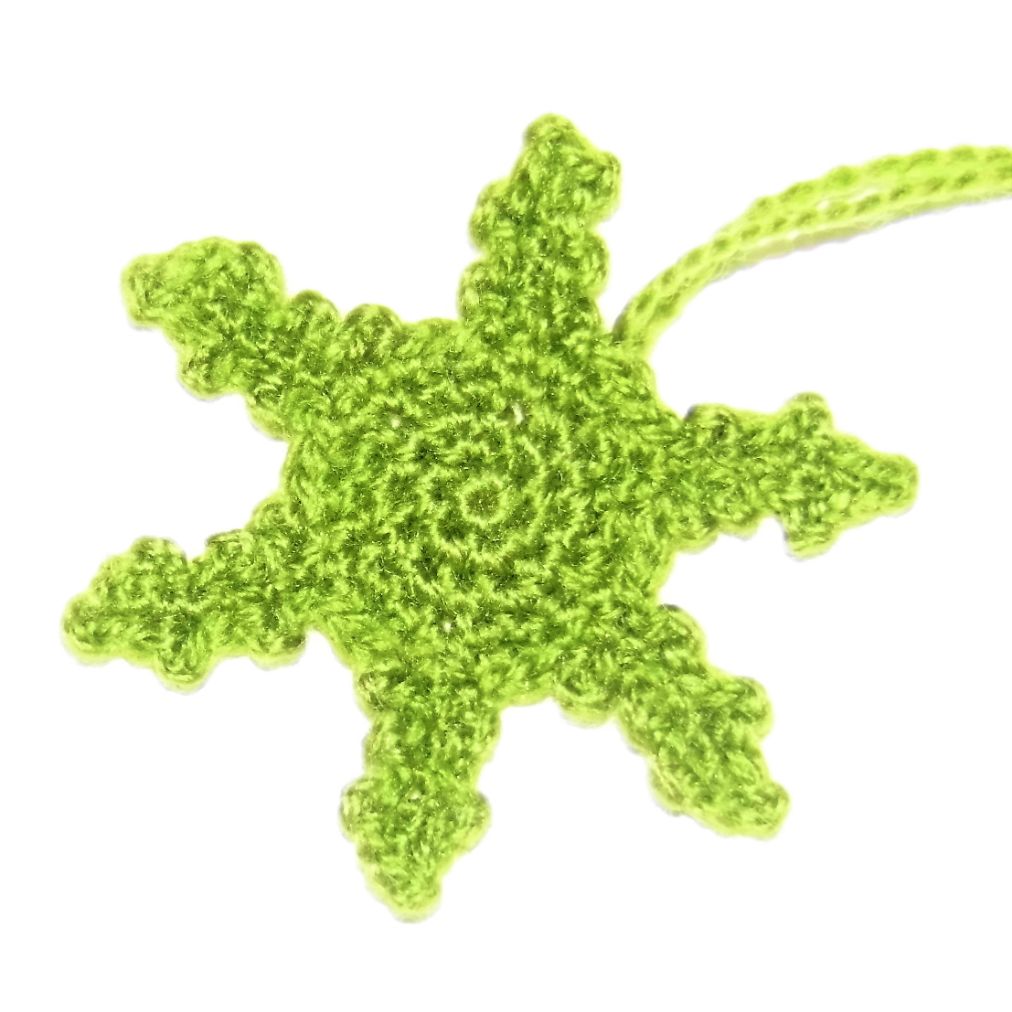
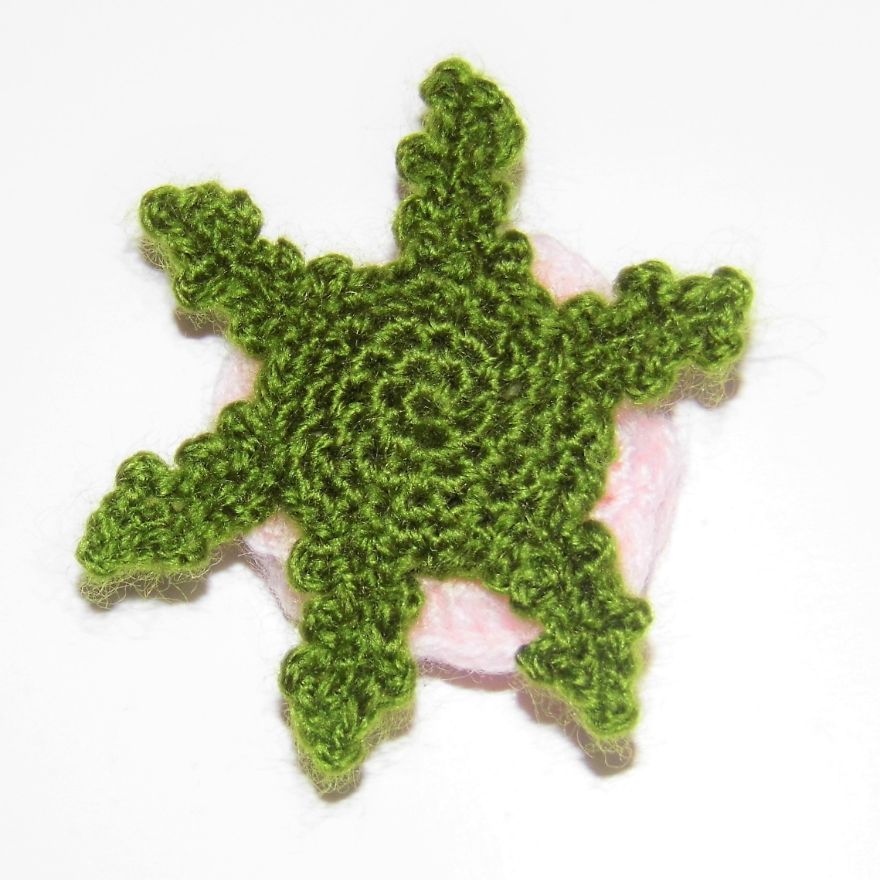
I fasten off leaving a long thread of wool to sew the piece on the back of the rose. Place the magic ring outside.
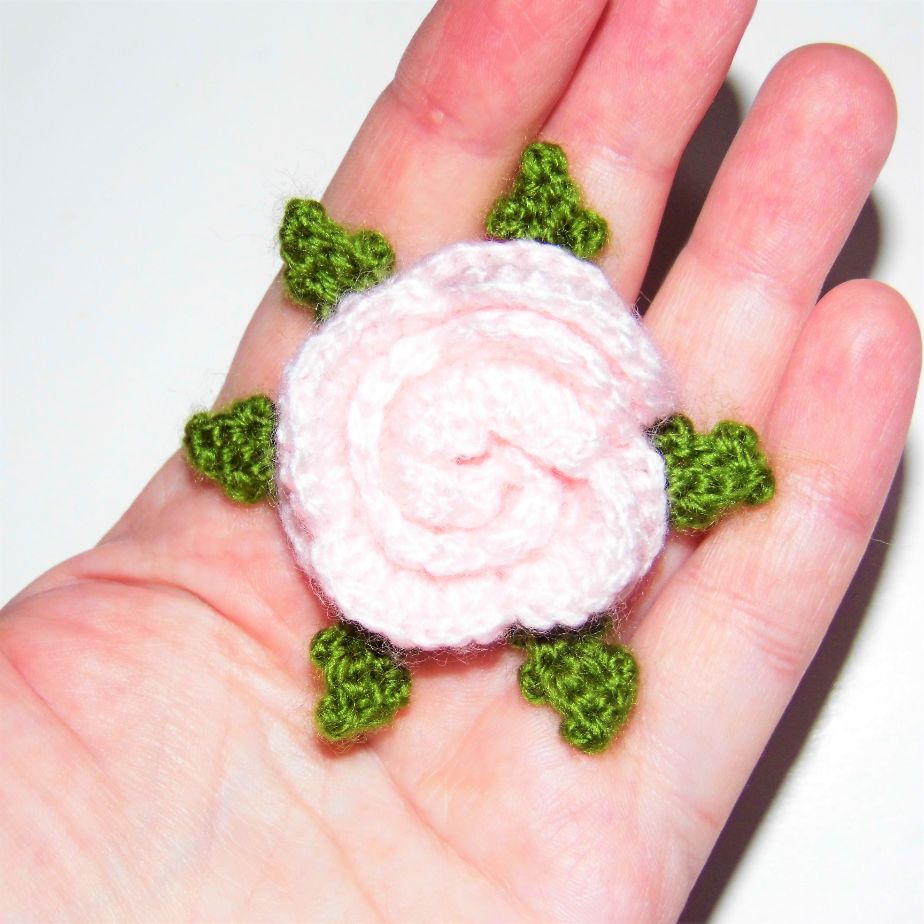
And the Rose is finished! Do you like it?
But this is the first version of the pattern and there are things to review and even modify. For example, adding height to the final petals, a touch of color to the initial ones. Maybe I should place the leaves in a way that is not so symmetrical, or modifying their size. Designing a pattern means giving it many turns, correcting, rectifying, even after finishing it.
I hope you like both the pattern and the tutorial Designing an amigurumi: Rose and find it useful.
See you in the next one!