Posted on 2 Comments

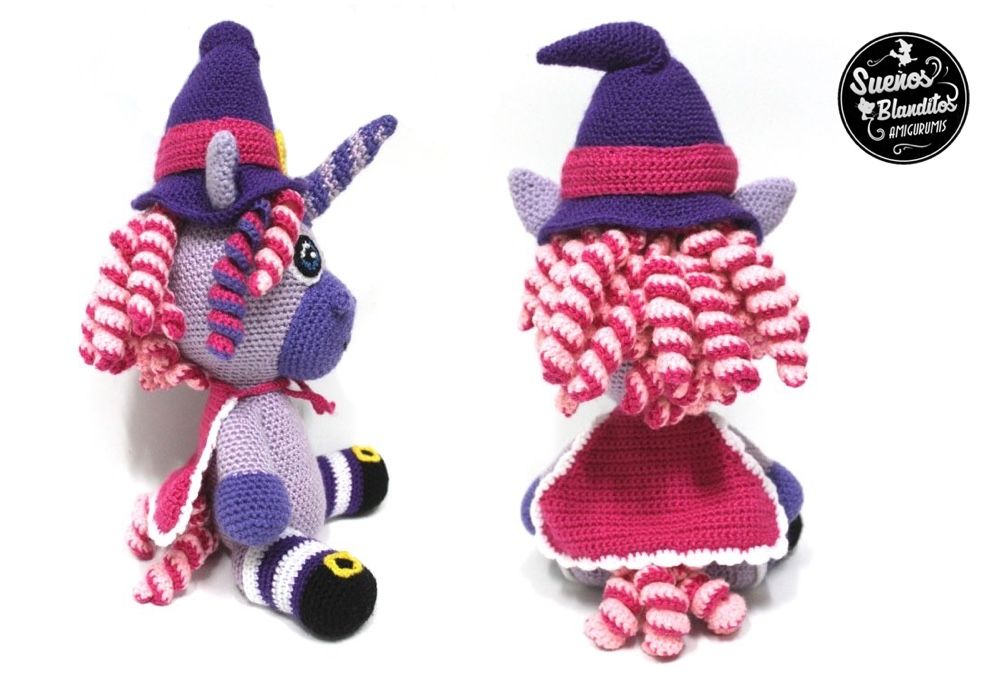
Witch Hat Amigurumi Pattern

Happy Halloween!

Did you know that witches are my favorite characters?

One of the first amigurumi patterns that I have done is a little witch and I am so fond of her that I still use her image as an avatar.

You will have noticed that a witch also appears on my logo.

Continue reading Witch Hat Amigurumi Pattern

Posted on Leave a comment

Pecosa, the craftswoman who gives work to Peruvian women

In my previous post I talked about the different physical and emotional benefits that crocheting amigurumis gives us.

This time I want to talk about how amigurumi can open new horizons in the professional field and how great things can be achieved with effort and perseverance.

This is the example of Katia Horbatiuk and “Pecosa” the amigurumis brand that she has created in Peru.

This young Ukrainian girl, passionate on crochet since she was a little girl, has turned her passion into a way of life and an entrepreneurial project that provides work for dozens of Peruvian women with difficulties accessing the labor market.

Proud to be a weaver, Katia began her project in 2013 through Facebook. Overwhelmed by the increasing number of requests she received, she sought help from other women, thus initiating an important training and employment program: “Pecosa en casa”.

Continue reading Pecosa, the craftswoman who gives work to Peruvian women

Posted on 6 Comments

Crochet and Amigurumis as Therapy

Sometimes we forget that on the other side of a message there is a real person, of flesh and blood, with problems, concerns, in short, a life.

Through this passion that joins us, I have discovered that crocheting amigurumis is more than making a doll with yarn, hook and fiberfill.

Starting with myself, the amigurumis have helped me to improve my self-esteem and to cope with moments of great sadness or worry. They have been a distraction, a relief and on many occasions the necessary push that has prevented me from falling into discouragement.

Since I started this adventure, there have been many messages that I have received. Messages of all kinds, from daily consultations related to patterns, to thanks or congratulations, but without a doubt, the messages that move me most are those in which you make me a participant in the reasons that have led you to crochet amigurumis:

Continue reading Crochet and Amigurumis as Therapy

Posted on 2 Comments

Little Monkey Bookmark free amigurumi pattern

Back to school is here!

They are moments of illusion, novelties, meetings… and there is much to do.

As I’m sure you’re very busy, this week I bring you a different pattern than you’re used to:

The Little Monkey Bookmark free amigurumi pattern
Continue reading Little Monkey Bookmark free amigurumi pattern

Posted on 2 Comments

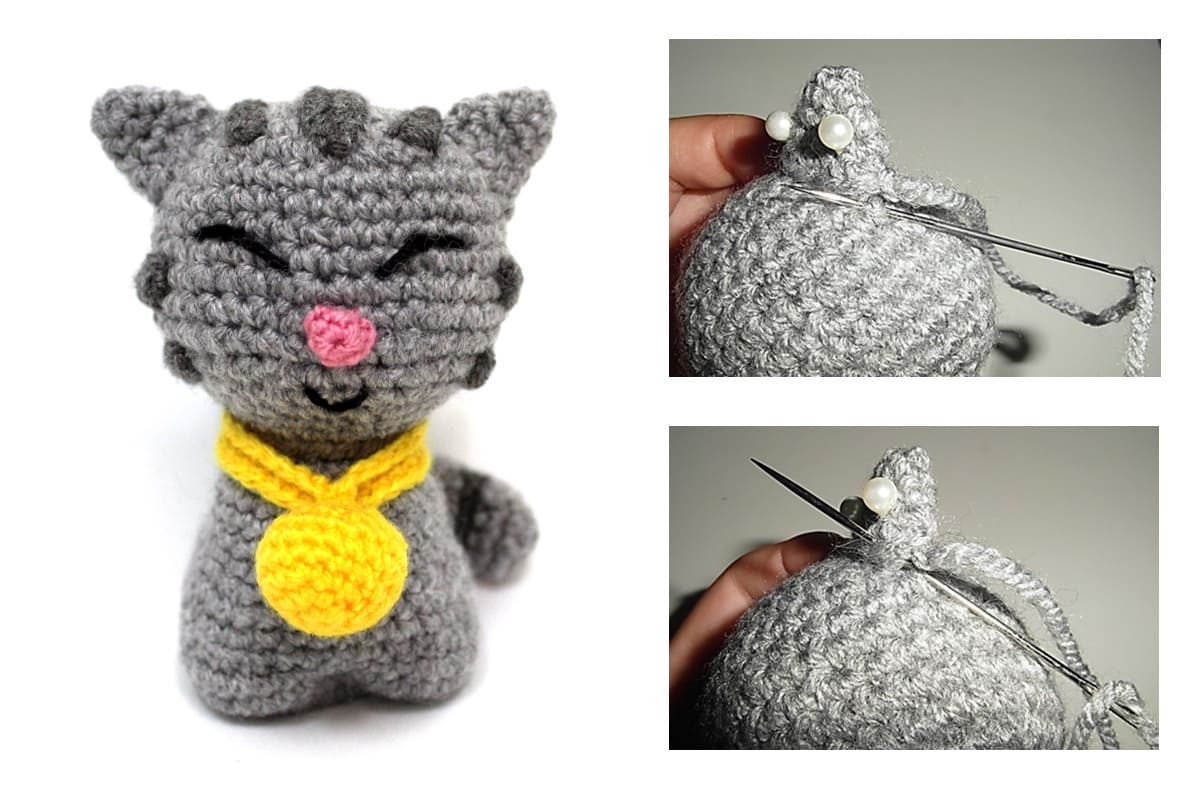
How to sew the different parts of our Amigurumi + Kitten Pattern

We are going to deal with one of the issues that most concern the amigurumis crocheters, especially if they are starting:

How to sew the different parts of our amigurumi?

This question is important, because although you crochet each part very well, if when assembling the joint is not correct, it will not only affect the appearance of your creation, but you run the risk of detaching the pieces, with the problems that this can cause.

In order to sew the parts of an amigurumi you will need:

  • The different pieces previously crocheted in which, to facilitate the join, you will have left a thread at the end of the fabric. The length of this thread will depend on the size of the piece you have to sew. More it is better than less and it will be the experience that will allow you to adjust the lenght.
  • Wool or yarn of the right color in relation to the part you have to sew. You will need it in case you have not left a thread or that it isn’t enough to complete the joint of the piece.
  • Yarn Needle, that is, a needle suitable for sewing the wool or yarn that we use to crochet our amigurumis. You can find them in different materials, sizes and thicknesses. I usually use metal about 8 cm long.
  • Tape measure to place the pieces in the right place, especially if the exact measurements are specified in the pattern.
  • Pins to secure each piece in place and prevent them from moving while you sew them.
  • The diversity of the pieces and their placement force us to join them in different ways. Let’s see some examples applied to our amigurumi kitten:

Download Cat free amigurumi pattern >>

Joining an open piece without filling to a closed piece:

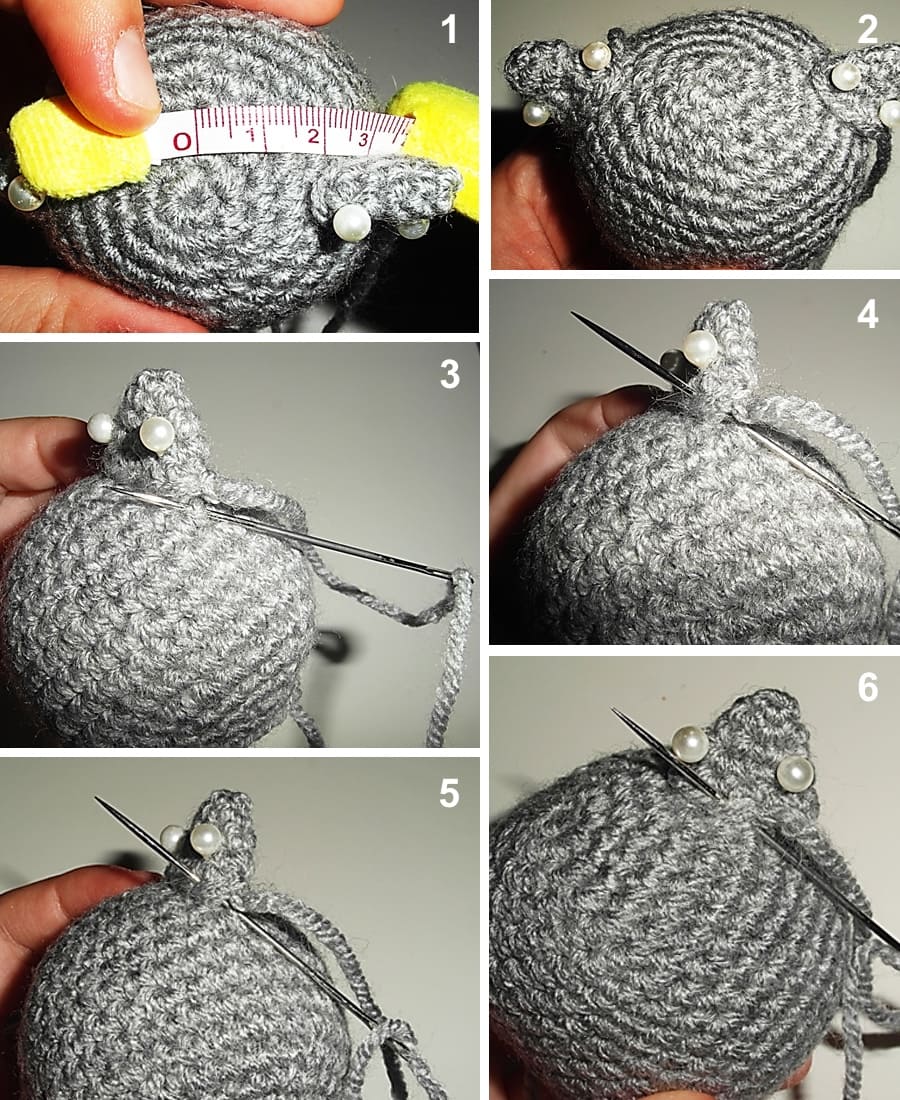
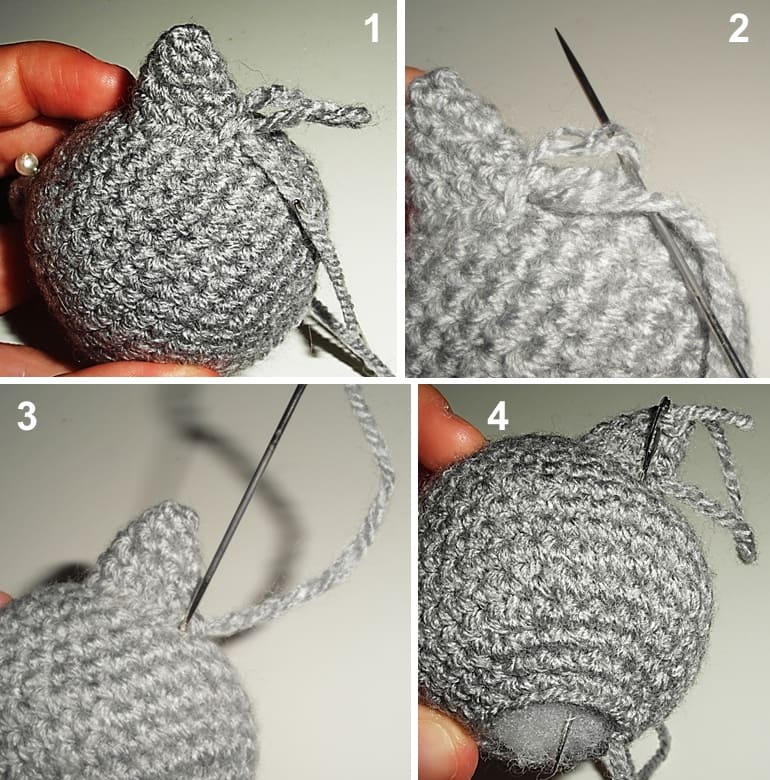
It is about joining the ears to the head of our kitten.

On this occasion, the open piece, as it does not have fiberfill, is flat, which divides it into two parts, front and back.

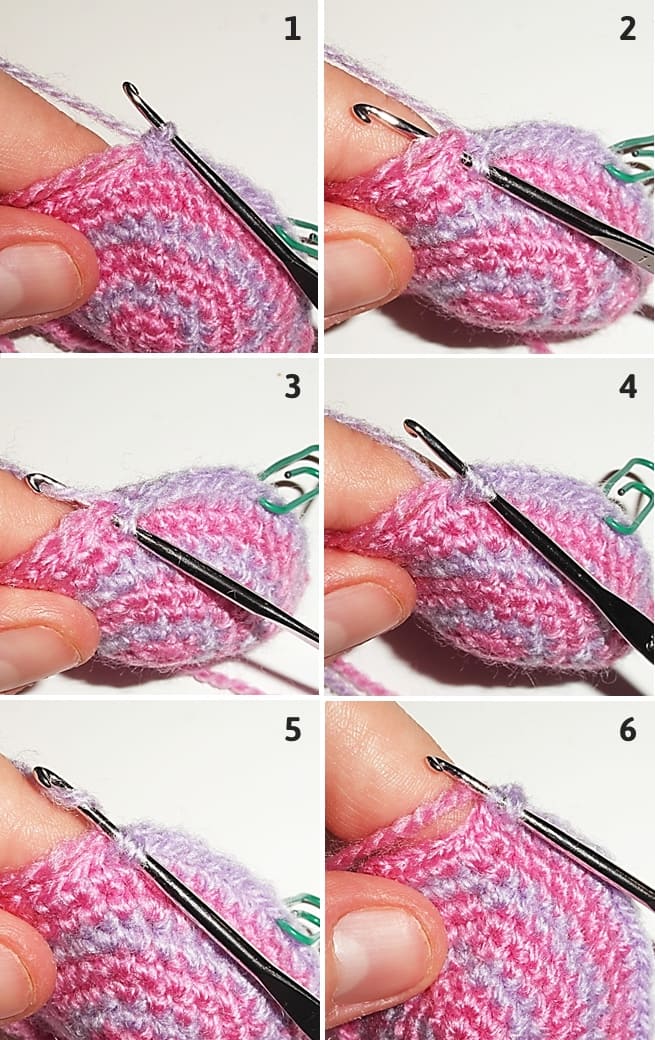
Once the piece is placed in the correct place, for what you can use a measuring tape (photo 1) fix it with one or several pins (photo 2).

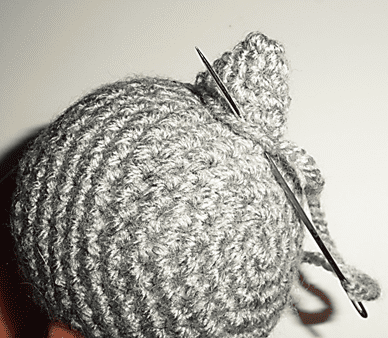
On one hand, sew it by taking a piece of fabric from the head and on the other, the full stitch of the ear. (photos 3 to 6)
Amigurumi Cat

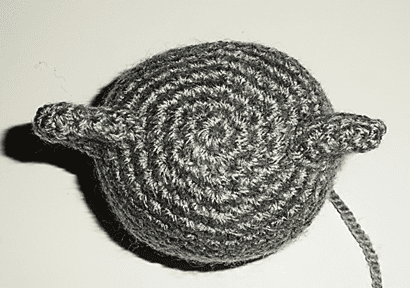
By this way when you have a part sewed, move the ear to the other side and sew the other part as close as possible.
Crochet Cat

Finally, make a small knot and introduce the remaining thread to lose it inside the fabric and cut the rest. You should do this to finish the join of all the pieces of your amigurumis.
Sew Parts Amigurumi

You already have both ears of your kitten.
Sew Parts Amigurumi

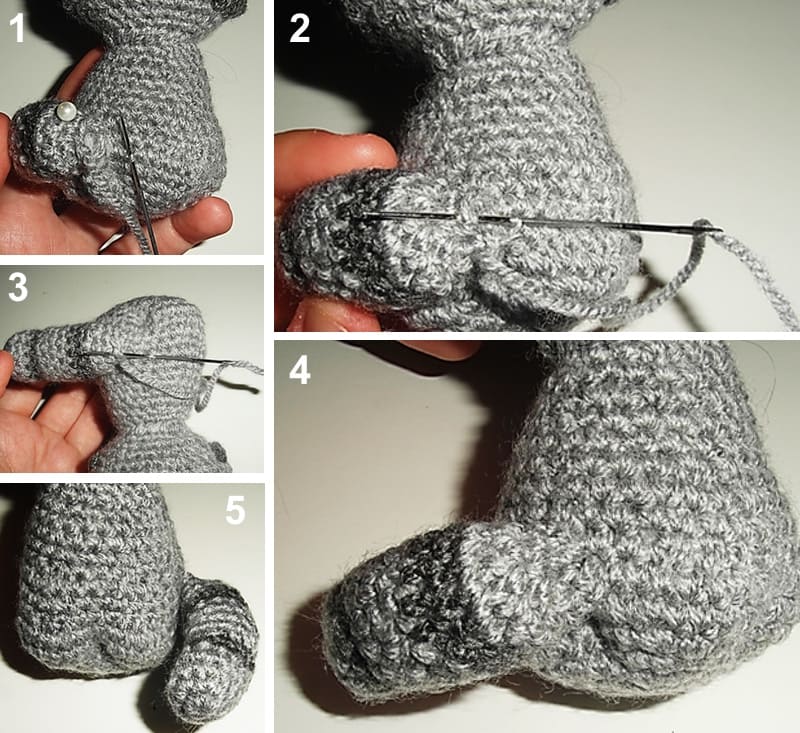
Joining an open piece to a closed one:

We have done it with nose and tail.

To begin, hold the piece with pins in the desired place.

Crochet Kitten

Then, sew it taking a bit of the fabric of the closed piece, that is, the head and body of the kitten, to join it to each stitch of the open piece, point by point.
Sew Parts Amigurumi

In the case of the tail, having a twisted shape, you must pay special attention to take the fabric of the closed piece so that the open piece keeps its shape.
Amigurumi Cat Crochet

Joining two flat pieces:

We are going to sew two flat pieces, one on top of the other. It is about joining the stripes of the kitten to the head.
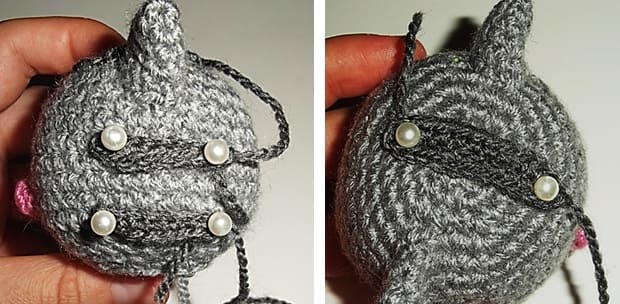
Amigurumi Kitten Pattern

You will do it in the same way: Take from the small piece the whole stitch and from the big piece a little fabric.

Sew Amigurumi

And so you have the kitten’s stripes:
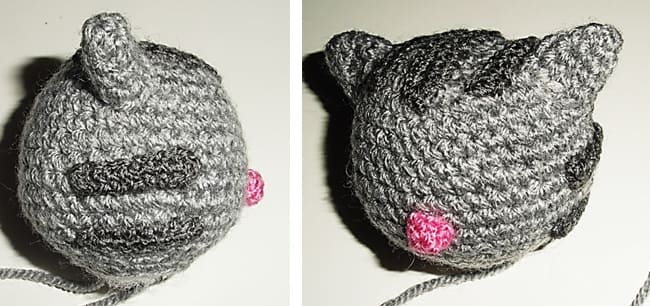
Kitten Pattern

Joining of two open pieces:

It will be the case of the join of the head with the body.

It is something very simple, because the number of stitches of both pieces usually matches.

Proceed then to fix the head in its place and once well centered, sew the stitches one by one, that is, the point of the head with its corresponding point of the neck.

Before finishing, when you have left 3 or 4 stitches to finish the join, a little trick to achieve more firmness in the head of any of your amigurumis is to introduce a little more filling in that hole.

You will be surprised to see that you can still put plenty of stuffing in this area of the neck because when handling it while we sew, the fiberfill has moved up (head) or down (body), leaving the area of the neck weakened.

If the head of your amigurumi does not hold up anyway, try this.

Joining the ends of the same piece:

It involves sewing the collar over the kitten’s neck joining the ends.

In this case, we will sew the jingle bell on this joint so more than its appearance, what interests us is that it has a V shape.

To do this, sew zig-zag taking the stitch of one of the sides and going to the next stitch on the other side to complete the join.
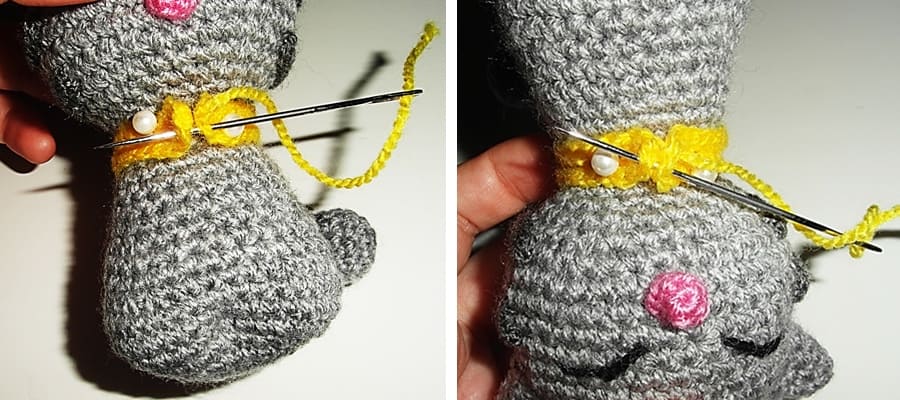
Amigurumi Cat

Joining two closed pieces:

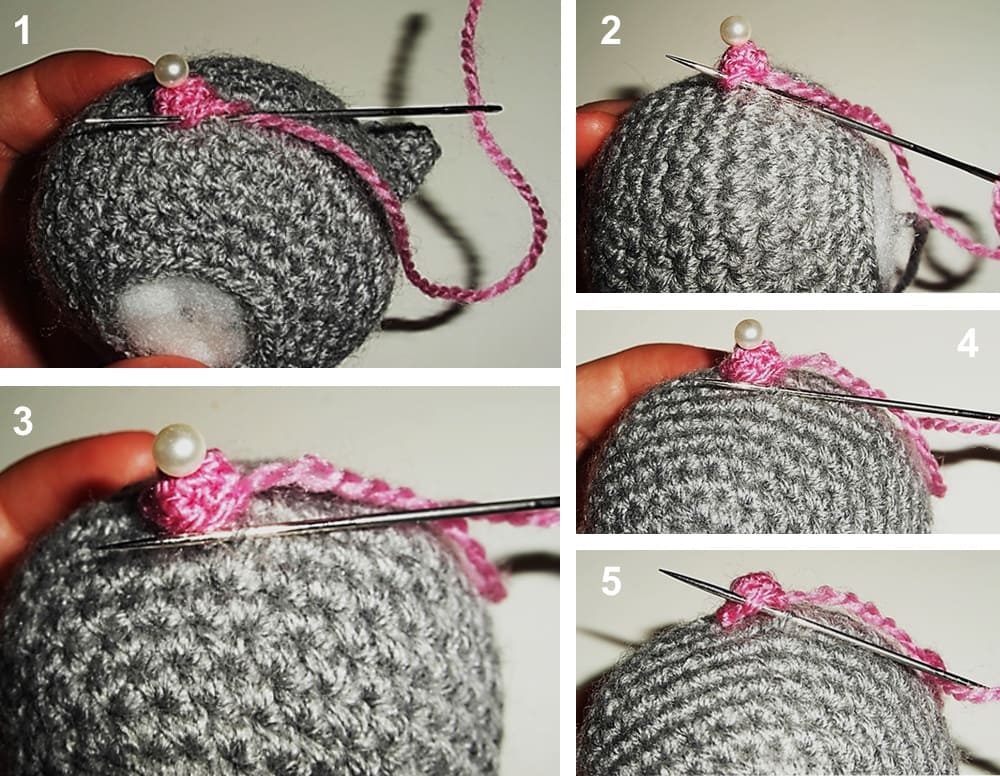
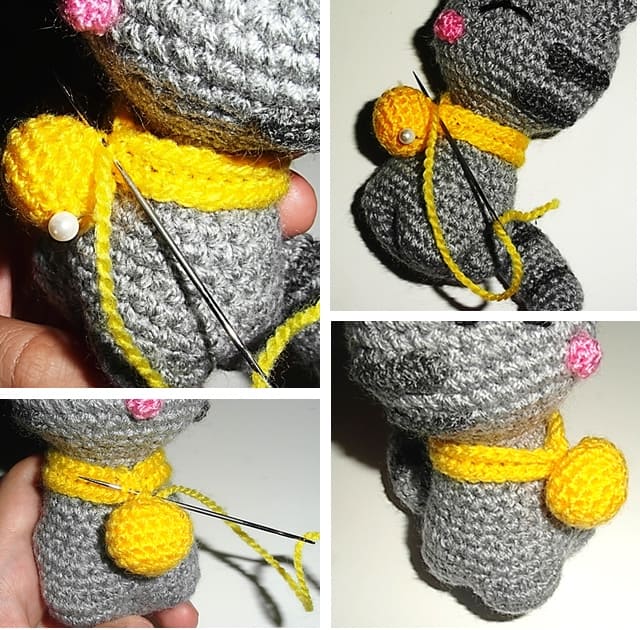
In our example, we are going to sew the jingle bell on the collar.

To do this, after holding it in place (photo 42) take some fabric from each part, moving around the jingle bell and trying to do it in a small radius so that it looks like it is hanging.
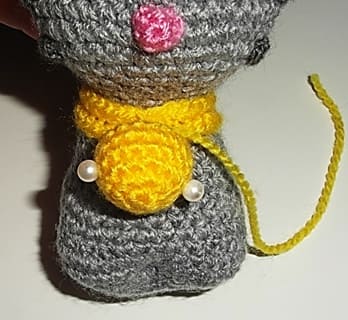
Amigurumi Cat

This is all!

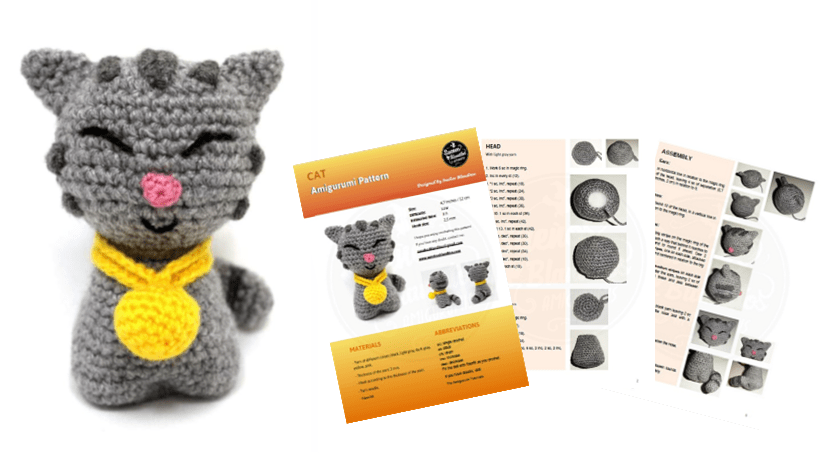
Let’s practice this tutorial crocheting this cute kitten.

Download Cat free amigurumi pattern >>
Happy crochet!

Posted on 2 Comments

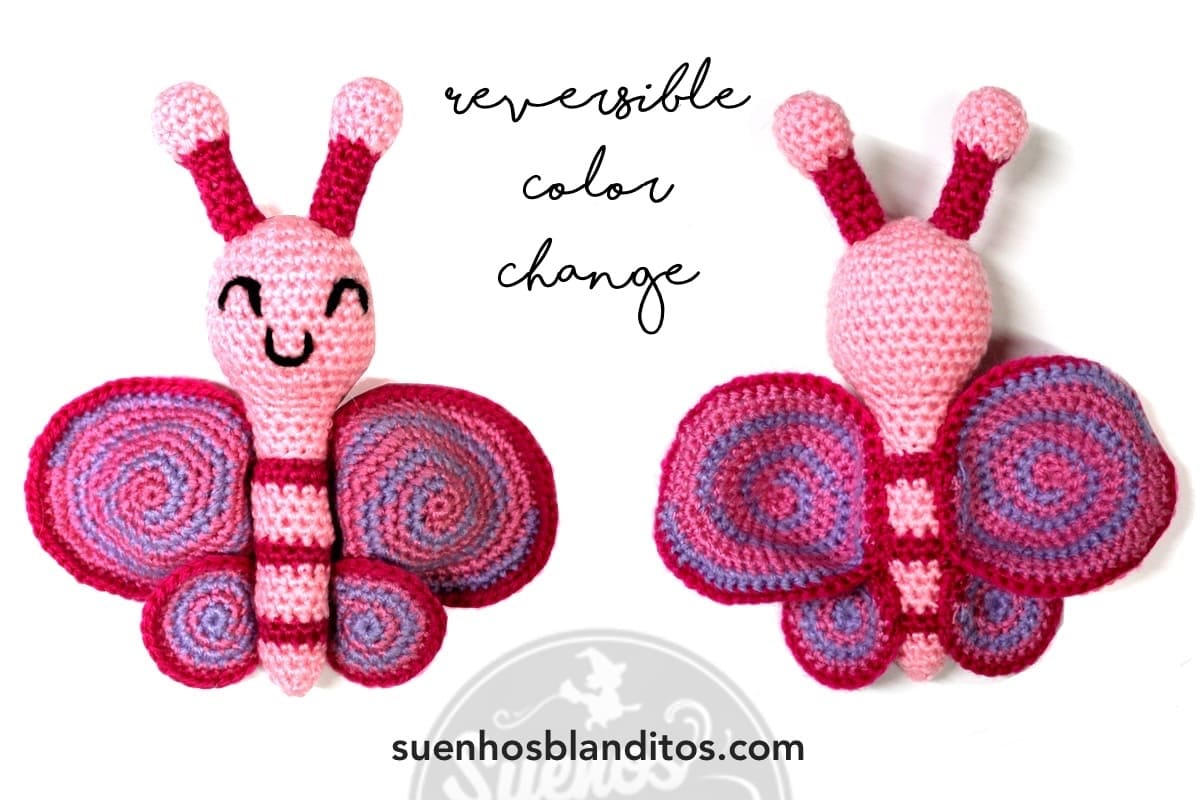
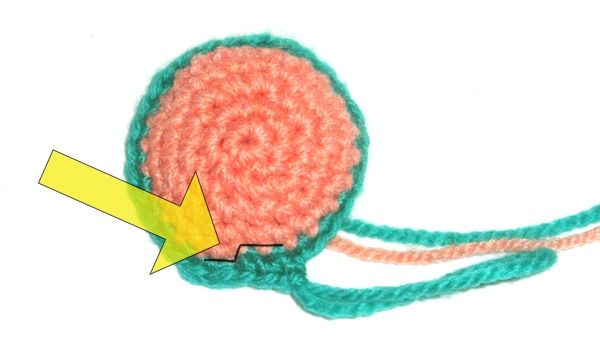
Practice the Reversible Color Change by Crocheting this nice Butterfly

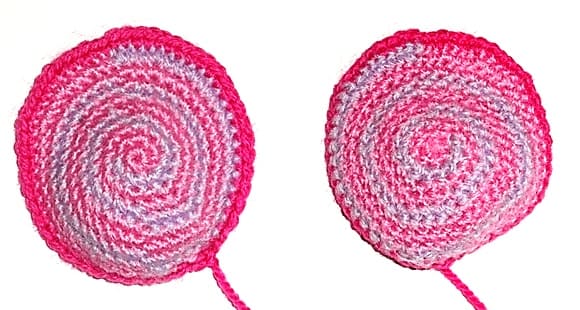
Sometimes we find the difficulty of crocheting a flat piece that has successive color changes having the need that the transition between colors will be good on both sides, by the right and also by the reverse that will remain visible.

Color Changes

To achieve that the changes of color do not alter the reverse of our fabric keeping the same drawing as the right, what we do is crochet with the two threads, one main and another hidden, so that we can alternate between them without affecting the design.

Let’s see how to do it in our case:

Download Butterfly free amigurumi pattern >>

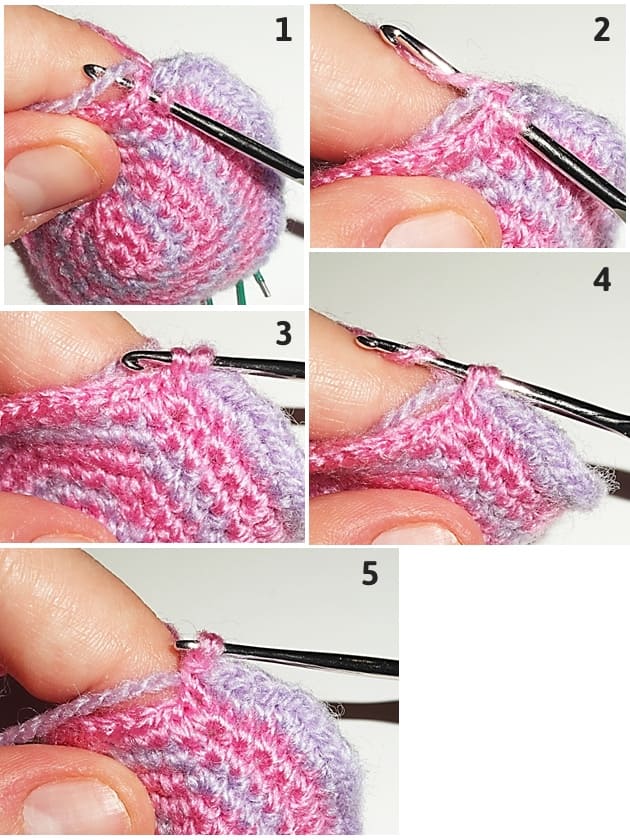
1.- We begin by crocheting with one of the colors (pink) to then change to the second color (lilac), but instead of cutting the pink thread or leaving it outside the fabric, what we will do is incorporate it into it.

To do this, we keep it on the back and we crochet on it at the same time that we crochet on each stitch with the thread of the main color.

The new lilac stitches will remain on the pink thread that is hidden among them.

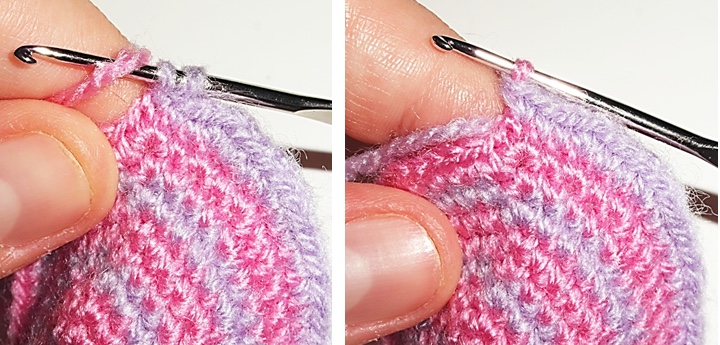
2.- We change again to the pink color that will become the main color in our fabric. We do it by incorporating it in the final step of a single crochet. To do this, we begin to crochet the single crochet with the lilac color and at the moment we have the 2 loops in the hook, we will introduce the pink color through them completing the single crochet.

3.- We already have the pink thread as the main one but we must keep the lilac color hidden, as we have done before and continue crocheting with the two threads.

As you can see, keeping the two strands in the fabric is very simple, avoids cuts and loose threads and in addition to providing a reverse of the piece without defects, it is also very useful when we have to make continuous color changes.

Practice the reversible color change by crocheting this nice butterfly

Download Butterfly free amigurumi pattern >>

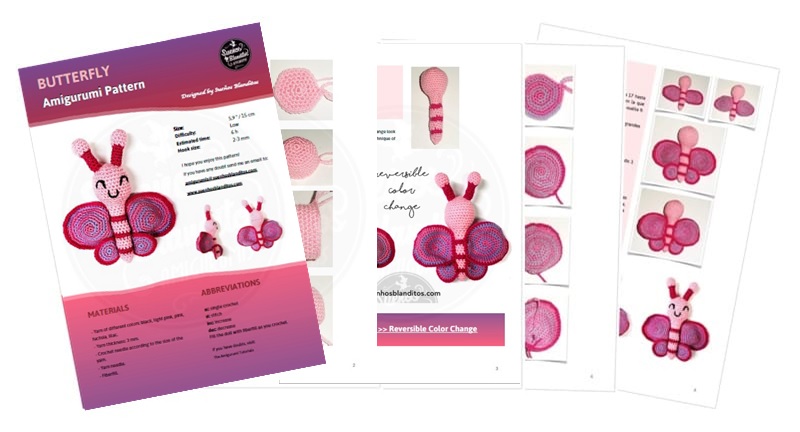
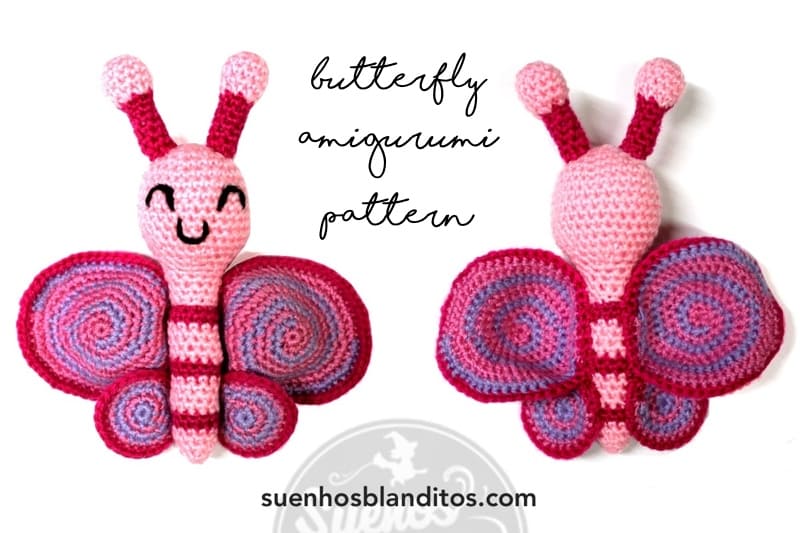
It is specially designed so that, following the instructions of the pattern, you can practice the color changes easily.Butterfly Amigurumi Pattern

Use other colors, combine them as you want, you’ll see how beautiful it looks!

And do not forget to send me a photo so everyone can see how well you did it.

Happy and colorful crochet!

Posted on 3 Comments

How to Hide the Color Changes in your Amigurumis

Do you have difficulties to changing colors in crochet?
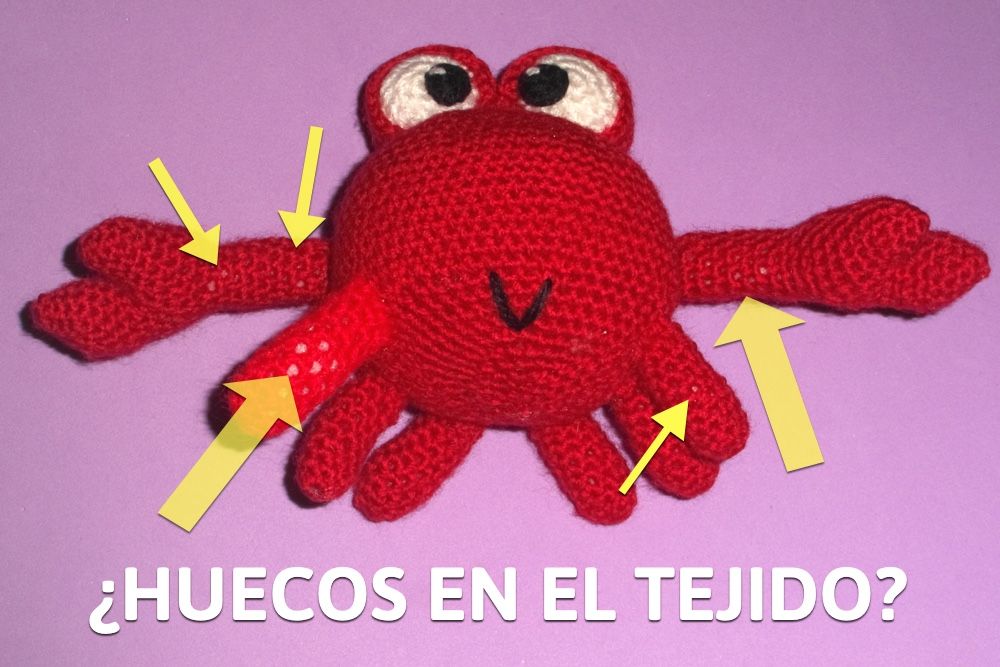
Is there a gap in the fabric that disfigures it?

Amigurumis are crocheted in rounds being the most used way to make them the spiral technique.

That is, instead of closing each round independently, we continue crocheting the next one.

By this way, the stitches move to form the spiral, instead of remaining above the stitches of the previous round.

When we change color, when we crochet in continuous rounds in spiral, that displacement of the stitches causes a gap in the fabric, an unevenness that disfigures the design.

It is a detail that can make a difference.

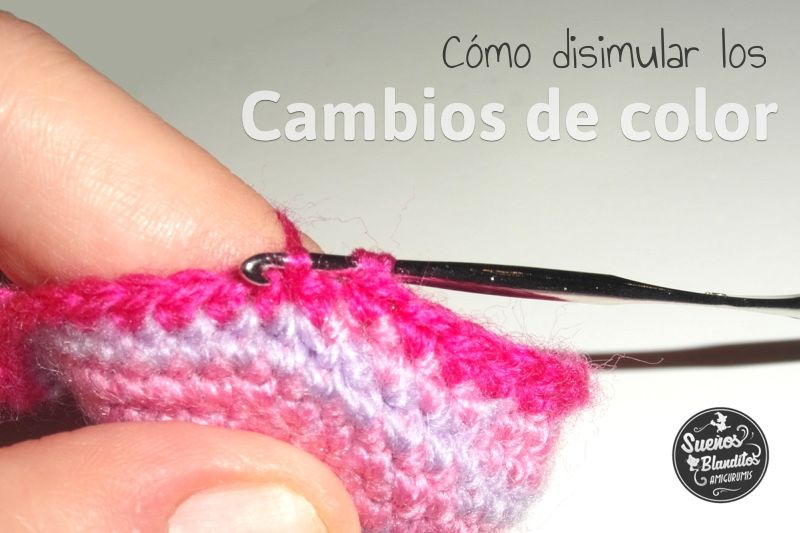
Today I am going to teach you 2 tips so that, in a simple way, the color changes are linear and have no unevenness:

Continue reading How to Hide the Color Changes in your Amigurumis

Posted on 7 Comments

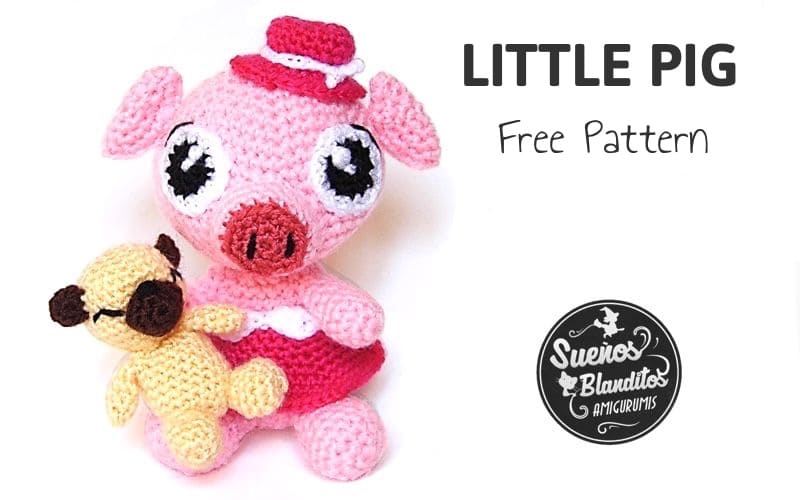
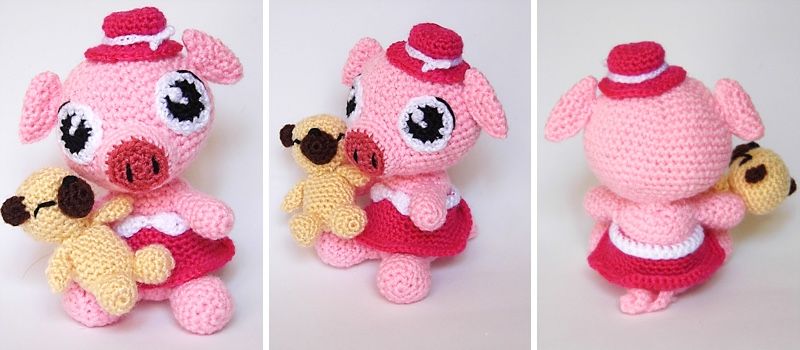
Little Pig Amigurumi Pattern

  • Difficulty: Medium
  • Estimated time: 5 h
  • Size: 6″ / 15 cm
  • Hook size: 2,50 mm
  • Recommended yarn: 100% Cotton

MATERIALS:

  • Yarn of different colors: pink, fuchsia, brick red, light brown, brown, white, black.
  • Thickness of the yarn: 3 – 4 mm
  • Hook according to the thickness of the yarn.
  • Yarn needle
  • Fiberfill

ABBREVIATIONS: 

  • sc: Single crochet.
  • inc: increase
  • dec: decrease
  • st: stitch
  • Fill the doll as you crochet

Continue reading Little Pig Amigurumi Pattern

Posted on 3 Comments

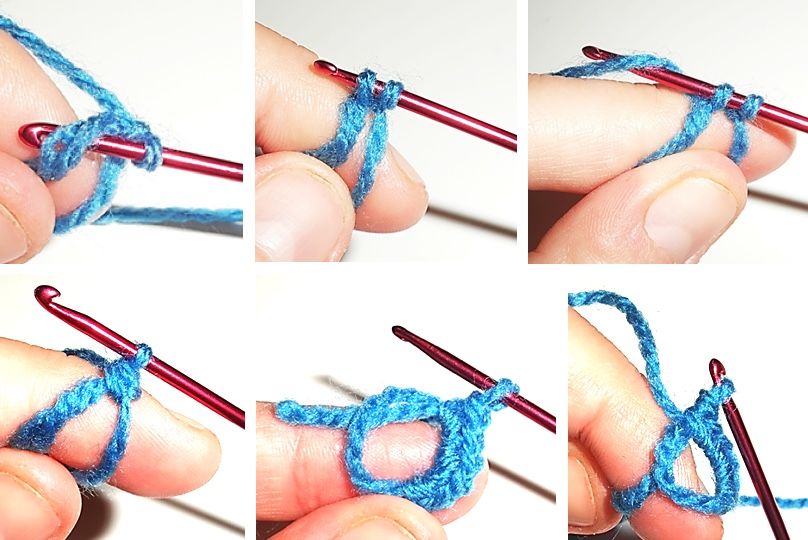
How to Crochet a Magic Ring Step by Step (Beginner’s Guide)


The magic ring Is the stitch that allows us to begin crocheting in the round and therefore most of amigurumis.

It consists of forming a sliding circle that we will close after crocheting on it the beginning stitches of our fabric.

Being a basic element, it is also the first great difficulty with which you find yourself when starting to crochet the amigurumis, even becoming a cause of frustration and abandonment before you start.

There are different ways to make the magic ring, adjustable ring or magic circle.

Next I will show you mine and you can check with this simple step by step that it is not as difficult as you thought.

Continue reading How to Crochet a Magic Ring Step by Step (Beginner’s Guide)

Posted on 297 Comments

Amigurumi Challenge: Little Animals Baby

Sueños Blanditos is 1 year old!

I am very happy to have my own website from 1 year now and be able to share all my work from this “home” that I hope you also consider yours.

Don´t think it has been a simple path. More than 5 years ago I started the adventure of designing amigurumi patterns, that’s why I have so many …

I started with a small blog and the truth is that I did not expect to get liked by anyone… I have never had too much confidence in myself. However, I was wrong and there were many who showed me.

Especially you, all of you. Those who follow me, those who buy, those who visit the web, crochet my patterns, send a photo, give me a “like” on the social networks or make a comment.

If it were not for your support, I would not have gotten that far.

That’s why I want to celebrate this first anniversary with a fun challenge so that we can all enjoy weaving these animal babies.

Continue reading Amigurumi Challenge: Little Animals Baby