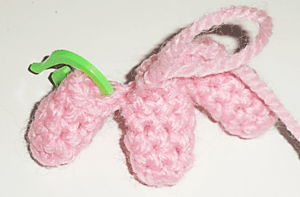
People, animals, objects… when designing an amigurumi, everything has a place with a little imagination and some basic ideas. On this occasion I want to teach you how to join several tubular pieces such as, for example, how to crochet the union of the fingers of our Amigurumis, so that you can easily start from them giving rise to many other parts of your amigurumis.
As an example we are going to join 3 pieces, but you can join much more. Just keep in mind that it is a linear union, that is, each piece will be next to another and at the same level.
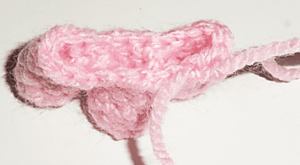
We start by crocheting each piece separately. We will make simple pieces, all 3 of the same size:
1. Work 6 sc in magic ring.
2. to 5. 1 sc in each st (6).
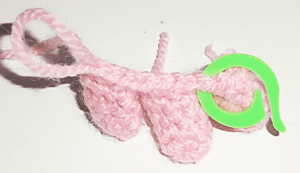
Crochet 2 pieces completely and fasten off, that is, cut the thread. Finish the third piece also completely, but don’t cut the thread to continue crocheting on the other two and thus be able to join them.
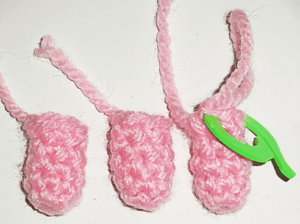
The important thing when joining the pieces is the number of stitches of the last round. It doesn’t matter if the piece has changed in size and shape, if it was at first narrower and we have increased it at the end or if on the contrary it has gone from wide to narrow. To join the pieces you should look at the number of stitches you have in the last round.
In our simple example, the three pieces have the same number of stitches on their last round, 6, but even if they had a different number, the joining procedure would be the same.
Let’s see:
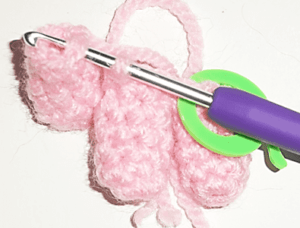
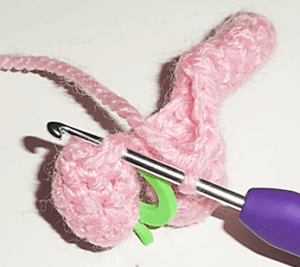
As I said, each piece has 6 sc, so what we do is crochet over half of the stitches, to form one side of the piece and then, over the other half, to the other side. If we are dealing with pieces with different number of stitches, we should pay more attention to the stitches of each one.
Begin the joining:
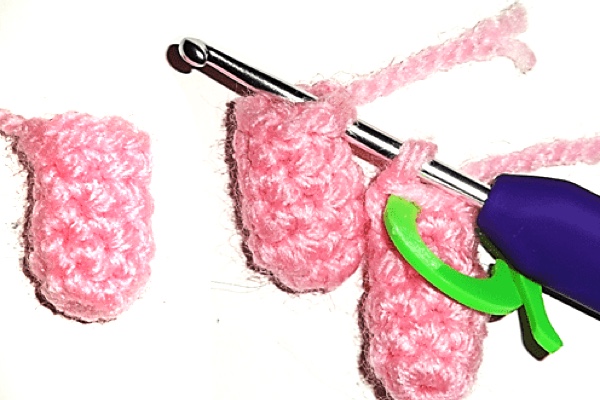
From the stitch where we are in the third piece and we have the round marker, we will work 1 sc in the second piece, on any stitch of the final round.
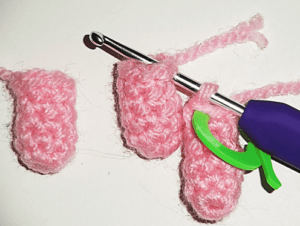
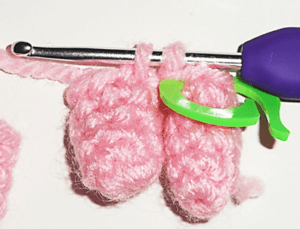
As I said, we must crochet on the half and as we have worked 1 sc, we should make another 2, that is, we will work 1 sc in each one of the following 2 stitches. By this way we will have crocheted 3 sc.
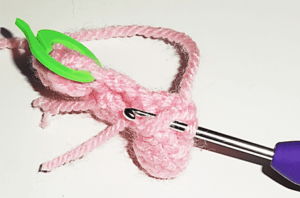
Tip: when going from one piece to another with sc there may be a small gap between them. To avoid this, instead of doing 1 sc, we work 1 slip stitch (which we will not take into account)

And on it the sc (that will count for the final count of stitches)
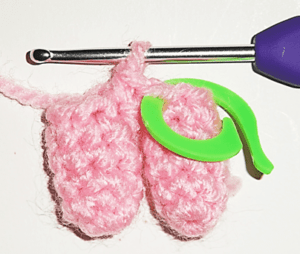
In this picture you can see 4 stitches, but the first one, the closest to the marker, is the slip stitch, which will not count for the total number.
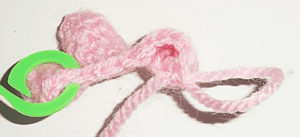
Work 1 sc in the last piece and crochet again another 2 sc.
As you can see, we have already worked on half of the stitches (3 sc in each piece) so we continue crocheting the other half.

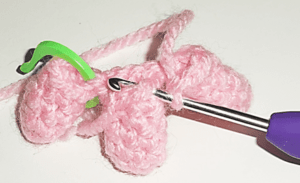
We work another 3 sc in that same piece (we’ve already crocheted the 6 stitches)
Work 1 sc in the next piece and then another 2 sc
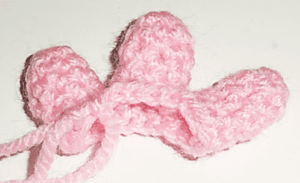
And go on to the last piece in which we must crochet the 6 sc that form it, completing the join.
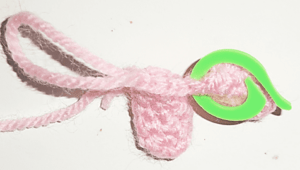
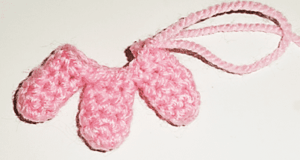
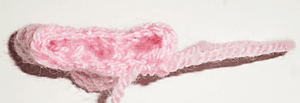
We already have the pieces together and forming a new one with 18 sc in all.
In case that the pieces that we have to join have an odd number of stitches and it’s not possible for us to modify the round so that it is an even number, we will have to evaluate if we want our resulting piece after the union to be narrower in one of the sides or balance the final number of stitches by adding or subtracting those from the other pieces.
For example:
1 piece of 9 sc + 1 piece of 6 sc + 1 piece of 5 sc.
We crochet 5 sc + 3 sc + 3 sc = 11 sc on one side and 4 sc + 3 sc + 2 sc = 9 sc on the other, the first side will be wider than the second.
Another option would be: 5 sc + 3 sc + 2 sc = 10 sc on one of the sides and 4 sc + 3 sc + 3 sc = 10 sc, thus balancing the final number of stitches on each side.
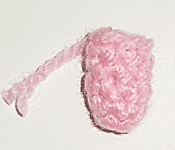
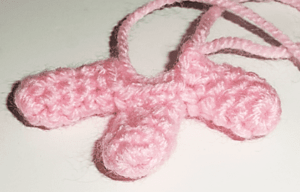
From this simple joining of tubular pieces you can crochet hands, feet, legs and everything you can think of.
And that’s all for today’s tutorial! I hope you liked it and it will help you.
If you have any doubts leave me a comment! ?