
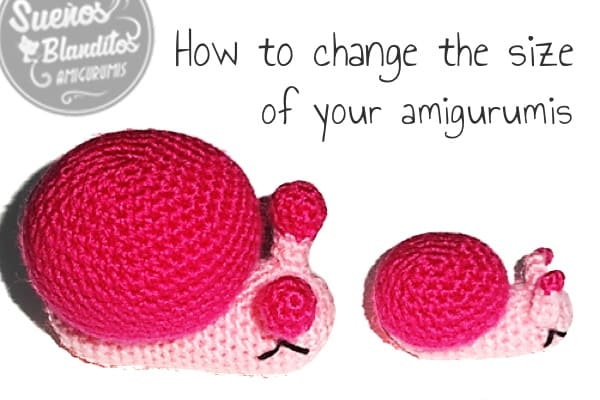
Hello!. In this tutorial we are going to see how to change the size of your amigurumis
Many times you have found the pattern of an amigurumi that you love, that is perfect, just what you wanted, but when you see the size, it is too big or too small and it isn’t suitable… What can you do?
Don’t worry, this doesn’t have to be an unsolved problem. In a simple way you will be able to adapt the size of the amigurumi to your needs, whether you are a beginner or have a more advanced level.
We are going to see the solutions, from the simplest to the most complex.
There are two types of solutions to change the size of your amigurumis:
1. Vary the size of the hook and the thickness of the yarn
This is the most obvious and also the simplest solution.
It is about following the same pattern using a hook of a larger or smaller size and thicker or thinner wool or yarn, depending on whether your amigurumi is larger or smaller than the model of the pattern.
Modifying the measurements of the materials will allow you to change the size of the amigurumi without having to adapt the pattern, which is perfect if you are a beginner and it is a simple pattern.
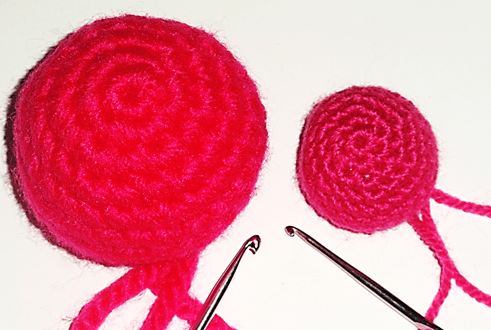
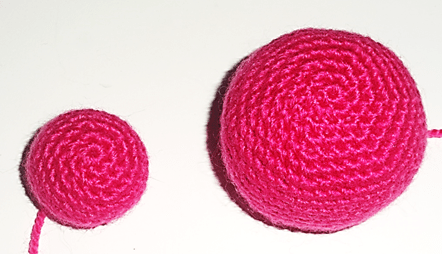
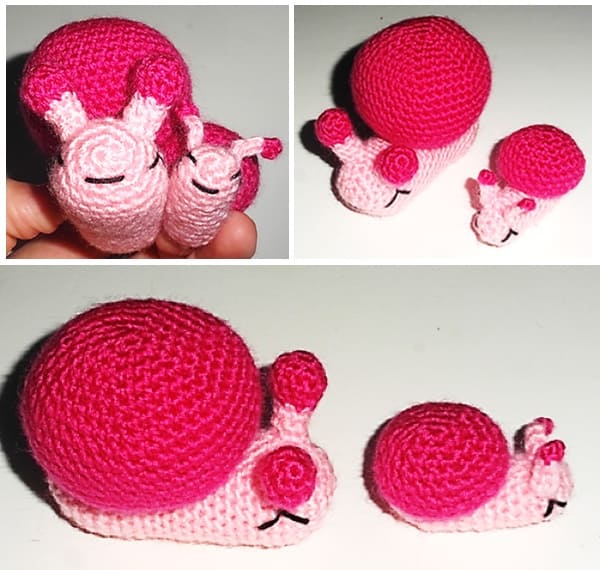
A thinner hook with a thinner thread will allow you to reduce the size of the amigurumi, while if these materials are thicker you will get the opposite effect and you will have a bigger amigurumi.
In the pictures you can see how when crocheting the same pattern using different measures in the materials, the size changes considerably.
Example Piece 1:
1. Work 6 sc in magic ring.
2. Inc in every st (12).
3. “1 sc, inc”, repeat to the end of the round (18).
4. “2 sc, inc”, repeat (24).
5. to 8. 1 sc in each st (24).
9. “2 sc, dec”, repeat (18).
10. “1 sc, dec”, repeat (12).
Fasten off.
2. Modify the pattern while maintaining the proportions of the amigurumi
This solution is a bit more complex since it involves altering the pattern by modifying those parts of it that directly affect the size of the amigurumi. For this it’s necessary that you have basic notions about the patterns and the application of the mathematics on them.
To start, we are going to remember the 3 types of rounds that come into play and that allow us to shape the amigurumis:
Increasing rounds:
They consist of the combination of sequences of stitches and increases forming the width of the piece. You can easily distinguish them in the patterns by the presence of consecutive increases that in turn suppose the increase of the total points of each round. In the example we have used are rounds 2, 3 and 4.
Fixed rounds:
In them the total number of points remains unchanged, that is, they consist of crocheting 1 point at each point, without making increases or decreases. Its presence in the patterns determines the length of the piece, so that with more fixed rounds, the longer it will be. In our example are rounds 5, 6, 7 and 8.
Decreasing rounds:
These are the opposite of the increasing rounds and consist of sequences of points and consecutive decreases that allow us to reduce the width of the piece until it even closes it. They are the rounds 9 and 10 that finish the piece of our example.
In order to change the size of our amigurumi we will have to follow the original pattern, identify these rounds and modify them to increase or decrease its size. We must influence the increasing rounds and the fixed rounds, since the decreasing rounds will be directly related to the increasing rounds.
To do it correctly and keep the proportions of the amigurumi we need to apply the mathematics on the number of rounds and on the number of total points, more specifically, we must use a Simple rule of 3.
Let’s see how:
Calculation of the number of fixed rounds:
1) Follow the original pattern and decide the width of the new amigurumi by adding or removing increasing rounds, following the sequence of points that the original pattern establishes. If you add them, your amigurumi will be bigger and if you remove them, smaller.
Following the example pattern:
We add increasing rounds to make it bigger. So we will have:
5. “3 sc, inc”, repeat (30).
6. “4 sc, inc”, repeat (36).
7. “5 sc, inc”, repeat (42).
We stay here. We want our new piece to have 42 points.
2) Once you have the desired points of the width, you can already calculate the number of fixed rounds. Follow this formula:
(Desired points x Number of the last fixed round in the original pattern)/Number of Points in the fixed rounds of the original pattern
The result of this operation will be the number of fixed rounds that you will have to crochet in the piece of your amigurumi so that it maintains the proportion in relation to the increasing rounds.
According to our example, the formula would be like this:
(42 x 8)/24=14
So, if with a width of 24 sc we make fixed rounds until we reach 8, with a width of 42 we should make fixed rounds until number 14, so that our pattern would continue like this:
8. to 14. 1 sc in each st (42).
You already have the width and length of the piece. To finish it you must use the decreasing rounds according to the increasing rounds that you have crocheted.
Let’s see how our pattern ends:
15. “5 sc, dec”, repeat (36).
16. “4 sc, dec”, repeat (30).
17. “3 sc, dec”, repeat (24).
18. “2 sc, dec”, repeat (18).
19. “1 sc, dec”, repeat (12).
Fasten off.
The measures established in this first piece of your modified amigurumi will allow you to calculate what is necessary to crochet the rest.
Calculation of the maximum number of points in the increasing rounds:
Now that you have your first modified piece, you want to start crocheting others that should be in proportion to this one. For this, you have to apply this formula:
(Total points of the modified piece x Points of the piece you want to crochet in the original pattern)/Total points first piece original pattern
The result of this operation will give you the width that the new modified piece of amigurumi must have in relation to its first piece.
For this, we need another piece of the original pattern:
Example Piece 2:
1. Work 6 sc in magic ring.
2. Inc in every st (12).
3. to 14. 1 sc in each st (12).
15. Dec in every st (6).
Fasten off. Sew the hole with the yarn needle.
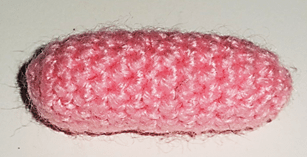
The second piece of the original pattern is 12 sc wide.
We are going to apply the formula to know what the width of our modified amigurumi should be:
(42 x 12)/24=21
So, if the original pattern has a width of 24 points in the first piece and 12 points in the second, the modified pattern, as we have seen, has 42 points in the first and according to the new calculation, 21 points in the second .
Our goal is to reach a width of 21 points, but since it is not a multiple of 6, which is the number that we used to form the sequences of increases, but of 3, we must modify the sequence of the last round of increases to obtain the result of 21.
Let’s see what the modified pattern would be:
1. Work 6 sc in magic ring.
2. Inc in every st (12).
3. “1 sc, inc”, repeat (18).
(1 + 2= 3 x 6 = 18)
4. “5 sc, inc”, repeat (21).
(5 + 2= 7 x 3 = 21)
Calculating the fixed rounds following the first formula would be:
(21 x 14)/12 = 24,5 which rounding we leave in 24
With this data, the modified pattern would continue like this:
5. to 24. 1 sc in each st (21).
And finally:
25. “5 sc, dec”, repeat (18).
26. “1 sc, dec”, repeat (12).
27. Dec in every st (6).
Fasten off. Sew the hole with the yarn needle.

In case you want to finish the snail, here is the pattern of the TENTACLES:
Small (x2):
Join directly in the piece and with light pink yarn chain 4, change to fuchsia and crochet 4 sc on the last chain. With light pink yarn crochet 4 sc on the chains, 1 slip st to the piece.
Big (x2):
With fuchsia yarn
1. Work 6 sc in magic ring.
2. “1 sc, inc”, repeat (9).
3. 1 sc in each st (9).
4. “1 sc, dec”, repeat (6).
5. Change to light pink yarn and crochet 1 sc in each st (6).
6. and 7. 1 sc in each st (6).
Fasten off.
You only have to put these two solutions into practice with your favorite patterns!
Happy crochet!
This is outstanding. I have been doing this without a formula. Basically I use Ratio and Proportion. When I want to double or make A piece larger. I
Use Ratio and proportion and it never ever FAILS.
OLD LESSON from My University Nursing professor ( for patient Drug calculations.) She said “Cathyjo
I was never good at algebra. But we have to medicate without error. I assure you it will never fail you” you will alway know the correct dosage if what ever medication and in any formulation you need to administer it.
It never failed me. I’m Ready all the nurses I was always called upon to help when the pharmacist was to busy. I was that gal. call CJ.!
At some point. Abs still now. I can calculate in my head. No one. No paper no calculator.
Later on I learned algebra. I could calculate quickly. So I would use ratio and. proportion, To get the correct dose , I would verify validate my answer with Alger ra to verify my answer.
This was an excellent article. I’m so glad I found d it. I read ever article on this page abs what a. Excellent review. Phenomenal explanation of old tried tested a d true adages. I completely understand why the chain stitch counts. I really do. Whether you include in in the total number or not it counts. Because it has a function. Thank you fir clarity.
I always count the chain stitch.
If you could do one in the rounds a d tbe joining. Whether it’s in the chain Igor the first crochet. St. I always get in trouble here always have one st to
Many or one. less. I have done amigurumi for so long. I really have to work at if if I decide to make a hat in the round d. Baby booties. Anything that requires a join.
Now I have a question
How do you calculate the shaping row.
As in when you shape a fox or a bunny’s head etc.
There s usually a series of complex instructions. This is where it really goes left for me. So far I have not been successful.
Fir ex.
I Inst.
Sc in the first 10, 2sc in the next, sc next 5 , sc 1 and 2 in the next. Repeat x2.
😳. I just couldn’t wrap my head around s the modification for my now
Huge bunny. I frogged it.
So if you see, this can you help.
What do you do when the pattern is not straight forward up increase/decrease down. But has the shaping. row.
Hello m
Sure those nu
Bet will
Have to change to account t fir tbe new size. And fir tbe sale to actually be created. After all it’s a function and a percent of what you are now working with.
Thanks a million.
Best regards,
Cathyjo.
Thank you very much for your comment, Gobabe.
The truth is that there are some parts that I don’t fully understand. I’m afraid my knowledge of English is limited 😉
As for your question of How calculate the shaping row, my knowledge is also limited. Personally, I don’t think there is a universal formula, or at least I don’t know about it. What I do is modify each pattern individually, designing those parts that shape the amigurumi.
Kind regards