
We are going to deal with one of the issues that most concern the amigurumis crocheters, especially if they are starting:
How to sew the different parts of our amigurumi?
This question is important, because although you crochet each part very well, if when assembling the joint is not correct, it will not only affect the appearance of your creation, but you run the risk of detaching the pieces, with the problems that this can cause.
In order to sew the parts of an amigurumi you will need:
- The different pieces previously crocheted in which, to facilitate the join, you will have left a thread at the end of the fabric. The length of this thread will depend on the size of the piece you have to sew. More it is better than less and it will be the experience that will allow you to adjust the lenght.
- Wool or yarn of the right color in relation to the part you have to sew. You will need it in case you have not left a thread or that it isn’t enough to complete the joint of the piece.
- Yarn Needle, that is, a needle suitable for sewing the wool or yarn that we use to crochet our amigurumis. You can find them in different materials, sizes and thicknesses. I usually use metal about 8 cm long.
- Tape measure to place the pieces in the right place, especially if the exact measurements are specified in the pattern.
- Pins to secure each piece in place and prevent them from moving while you sew them.
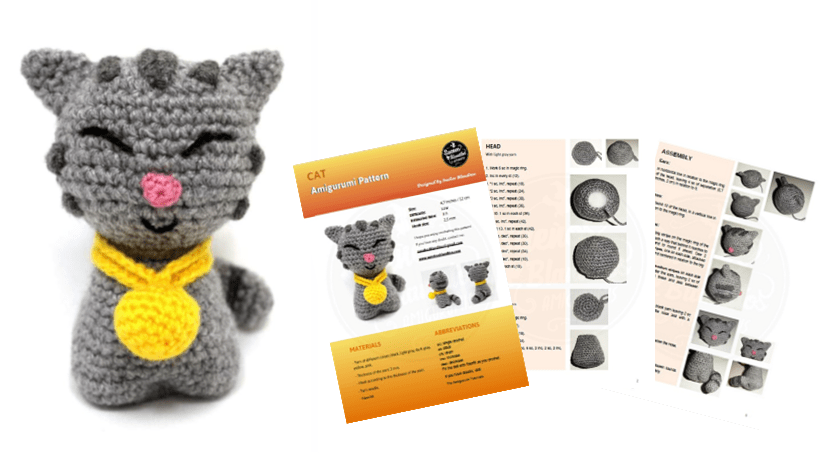
- The diversity of the pieces and their placement force us to join them in different ways. Let’s see some examples applied to our amigurumi kitten:
Download Cat free amigurumi pattern >>
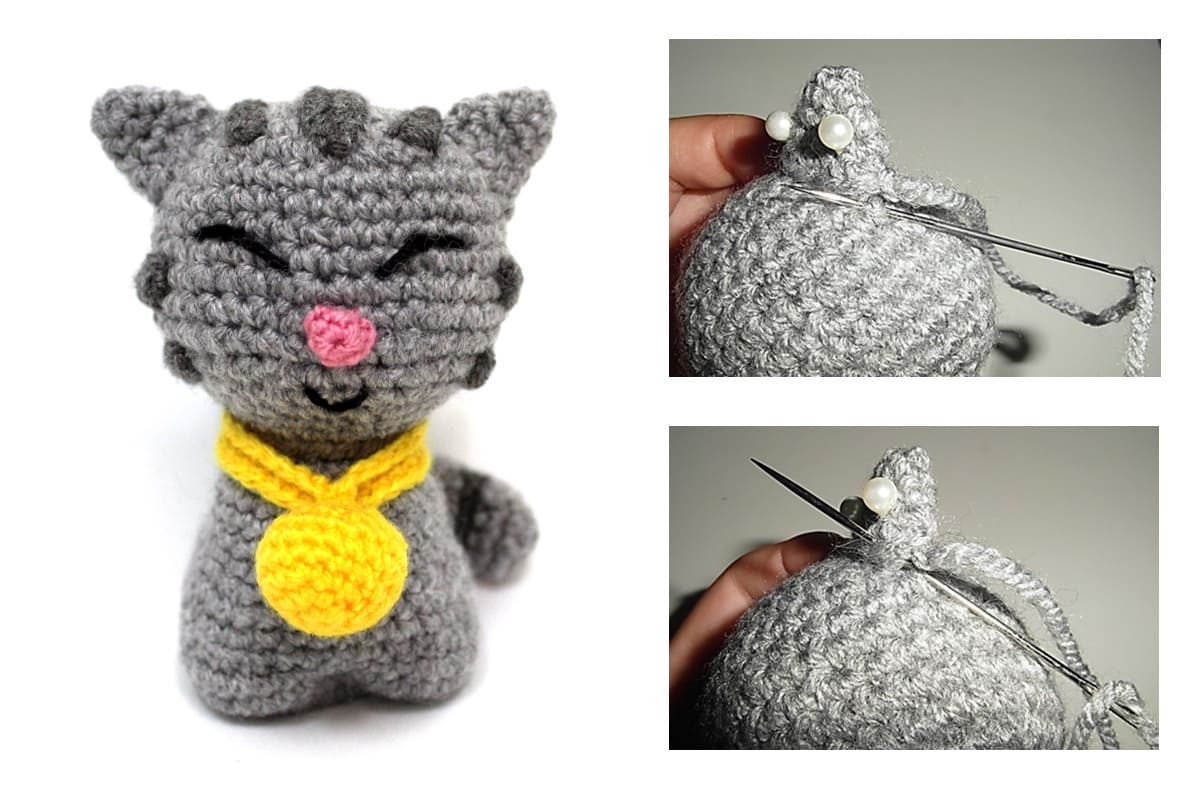
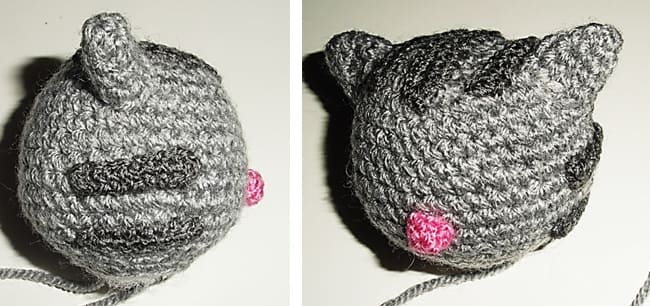
Joining an open piece without filling to a closed piece:
It is about joining the ears to the head of our kitten.
On this occasion, the open piece, as it does not have fiberfill, is flat, which divides it into two parts, front and back.
Once the piece is placed in the correct place, for what you can use a measuring tape (photo 1) fix it with one or several pins (photo 2).
On one hand, sew it by taking a piece of fabric from the head and on the other, the full stitch of the ear. (photos 3 to 6)
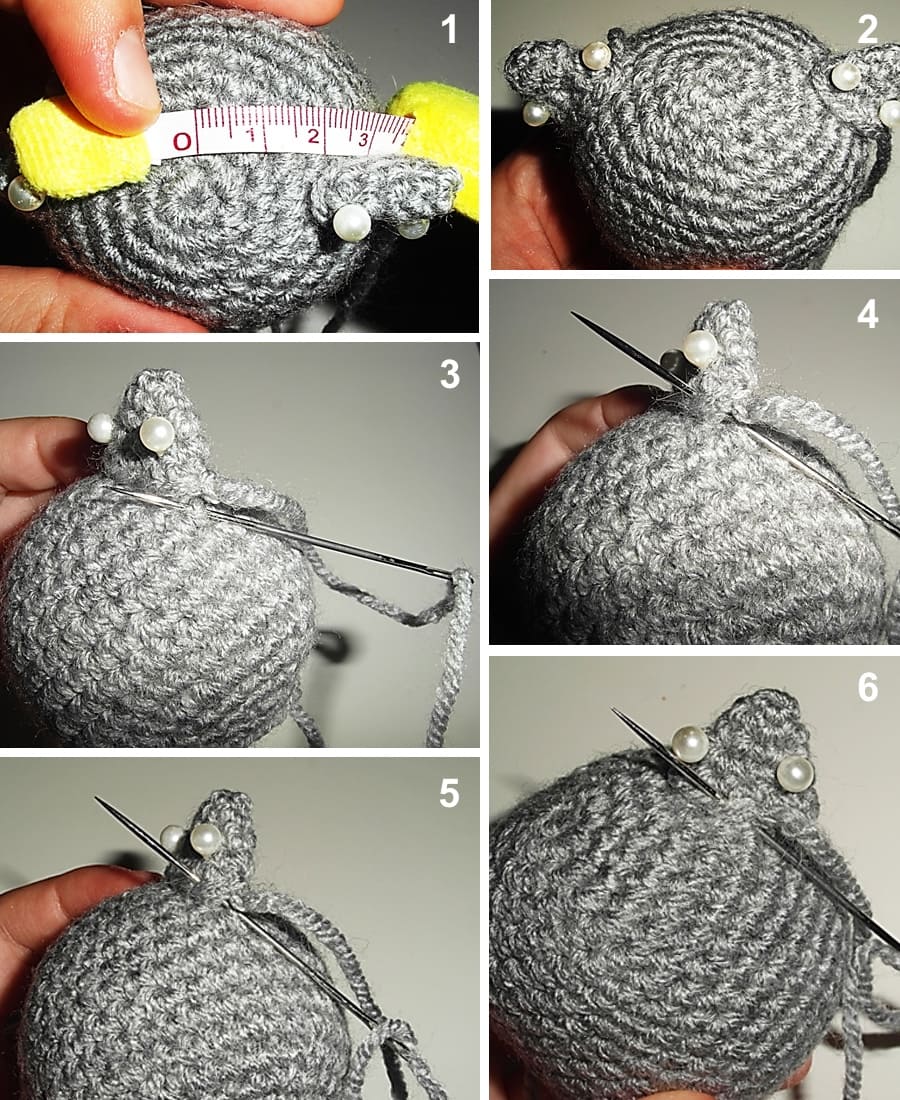
By this way when you have a part sewed, move the ear to the other side and sew the other part as close as possible.

Finally, make a small knot and introduce the remaining thread to lose it inside the fabric and cut the rest. You should do this to finish the join of all the pieces of your amigurumis.
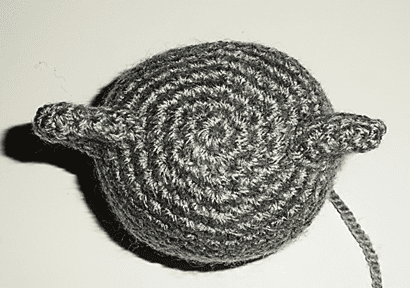
You already have both ears of your kitten.
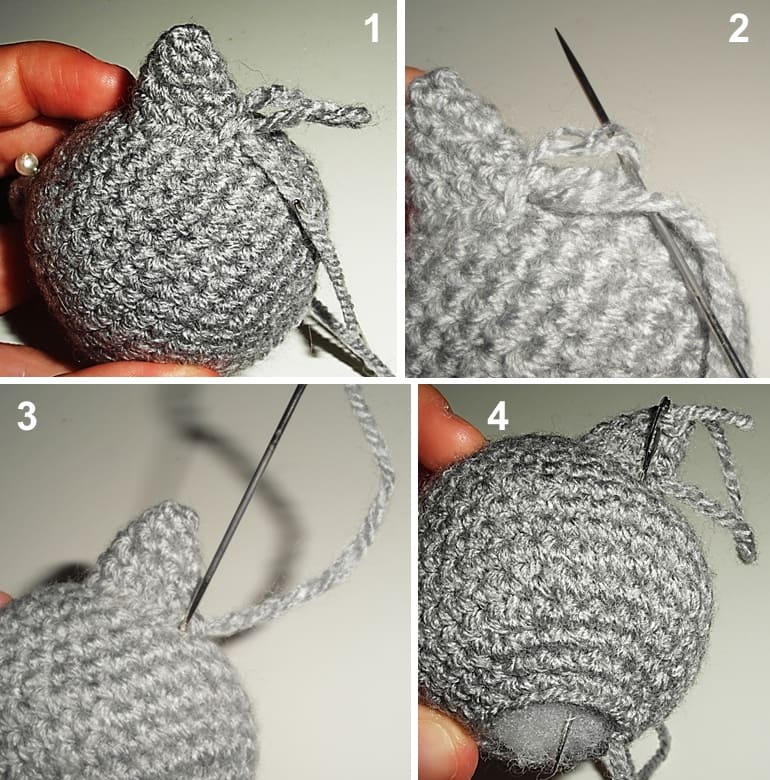
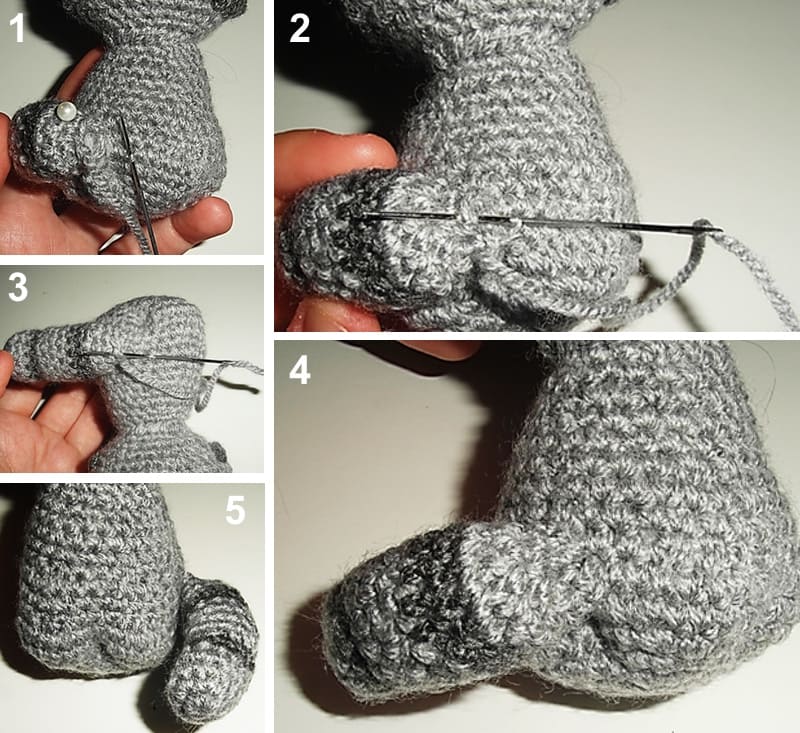
Joining an open piece to a closed one:
We have done it with nose and tail.
To begin, hold the piece with pins in the desired place.
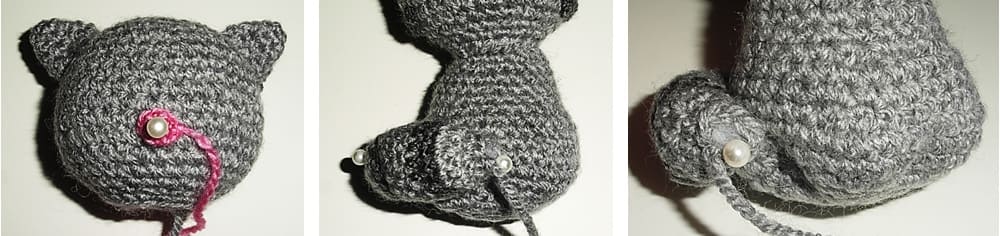
Then, sew it taking a bit of the fabric of the closed piece, that is, the head and body of the kitten, to join it to each stitch of the open piece, point by point.

In the case of the tail, having a twisted shape, you must pay special attention to take the fabric of the closed piece so that the open piece keeps its shape.
Joining two flat pieces:
We are going to sew two flat pieces, one on top of the other. It is about joining the stripes of the kitten to the head.
You will do it in the same way: Take from the small piece the whole stitch and from the big piece a little fabric.
And so you have the kitten’s stripes:
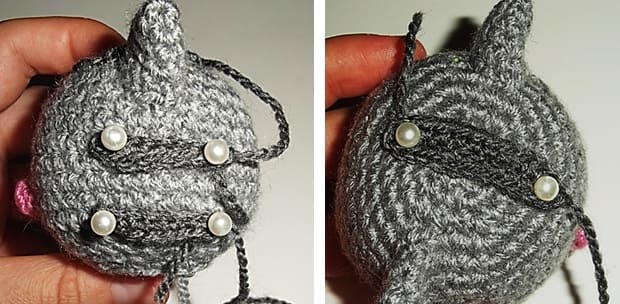
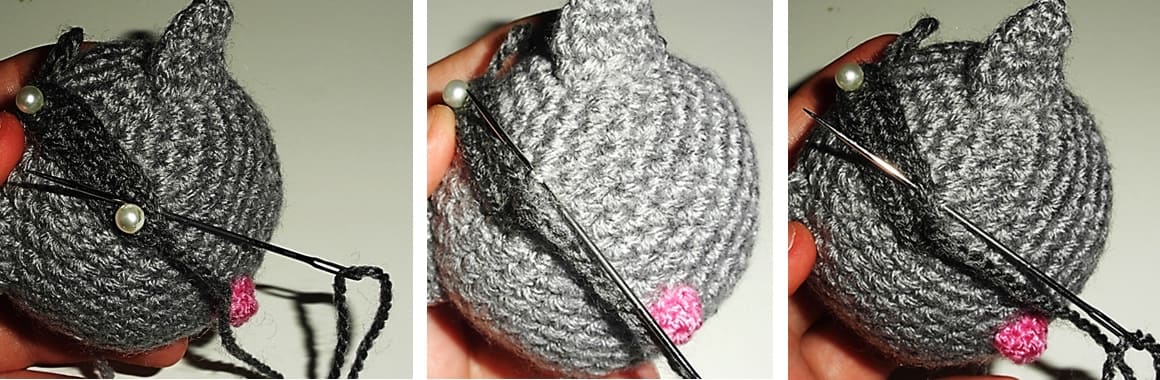
Joining of two open pieces:
It will be the case of the join of the head with the body.
It is something very simple, because the number of stitches of both pieces usually matches.
Proceed then to fix the head in its place and once well centered, sew the stitches one by one, that is, the point of the head with its corresponding point of the neck.
Before finishing, when you have left 3 or 4 stitches to finish the join, a little trick to achieve more firmness in the head of any of your amigurumis is to introduce a little more filling in that hole.
You will be surprised to see that you can still put plenty of stuffing in this area of the neck because when handling it while we sew, the fiberfill has moved up (head) or down (body), leaving the area of the neck weakened.
If the head of your amigurumi does not hold up anyway, try this.
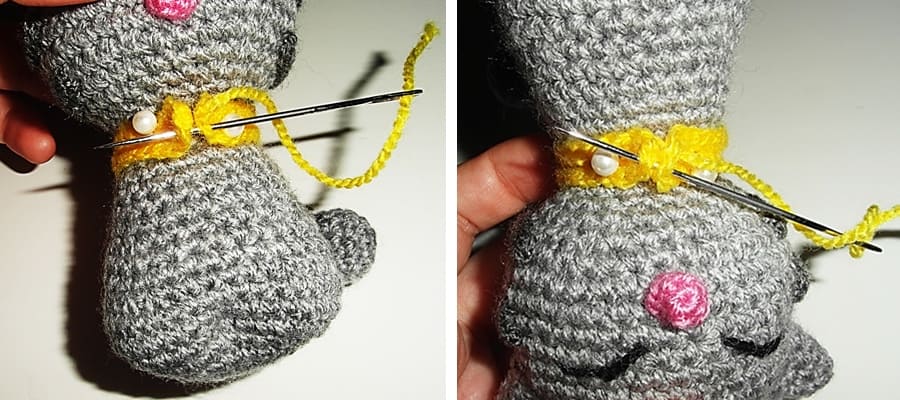
Joining the ends of the same piece:
It involves sewing the collar over the kitten’s neck joining the ends.
In this case, we will sew the jingle bell on this joint so more than its appearance, what interests us is that it has a V shape.
To do this, sew zig-zag taking the stitch of one of the sides and going to the next stitch on the other side to complete the join.
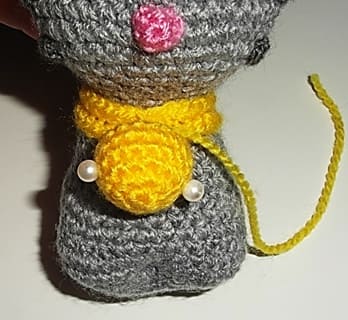
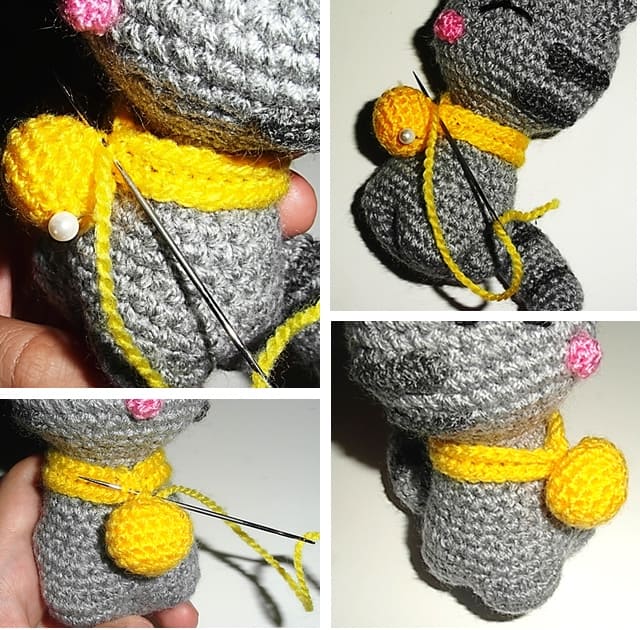
Joining two closed pieces:
In our example, we are going to sew the jingle bell on the collar.
To do this, after holding it in place (photo 42) take some fabric from each part, moving around the jingle bell and trying to do it in a small radius so that it looks like it is hanging.
This is all!
Let’s practice this tutorial crocheting this cute kitten.
Download Cat free amigurumi pattern >>
Happy crochet!

Recibir tus concejos me hacen aprender cada día un poquito más de estos queridos amigurumis que cambiaron mi vida. Son mis compañeros de la tarde y la felicidad de mis nietos e hijos. No puedo describirte la alegría de mis hijo cuando le dí para su cumple de 30 años la moto “re feliz “como un chico.
Ahora de a poco voy a empezar a hacer los regalos navideños cada uno se va eligiendo lo que quiere y yo feliz.
Este gatito me vine genial para ser parte de uno de ellos.
Tengo guardado tus recomendaciones y cada vez que cambio de color o ahora con lo que mandaste de como coserlo, los vuelvo a leer y listo.
Te mando un abrazoteee y gracias por estar conmigo en mis tardes de tejedora
¡Me hace mucha ilusión tu comentario! Significa mucho para mí que mis amigurumis os hagan felices a vosotros y a vuestros seres queridos. Muchas gracias!