Hello, how about going back to school? …
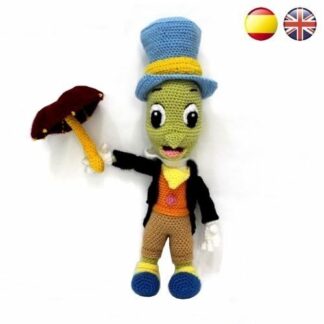
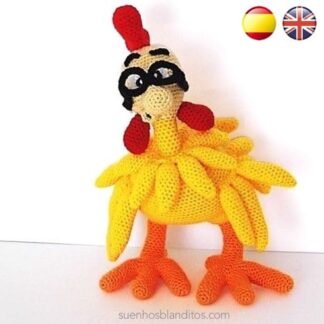
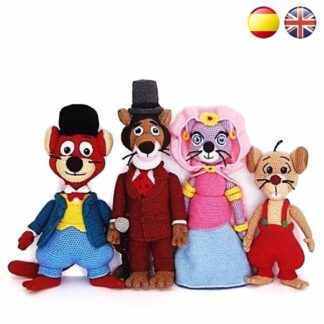
First I want to apologize for being so long without writing, I’m involved with an amigurumi animal project and the truth is that I do not have much time to dedicate to the blog.
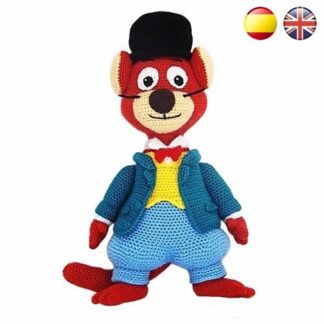
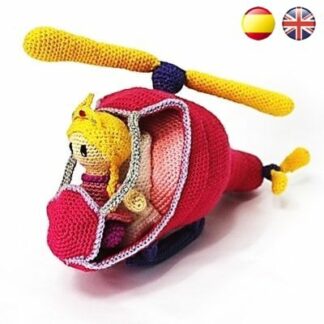
Look what cool they are:
And, as if that were not enough, I’m also preparing a collection of Halloween patterns
Terrifying!

Well, I can not get to everything …
I would like to create more entries for the blog, patterns, tutorials, … but time is what it is, and does not forgive.
But hey, it’s enough to complain and let’s go to the point.
Usual Mistakes When crocheting amigurumis
It is very common, especially when you’re starting out, make mistakes when crocheting your amigurumis.
These mistakes can make that your amigurumi doesn´t have the finish you expected or, in the worst case, you cannot finish it at all.
In order to make your amigurumis look as beautiful as possible, do not make these 3 mistakes:
1.- Choose bad yarn and hook:
What kind of yarn should I use?
The materials that form the yarn can be cotton, acrylic fiber or both materials. You can see this easily on the labels of the products.
The difference is that with cotton You will get a softer and fluffy result, ideal for children and babies.
However, acrylic yarn It is usually recommended for crocheting amigurumis since it is a material that opens less, easy to weave and the amigurumis can be washed without problems.
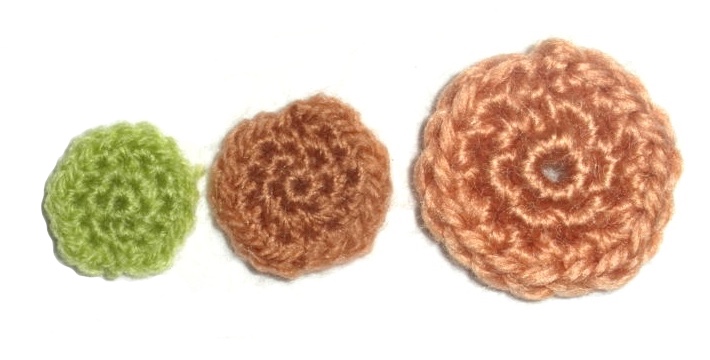
What thickness of yarn should I use?
The thicknesses of yarn to crochet amigurumis tend to vary between 3 and 5 mm.
Obviously, if we use a thicker yarn we will get a bigger amigurumi and if we use a thin one they will be smaller.
Normally, the thickness of yarn that we should use is indicated in the pattern, so I advise you to follow this recommendation.
Otherwise we risk that by varying the size of the pieces, the final result is not appropriate, we are not be able to fit the pieces or their consistency is incorrect.
Remember that it is also very important to choose the correct hook for that thickness of yarn.
What size of hook should I use?
Normally, the yarn labels indicate the recommended hook size. But many labels are not reliable, so I recommend you use a hook a little smaller than the thickness of the yarn.
If you use a hook that is too small, the weave will be very tight, with the stitches stuck together. If you use a hook too thick the fabric will be very loose, and you will see gaps between the stitches.
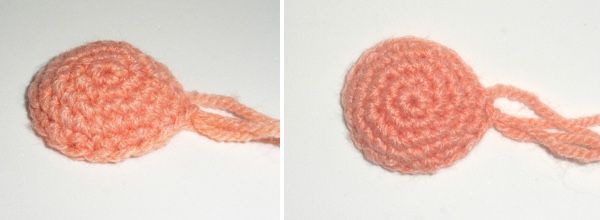
Here’s an example:
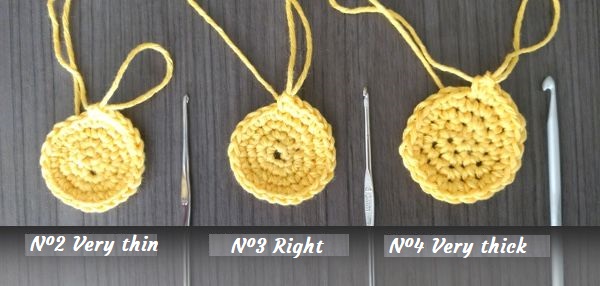
The key is to find the intermediate point, that will be the size of hook you should use.
As you can see, if you crochet with a thicker hook, the separation between the stitches makes the amigurumi also be bigger.
However, if you use a hook too thin, the fabric will end up curving due to the tension of the stitches.
So you know, choose well your hook, it is worth trying to lose a few minutes before you have to repent later.
In this post I tell you more things about Materials and accessories for crocheting amigurumis.
2.- Different tension in the stitches:
When we are starting and we still have not controled the hook and the stitches, it is very usual that the tension we apply when crocheting is not correct and the stitches are loose or too tight. In either case, it is best to undo the wrong done and start over.
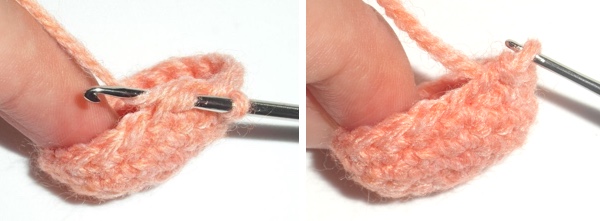
If we tight the stitches too much, in the first place, it will be almost impossible to crochet on them. The fabric will be tight and we will have many difficulties to insert the hook and continue.
This was my case when I started, I tightened it too much and that prevented me from continuing.
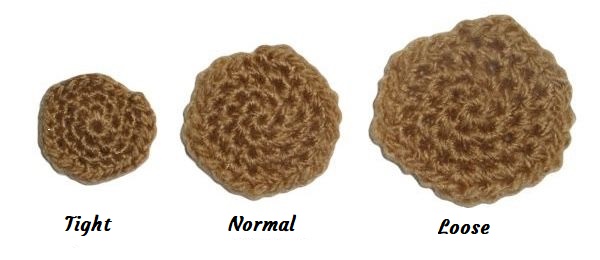
On the other hand, If we leave the stitches loose, we will be unable to shape them, there will be holes and this will give the fabric a neglected and uneven appearance.
With practice we will apply the appropriate tension that will make us feel comfortable with the hook and keep regularity in our fabric.
3.- Do not conceal the transitions between stitches and the color changes:
As you can see, we should not only consider our amigurumi have the right shape, but it is also very important that its appearance is neat and tidy.
We must do everything possible so that the stitches are equal, that the joints, increases, decreases and changes of color are as even as possible.
Transitions between stitches:
In order to ensure that the transitions in our weave are concealed and do not affect our work we can use a series of tips:
-
- The joints that we make between several stitches or when finishing a row, we must crochet them with a slip stitch, concealing in this way any unevenness or irregularity.
-
- As for the increases, if we do not follow a pattern, we must try to do them sequentially, distributing them in a regular way along the weave.
If we follow the pattern, we just have to be careful when crochet them, paying attention to take the stitch on which we will increase.
- By applying the technique of invisible decreases these are no longer a problem. Taking the front loop of the stitch, we will join the two stitches invisibly making a perfect decrease.
On the other hand, we can find some difficulty in the final decreasing rows, before finishing the piece.
Sometimes it can be difficult to crochet this part and the space between the stitches is too big.
To avoid this, the simplest thing is to try to stretch the stitches, tightening the fabric a little more.
In this post you have more information about Increases and decreases.
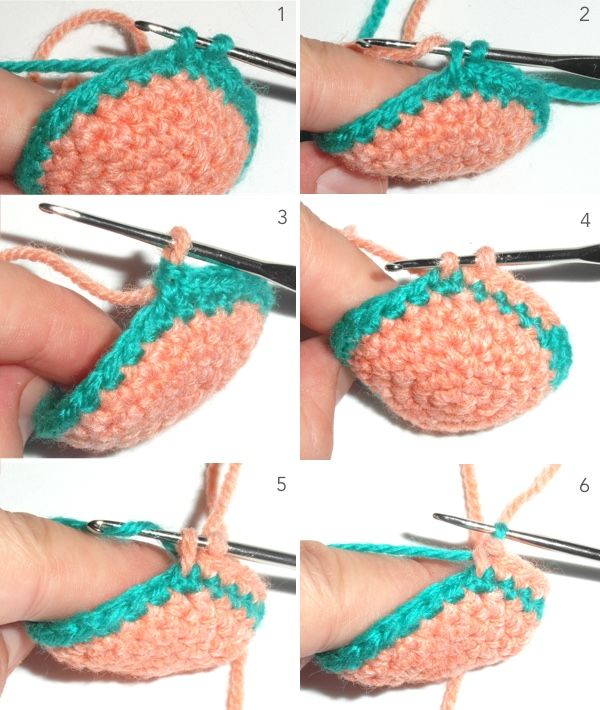
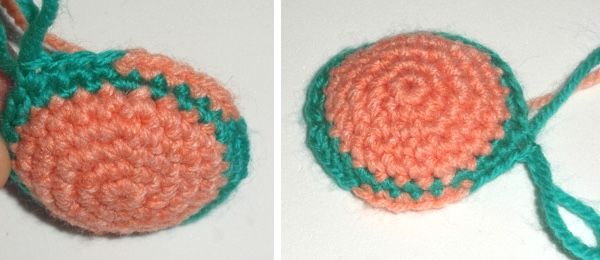
Color changes:
The change of color is something that usually worries us a lot.
When crocheting most of the spiral amigurumis, the more than evident unevenness that happens when changing color causes a bad effect in our work.
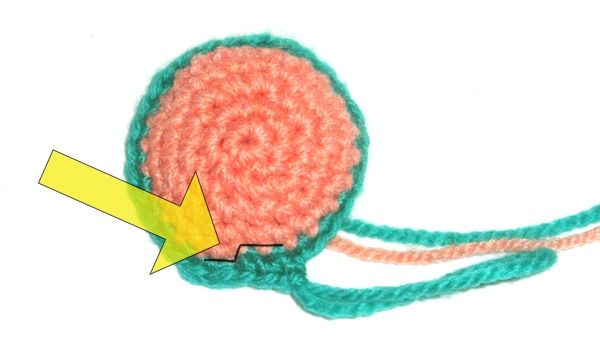
There are several ways to conceal this change. The one I use is:
- If the change of color takes the whole round, I do it by crocheting in rounds, this is, with a slip stitch on the last stitch, a chain over it and a single crochet on that same stitch.
By this way we conceal the join.
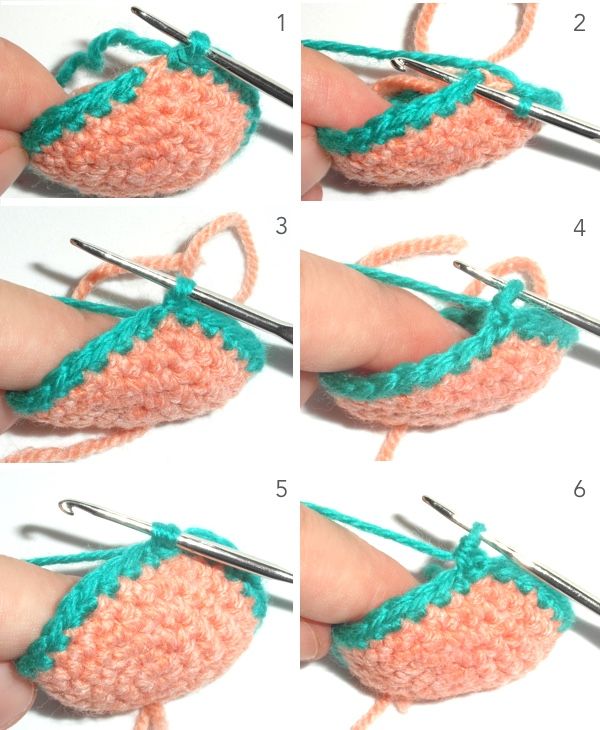
- If the change takes only a few stitches or part of the row, I introduce the new color in the previous stitch to which I must crochet, in the middle of a single crochet, this is, I start a single crochet and when I have the two threads in the hook, I insert the new color and complete with it the single crochet.
That’s all! I hope you liked these little tips and use them in your amigurumis.
And you? What mistakes have you made when crocheting amigurumis?
Tell me in the comments to help other weavers.


 amigurumi pattern")


Te están quedando super chulos con muchas ganas de hacer esos muñecos terroríficos…. Creo q alguno haré para Reyes a mi marido Le encantarán que es muy friki así q esperando m quedo.
Como siempre estas haciendo un trabajo excelente.
Muchas gracias Raquel! Será un regalo de Reyes original!
Hola muy buenos consejos a mi me cuesta unir las piezas y que quede prolijo o firme ejemplo como hago para vocer la cabeza de u na muñeca y que no se voltee????
Hola Alejandra:
En este otro tutorial del blog puedes encontrar consejos para sostener la cabeza de tu amigurumi: https://www.suenhosblanditos.com/consejos-y-tips/2-formas-de-sostener-la-cabeza-de-tu-amigurumi/
Espero que te sirva de ayuda.
I am doing the neckline of Peter Pan. But the end of green part and the Bennington of the fresh part became problem. I did not understood how to do it
Hi Ana,
I already explained it by email. I hope I’ve helped. Send me an email again if you have more questions. Best regards.
Se me da fatal el cambio de color. Me cuesta muchisimo hacerlo, y que no se note ya ni te cuento.
No te desesperes Mercedes. A mí también se me escapa algún cambio “regular” . Es cuestión de práctica. Con paciencia ya verás como sale bien.
Muy agradecida por los consejos. Realmente, son los errores que cometemos y que no permiten que nuestros trabajos no sean presentables.
Las recomendaciones que nos ha brindado nos ayuda a resolver situaciones que nosotras las principiantes no dominamos en está técnica. El dedicarnos a tejer al crochet, las personas que han cesado en el trabajo, es un aliciente porque nos induce a crear, a utilizar nuestro tiempo, a sentirnos útiles y dar alegría a quien lo recibe.
Es bueno reconocer su aporte en sus consejos.
Gracias Esther! Pienso lo mismo, tejer es una gran ayuda para superarnos y olvidar los problemas. Además, compartir nuestra pasión con otr@s compañer@s tejedores es muy gratificante.
Un saludo
Hola, gracias por tus enseñanzas, realmente me sirvieron mucho, estoy empezando a hacer frutas y verduras para poner el el refrigerador, es primera vez que voy hacer amigurumi, ojala me resulte.
Tus tejidos son bellos pero me da la impresion que son dificiles de tejer.
De donde eres? Yo soy de La Serena, Chile.
Cariños.
Hola Claudia! Soy de Galicia, España. Un placer!
Estoy segura de que los amigurumis te saldrán fenomenal, ya verás.
Muchas gracias por tus palabras!
Si son difíciles?, bueno, intento que no lo sean. Surgen dudas, pero siempre podéis contar conmigo para ayudaros a resolverlas.
Aquí en el blog y en la web tienes patrones gratuitos a tu disposición para que veas como son mis diseños y pruebes a ver si te gustan.
Besos
Preciosos te llevará otro libro de ellos y por supuesto será una nueva adquisición para mi, estoy haciendo a Willy Fog y Rígido y están preciosos. Gracias por esos trabajos tan bonitos
Gracias Mariluz!
Me alegro de que te gusten. Todavía queda mucho trabajo por delante para un libro.
Saludos
Antes que todo te agradezco los truquitos es importante las terminaciones y la estética de lo que estamos fabricando así que muchas gracias
Es cierto Hertha, esos pequeños detalles marcan la diferencia.
Gracias por comentar!
Saludos
Ciao , ti ringrazio per i tuoi consigli , però vorrei tanto sapere come posso fare perchè la testa dei personaggi amigurumi non risultino ciondolanti ma ben ferme sul collo .Grazie per l’aiuto
Gracias! Super útil! Me encantaría hacer para vender. Saludos desde Argentina
Pues si te animas, te deseo mucha suerte con esas ventas!
Saludos desde España
Hola me encantan tus patrones y tus consejos de la página creo que ha sido un gran acierto encontrar tu página, comenze hace muy poco con los amigurumis me han encantado y han sido una gran terapia también, me encanta hacerlos para mis hijas les encantan muchas gracias por tus diseños he adquirido los libros y patrones y ansiosa de que salgan nuevos pronto mis saludos desde chile
Gracias Claudia, muy amable.
Me alegra que te gusten pero sobre todo que te hayan servido de ayuda.
Un besito para tus niñas y un abrazo enorme desde España para ti.
Hola… Muy bonito tu trabajo, muchas gracias!
Hay un error muy común cuando se trabaja con un color diferente de hilo pero no en toda la vuelta sino solo una parte, como por ejemplo un animal con la barriguita de otro color, en este caso, a mi me pasa que el tejido queda inclinado, como si se fuera torciendo el tejido; he encontrado muy poca información para corregir, pero supuestamente la que funciona es coger una sola cadena al tejer (la de adelante) y no las dos como normalmente se suele tejer. De pronto tienes algo al respecto? Muchas gracias. Saludos!
Hola Catalina, muchas gracias!
Es muy interesante tu comentario.
Si te he entendido correctamente, creo que te refieres a que al tejer en espiral y cambiar de color, se nota un desplazamiento hacia la izquierda a medida que avanzamos en las sucesivas vueltas.
Esto es así, como te digo, al tejer en espiral, porque los puntos de la vuelta no estarán colocados exactamente sobre los de la vuelta anterior, sino que hay un pequeño desplazamiento.
Creo que hay tantas alternativas para tratar de corregirlo como tejedoras buscando una solución.
La que tú me comentas, me suena haberla oído, pero la verdad, no la conozco como para utilizarla o hablar sobre ella.
Lo que yo hago para mantener el dibujo es o bien tejer toda la pieza de manera tradicional y no en espiral, para minimizar el desplazamiento, o bien tejer en espiral y adaptar el cambio de color al desplazamiento, es decir, cambiar el punto en el que cambiamos el color para procurar mantener el dibujo recto.
En mi opinión, esto es un aprendizaje continuo en el que por supuesto me incluyo, así que todos los truquitos que nos ayuden a mejorar son bienvenidos!
Saludos.
Muchas gracias por la ayuda
De nada!
Saludos.
Gracias por vuestra ayuda, cada vez se más y quedan mejor!
De nada! Me alegro mucho!
Gracias por todos tus consejos, estoy haciéndome de material para regalar muñecos en estas fiestas por Argentina esta difícil el dinero para comprar patrones por el cambio de dinero, no importa compre varios de tus libros, nuevamente gracias y si tenes tiempo mándame los libros que tenes en castellano para ver que me falta así voy ahorrando
Gracias Elena!
Los ebooks que están disponibles son los que puedes ver a la venta en la página.
Como digo, estoy preparando nuevos proyectos, pero hay que esperar un poco todavía.
Un saludo
Gracias por el post, muy interesante. Probablemente ya lo habéis comentado, pero creo que otro de los errores que podemos cometer el hacer Amigurumi es a la hora de rellenarlos, es un error muy común que cambia todo el aspecto y forma de tu Amigurumi.
Gracias Marlen, es muy cierto. A veces no prestamos atención al relleno y tiene más importancia de lo que parece. Otro error muy común para añadir a la lista!
Saludos
Muchas gracias por los tips!
De nada Silvia!
yo solo he tejido una conejita con vestido orejas largas no me acuerdo de donde la saqué estaba en ingles me costo mucho encontrar la traducción aproximada, lo que me llamo la atención fue que al tejer como decia el tutorial se iba torciendo no me gusto como quedaba ,asi es que la empece de nuevo pero ahora cuando terminaba una corrida cerraba con un punto enano subia con una cadeneta y continuaba como decia la explicación yo encontré que me quedo perfecta, aúnque demoro mas me gusta así ,soy una persona mayor muy mayor, sola, así es que tengo mucho tiempo te escribo desde Chile,Traiguén novena región de la Araucanía
Muchas gracias Sonnia por tu comentario. Como bien dices, al tejer en espiral, el tejido se va torciendo y puede quedar feo. Lo que has hecho a la perfección es cambiar la manera de tejer y hacerlo de manera tradicional terminando las vueltas con un punto deslizado (punto enano) y una cadeneta.
Gracias por contarnos a todos tu experiencia.
Un abrazo muy fuerte desde España.
Mil graciassss! Cada vez me salen mejor. Besos
Me alegro mucho Patricia! Besos
muchas gracias los consejos son muy buenos y los tomaré muy en cuenta para que mis amigurumis cada vez me queden mejor gracias mil.
De nada. Gracias por comentar, Norma!
Besos.
Gracias por tus consejos, ten la seguridad que los voy a recordar pues me encanta crear . te estan quedando muy bonitos todos ellos.
Muchas gracias Sandy! Saludos!
Están muy bonitos y muchas gracias por los consejos saludos
Gracias Carmen!
Saludos!
Muy lindos tus consejos, sin saberlos cometí algunos y los solucione como recomiendas. Me encargaron una bailarina de ballet y tuve que recurrir a dos patrones distintos uno por ser muy enana y la otra por no tener detalles de la zapatillas. Bueno, cuando uno no sabe se amaña. Gracias por tus consejos.
Gracias por comentar Grace!
Es estupendo que hayas resuelto tan bien esos pequeños problemas que aparecen cuando tejemos.
Es muy cierto que cuando uno no sabe se amaña, pero tú sí has sabido como para buscar la solución que necesitabas y ese es un primer paso muy importante para hacer tus propias creaciones.
No te conformes con lo que dice el patrón si no te gusta el resultado y nunca temas cambiarlo por pensar que tienes pocos conocimientos, aprenderás de los aciertos pero también de los errores.
Saludos
Muchas gracias por tus consejos son muy necesarios a la hora de tejer y son muy ciertos porque a mi me pasaba con mis primeros amigurumis, luego gracias a la buena observación e insistencia comencé a tener en cuenta éstos errores que vos comentaste. Lo que más me costó fue realmente los cambios de colores, pero ya entendí, gracias y seguiré atenta a todos tus consejos!!!
Gracias a ti Cristina por comentar!
Me gusta mucho que menciones esos dos valores tan importantes y necesarios: observación e insistencia.
Saludos
Muchas gracias x sus consejos estoy comenzando a tratar de hacer amigurumis me gustaron desde q los vi y me he interesado hacerlos mis felicitaciones soy de San José Costa Rica
Gracias a ti Ana Myriam por tu comentario. Ya verás como te diviertes tejiendo amigurumis!
Un abrazo para Costa Rica desde España.
Gracias por tus consejos!!sos una genia tejiendo!!!tejo desde chica pero me anime a los amigurumis el año pasado.. tenia miedo que no me quedaran!!saludos desde Carcaraña ,provincia de Santa Fe,Argentina
Gracias Susana!
Seguro que te quedan preciosos!
Un fuerte abrazo desde España.
Muito obrigada, estou iniciando a fazer amigurumis, então suas dicas foram importantes!
Fico feliz por você ter gostado, Nilcea. Cumprimentos
Gracias por tus consejos y por compartir tantos patrones hermosos.Saludos desde Uruguay
Un placer Gracie! Gracias por comentar.
Saludos
Lo que mas me costo aprender es no tejer con tanta tension,pero es solo cosa de practica , muy utiles tus consejos y tus amigurumis estan bellisimos
Lo unico q aun no consigolograr es tejer los zapatos iniciando con una cadena y de ahi tejer alrededor de ella
Siempre me queda uno mas grande que el otro
Algun consejo que me puedas dar ?
Muchas gracias Denisse!
Como bien dices, eso también es cosa de práctica, porque si sigues el patrón no hay motivo para que quede más grande, bueno, al menos hasta cierto punto, que no somos máquinas.
Yo pienso que es normal que al tejer dos o más piezas iguales haya alguna pequeña diferencia de tamaño, sobre todo por la diferente tensión que ejercemos al tejer. A mí me pasaba mucho al principio y aún me pasa alguna vez. Cuando tejemos la primera pieza vamos más despacio, dudamos, en mi caso, al hacer el diseño voy tomando notas, así que la tensión del tejido es la normal. Al hacer la segunda, vamos más rápido, ya sabemos cómo hacerlo, por lo que al menos en mi caso, si no tengo cuidado, hace que apriete más los puntos y quede más pequeña que la primera.
Mi consejo es que tengas paciencia y sigas practicando como hasta ahora. Ya verás como esas pequeñas imperfecciones se solucionan solas.
Un abrazo.
merci beaucoup pour tous ces conseils – cordialement Annie
Merci! ?
Thank you so much your patterns are very easy to follow I could read a little Spanish so I’m make woody woodpecker it’s only in Spanish but I’m going to try to do it lol thank you so much. ??
Thank you! You are very kind. I want to translate into English all my patterns, but I need more time. If you need some help with woody woodpecker just contact me and I will help you gladly.
Regards.
Thank you for the instructions. I am rather new to this and appreciate all of your help. I’ve read through the patterns and find them to be well written, easy to understand and there is nothing included that I haven’t tried in other crochet projects.
I love the information on color changing! I will be doing this for now on! I have always disliked the ‘jog’ when changing colors, and this will fix that! Thank you so much for the wonderful information!
I’m glad you like it and that you find it useful, Randi. 🤗