| This Challenge has finished!
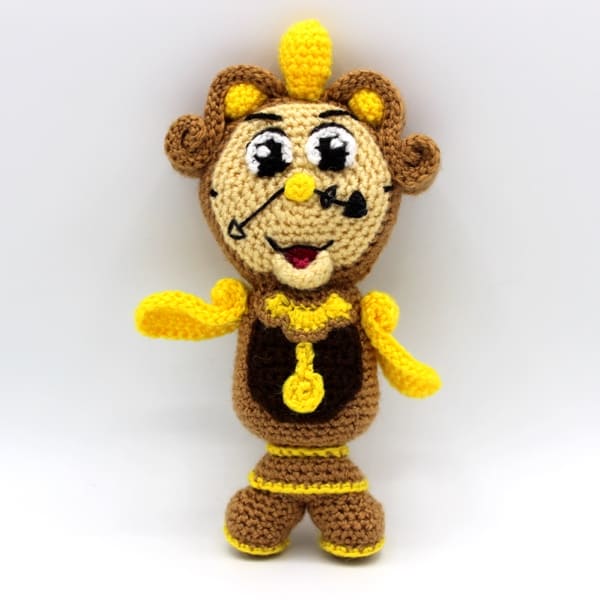
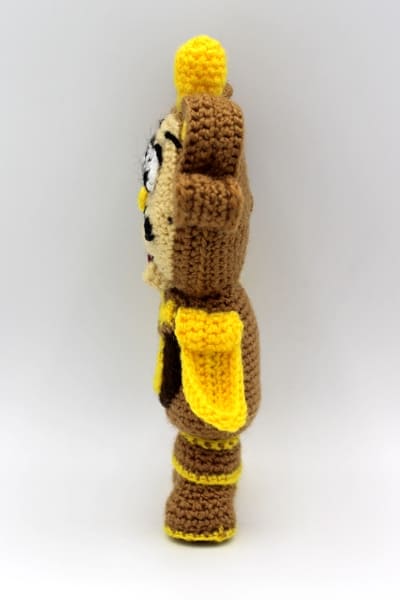
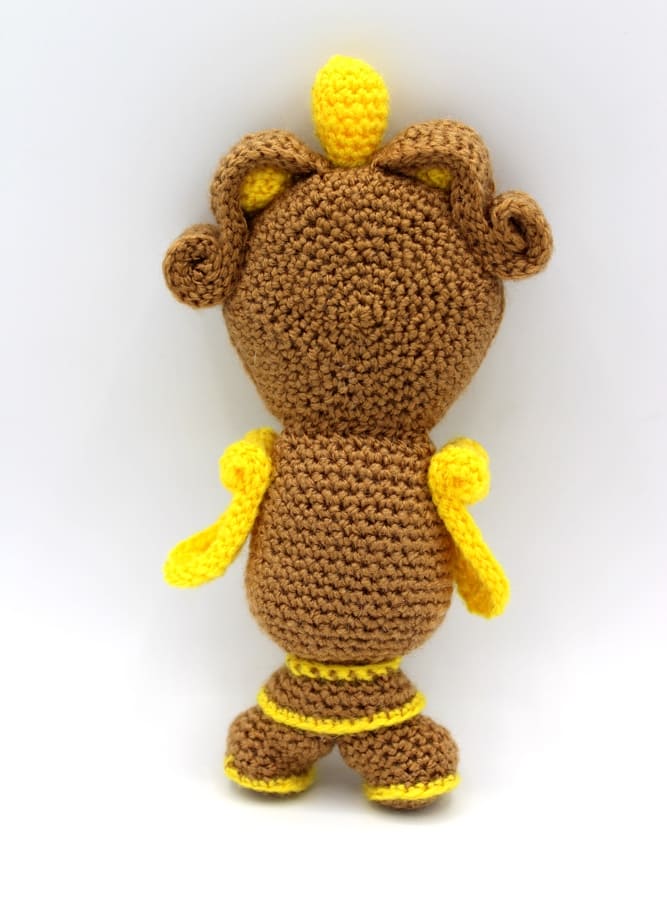
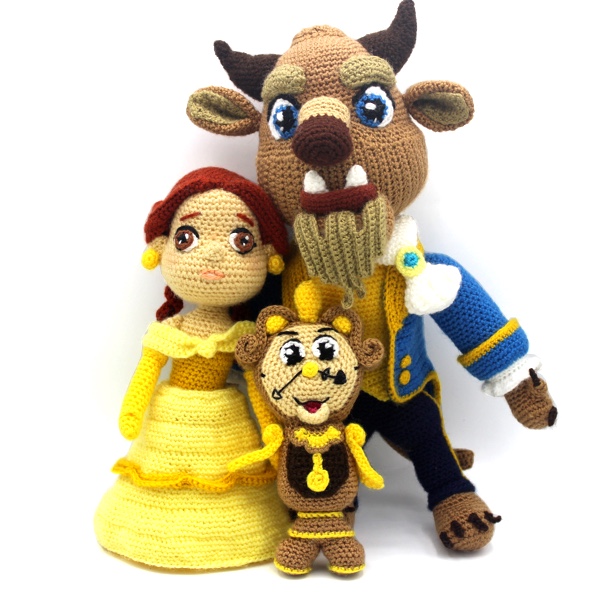
The Mysterious Amigurumi is: Cogsworth (Beauty and the Beast)
Congratulations to the winners!
Completed on April 30, 2019 |
Suenhos Blanditos is 2 years old!
And I want to celebrate with you in style by doing what we like the most: crocheting an amigurumi.
Are you ready?
The Mysterious Amigurumi Challenge Starts:
2 times a week, throughout the month of March, I will publish in this post a part of the pattern of an amigurumi…
It is an unprecedented pattern.
Without title, without photos, only instructions …
You will have to crochet it to know what it looks like …
And think how the pieces fit together to guess what the mysterious amigurumi is.
If you participate you can win great prizes:
- The first one that guesses the mysterious amigurumi will win a € 30 Coupon to buy in Sueños Blanditos.
- For the second and third winners there will be a Coupon of € 20 and € 10 respectively.
To participate you have to give your answer in the comments of this post, but beware, only the first answer you give will be accepted.
And if for example you say several answers in a comment: it is a bird, it is an airplane, it is Superman, the answer that will be worth it will be a bird. The first.
And since it would not be fair for the same person to repeat the prize, you can only participate in one of the websites, Spanish or English.
Play, crochet, use your imagination and participate in the Mysterious Amigurumi Challenge!
Remember, crochet the parts that will be published down here and when you know the Mysterious Amigurumi, write it in the comments.
AMIGURUMI PATTERN COGSWORTH (BEAUTY AND THE BEAST)
MATERIALS
- Yarn of different colors: white, black, light brown, light beige, yellow, brown, fuchsia, dark red.
- Thickness of the yarn: 3 mm.
- Black embroidery thread
- Hook according to the thickness of the yarn.
- Yarn needle.
- Fiberfill.
ABBREVIATIONS
- sc: single crochet
- st: stitch
- ch: chain
- inc: increase
- dec: decrease
Fill the doll with fiberfill as you crochet.
If you have doubts about the stitches check Basic Stitches to Crochet Amigurumis.
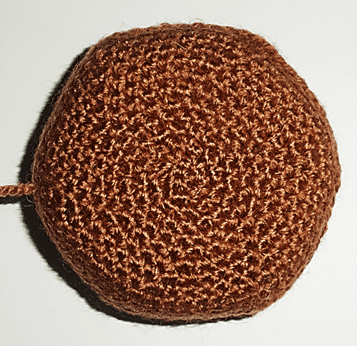
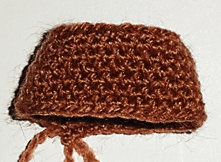
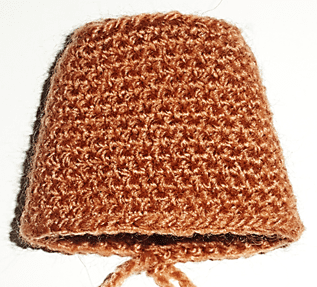
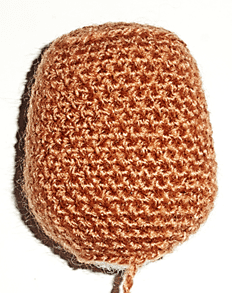
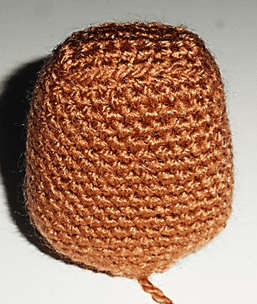
HEAD
With light beige yarn
1. Work 6 sc in magic ring.
2. Inc in every st (12).
3. “1 sc, inc”, repeat (18).
4. “2 sc, inc”, repeat (24).
5. “3 sc, inc”, repeat (30).
6. “4 sc, inc”, repeat (36).
7. “5 sc, inc”, repeat (42).
8. “6 sc, inc”, repeat (48).
9. 1 sc in each st (48).
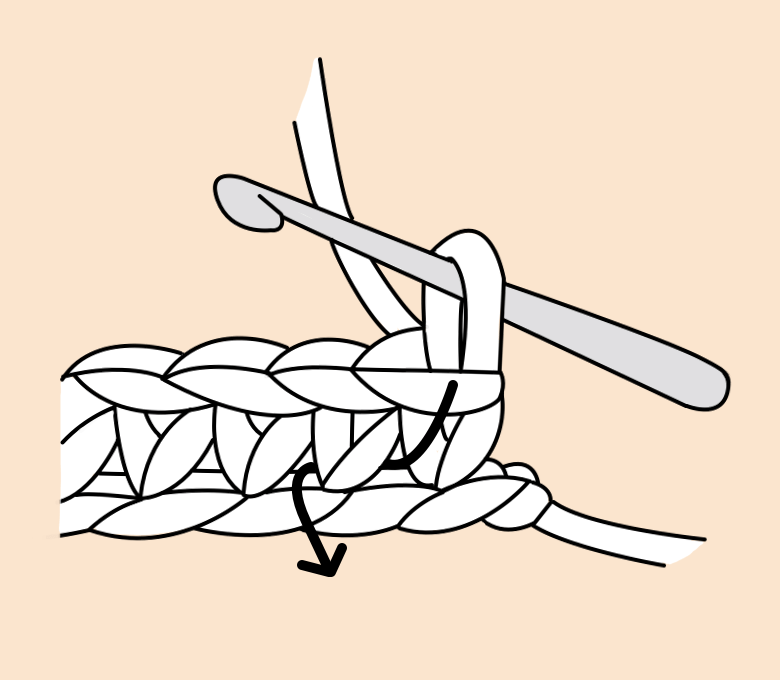
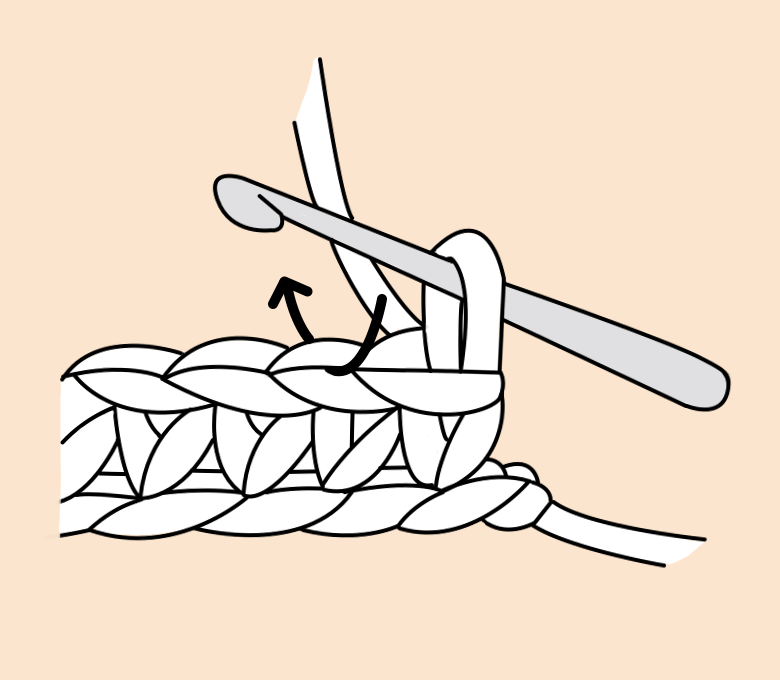
10. Change to light brown yarn and work 1 sc in the post of each st, 1 sc in each st (48).
11. “7 sc, inc”, repeat (54).
12. “8 sc, inc”, repeat (60).
13. Crochet in back loops only 1 sc in each st (60).
14. “8 sc, dec”, repeat (54).
15. 1 sc in each st (54).
16. “7 sc, dec”, repeat (48).
17. “6 sc, dec”, repeat (42).
18. “5 sc, dec”, repeat (36).
19. “4 sc, dec”, repeat (30).
20. “3 sc, dec”, repeat (24).
21. 1 sc in each st (24).
22. “2 sc, dec”, repeat (18).
23. “1 sc, dec”, repeat (12).
24. Dec in every st (6).
Fasten off. Sew the hole with the yarn needle.

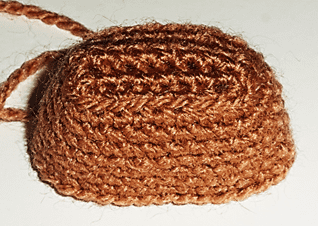
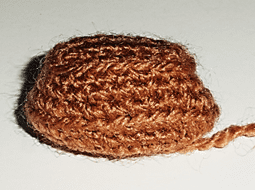
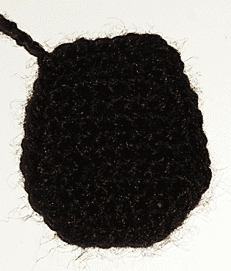
BODY
With light brown yarn
1. Ch 9, turn, sc in 2nd ch from hook, sc in remaining 7 ch (8).
2. and 3. Ch 1, turn and crochet 1 sc in each st (8).
4. Place the round marker to start crocheting in rounds with sc. Work: 2 sc, 1 inc, 6 sc, 1 inc, 2 sc, 1 inc, 6 sc, 1 inc (24).
5. Crochet in back loops only 1 sc in each st (24).
6. 3 sc, 1 inc, 7 sc, 1 inc, 3 sc, 1 inc, 7 sc, 1 inc (28).
7. and 8. 1 sc in each st (28).
9. 4 sc, 1 inc, 8 sc, 1 inc, 4 sc, 1 inc, 8 sc, 1 inc (32).
10. to 13. 1 sc in each st (32).
14. 1 sc, 1 inc, 5 sc, 1 inc, 9 sc, 1 inc, 5 sc, 1 inc, 8 sc (36).
15. to 18. 1 sc in each st (36).
19. 2 sc, 1 dec, 5 sc, 1 dec, 9 sc, 1 dec, 5 sc, 1 dec, 7 sc (32).
20. 2 sc, 1 dec, 4 sc, 1 dec, 8 sc, 1 dec, 4 sc, 1 dec, 6 sc (28).
21. 2 sc, 1 dec, 3 sc, 1 dec, 7 sc, 1 dec, 3 sc, 1 dec, 5 sc (24).
22. 2 sc, 1 dec, 2 sc, 1 dec, 6 sc, 1 dec, 2 sc, 1 dec, 4 sc (20).
23. 2 sc, 1 dec, 1 sc, 1 dec, 5 sc, 1 dec, 1 sc, 1 dec, 3 sc (16).
Fasten off.
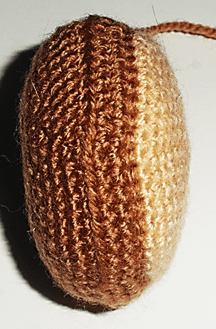
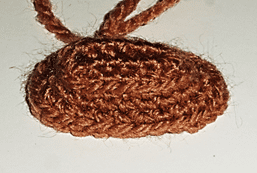
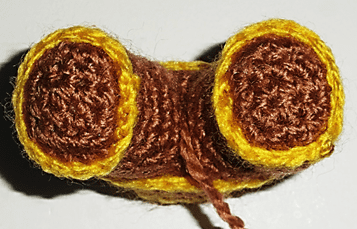
SUPPORT
With light brown yarn
1. Ch 7, turn, sc in 2nd ch from hook, sc in remaining 5 ch (6).
2. and 3. Ch 1, turn and crochet 1 sc in each st (6).
4. Place the round marker to start crocheting in rounds with sc. Crochet: 2 sc + 6 sc + 2 sc + 6 sc = 16 sc.
5. Crochet in back loops only 1 sc in each st (16). You will return to this round to complete the support.
6. 1 sc, 2 inc, 6 sc, 2 inc, 5 sc (20).
7. 1 sc, 4 inc, 6 sc, 4 inc, 5 sc (28).
8. Crochet in back loops only 1 sc in each st (28). You will return to this round to complete the support.
9. 1 sc, 4 dec, 6 sc, 4 dec, 5 sc (20).
10. 1 sc, 2 dec, 6 sc, 2 dec, 5 sc (16).
11. Dec in every st (8).
Fasten off. Sew the hole with the yarn needle.
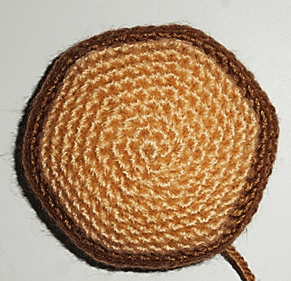
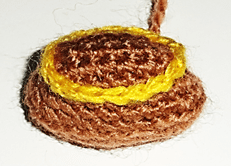
Complete the support:
With yellow yarn
Return to round 5 of the support and holding it with the bottom pointing up, crochet in the free loops 1 sc in each st (16).
Fasten off.
Return to round 8 of the support and holding it with the bottom pointing up, crochet in the free loops 1 sc in each st (28).
Fasten off.
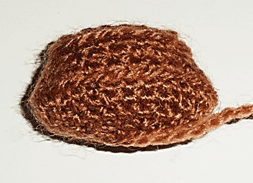
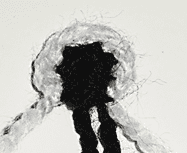
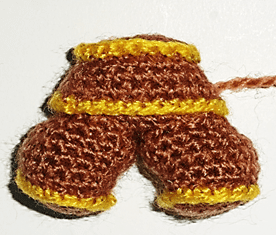
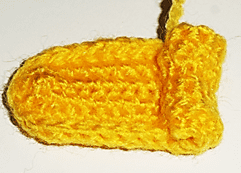
LEGS (x2)
With light brown yarn
1. Ch 5, turn, sc in 2nd ch from hook, sc in remaining 3 ch (4).
2. to 5. Ch 1, turn and crochet 1 sc in each st (4).
6. Place the round marker to start crocheting in rounds with sc. Work: 4 sc + 4 sc + 4 sc + 4 sc = 16 sc.
7. Crochet in back loops only 1 sc in each st (16). You will return to this round to complete the legs.
8. and 9. 1 sc in each st (16).
10. 2 sc, 4 inc, 4 sc, 2 dec, 2 sc (18).
11. 13 sc, 2 dec, 1 sc (16).
12. 12 sc, 2 dec (14).
Fasten off.
Complete the legs:
With yellow yarn
Return to round 7 of the legs and holding them with the bottom pointing up, crochet in the free loops 1 sc in each st (16).
Fasten off.
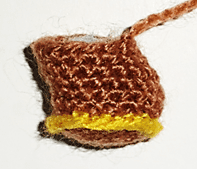
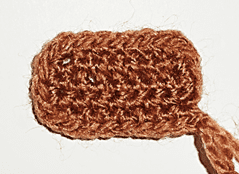
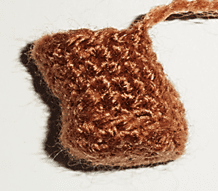
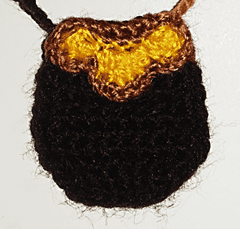
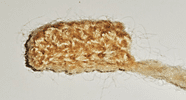
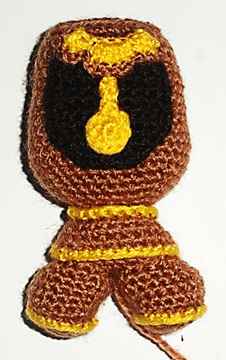
CENTRAL PART OF THE BODY
With brown yarn
1. Ch 7, turn, sc in 2nd ch from hook, sc in remaining 5 ch (6).
2. and 3. Ch 2, turn, crochet 1 sc in each st until you reach the last st, inc 1 (8), (10).
4. Ch 1, turn and crochet 1 sc in each st (10).
5. Don’t ch 1, turn, crochet 1 sc in each st until you reach the last 2 st, dec 1 (8).
6. to 8. Ch 1, turn and crochet 1 sc in each st (8).
9. Don’t ch 1, turn, crochet 1 sc in each st until you reach the last 2 st, dec 1 (6).
10. Ch 1, turn and crochet 1 sc in each st (6).
11. Place the round marker to start crocheting in rounds with sc. Work: 9 sc + 6 sc + 9 sc + 6 sc = 30 sc.
Fasten off.
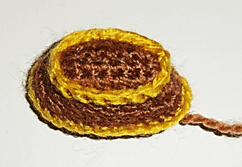
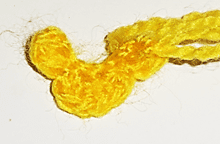
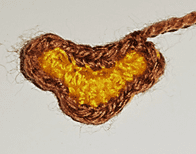
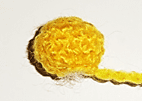
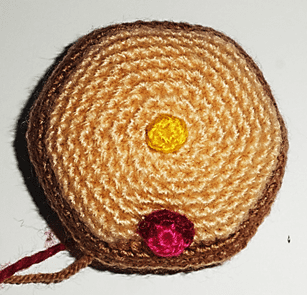
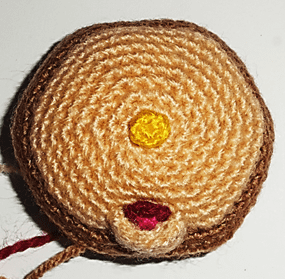
Upper ornament:
With yellow yarn
1. Ch 8.
2. Turn and crochet 3 double crochets in the first chain, 1 slip st in the next, 3 double crochets in each one of the following 2 chains, 1 slip st in the next, 3 double crochets in the next chain, 1 slip st in the last chain (15)
3. Change to light brown yarn and continue crocheting without turning: 7 sc in the beginning chains, 3 sc in the first 3 double crochets, 2 slip st, 4 sc, 2 slip st, 3 sc, 1 final slip st completing the round (22).
Fasten off.
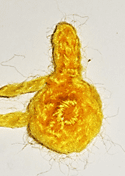
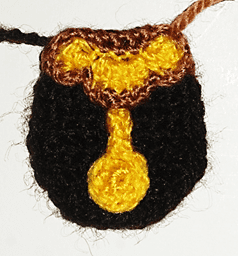
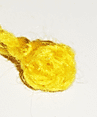
Pendulum:
With yellow yarn
1. Work 6 sc in magic ring.
2. 1 sc in each st (6).
3. 1 slip st, ch 5, 4 slip stitches on them, 1 slip st to the magic ring.
Fasten off.
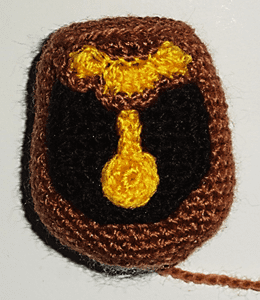
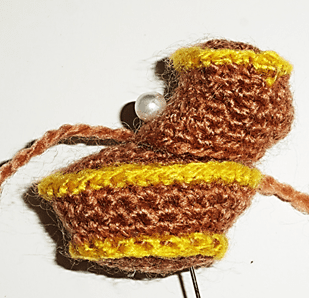
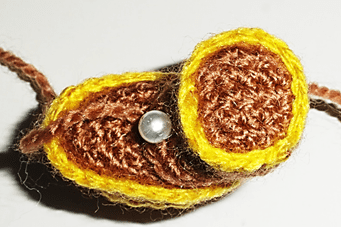
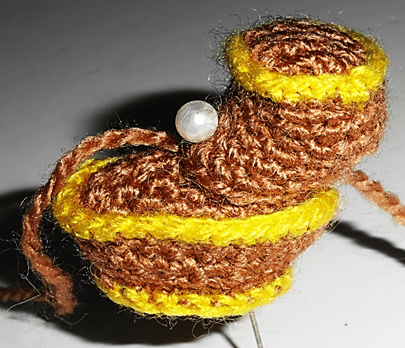
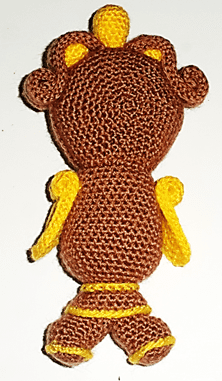
Sew the upper ornament on the edge of the brown piece, leaving unattached at the bottom, to be able to introduce part of the pendulum below. Then you can sew both pieces as seen in the images.
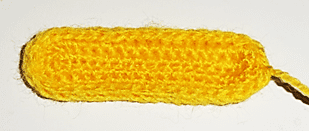
ARMS (x2)
With yellow yarn
1. Ch 21, turn, sc in 2nd ch from hook, sc in remaining 19 ch (20).
2. Continue crocheting without turning, that is, in the beginning chains again but in the other side another 20 sc to get a 40 sc piece (40).
3. Place the round marker to start crocheting in rounds 1 sc in each st (40).
4. Work 1 sc in the post of each st (40).
Fasten off.
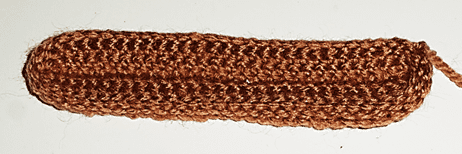
UPPER ORNAMENT OF THE HEAD
Sides (x2)
With light brown yarn
1. Ch 31, turn, sc in 2nd ch from hook, sc in remaining 29 ch (30).
2. Continue crocheting without turning, that is, in the beginning chains again but in the other side another 30 sc to get a 60 sc piece (60).
3. Place the round marker to start crocheting in rounds 1 sc in each st (60).
4. Work 1 sc in the post of each st (60).
Fasten off.
Central Part of the sides (x2)
With yellow yarn
1. Work 6 sc in magic ring.
2. Inc in every st (12).
3. and 4. 1 sc in each st (12).
5. Dec in every st (6).
Fasten off.
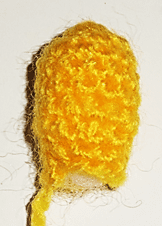
Central Ball
With yellow yarn
1. Work 6 sc in magic ring.
2. Inc in every st (12).
3. to 6. 1 sc in each st (12).
7. “2 sc, dec”, repeat (9).
8. 1 sc in each st (9).
Fasten off.
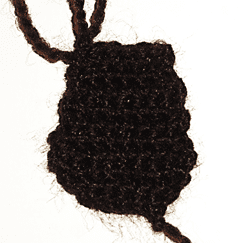
EYES (x2)
With black yarn
1. Work 6 sc in magic ring.
2. Change to white yarn and crochet 2 sc, 1 inc, 2 sc (leave the last sc unworked)
Fasten off.
With white yarn embroider the twinkles.
NOSE
With yellow yarn
Work 4 sc in magic ring.
Fasten off.
MOUTH
With fuchsia yarn
1. Work 6 sc in magic ring.
2. Change to dark red yarn and crochet 3 inc (leave the rest unworked)
Fasten off.

CHIN
With light beige yarn
1. Ch 7, turn, sc in 2nd ch from hook, sc in remaining 5 ch (6).
2. Continue crocheting without turning, that is, in the beginning chains again but in the other side another 6 sc to get a 12 sc piece (12).
3. Place the round marker to start crocheting in rounds 1 sc in each st (12).
4. Ch 1, turn and join with slip stitches the 6 sc of each side (6).
Fasten off.
ASSEMBLY
Face:
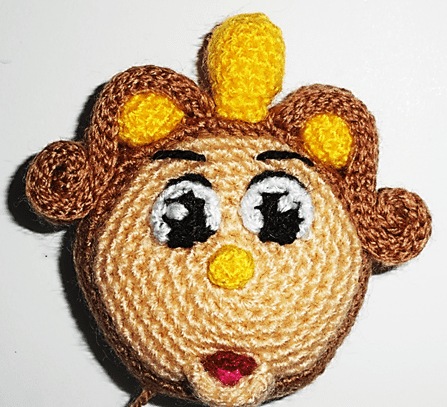
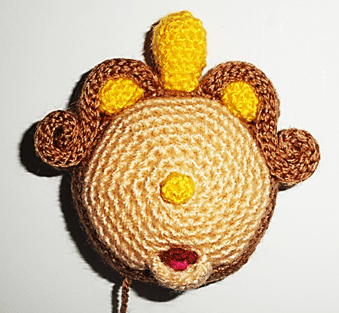
Sew the nose on the magic ring of the head.
Centered in relation to it, in the lower part of the face, sew the mouth, so that it protrudes a little from the line of color change. Surrounding the lower part of the mouth, place the chin, giving the piece a curved shape.
Above the nose, sew the eyes, leaving 2 sc of separation from it and also between them. With black yarn embroider the upper line and 2 sc above the eyebrows, from the edge of the face, with a length of 4 sc.
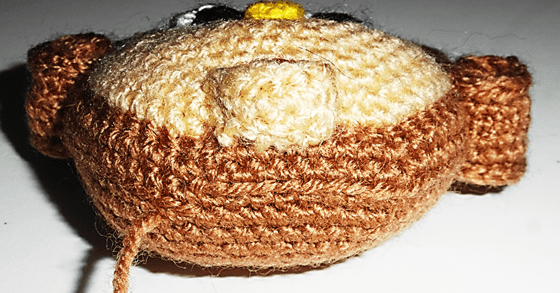
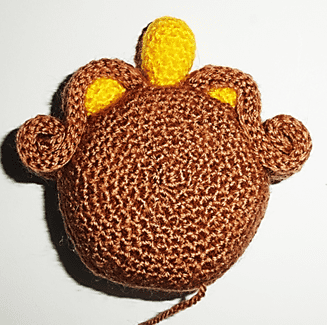
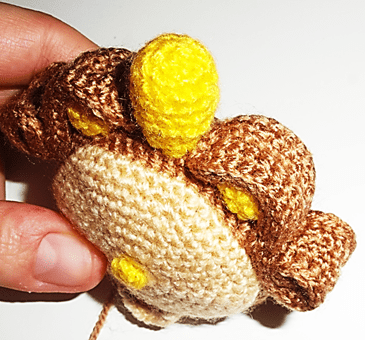
Upper ornament:
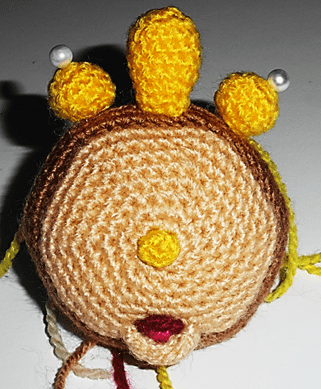
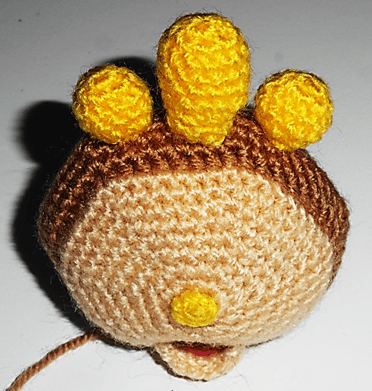
Sew the central ball on the top edge of the head, leaving as separation the round that you crocheted in the post of each st.
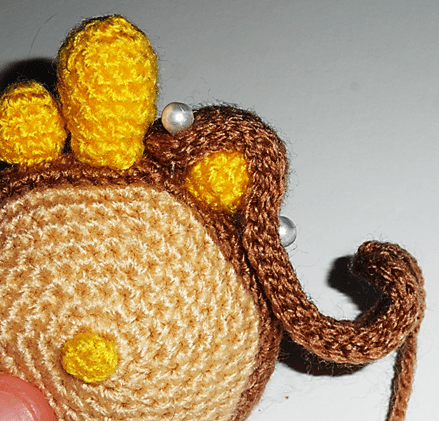
Starting from the central ball, sew the yellow pieces on both sides, to then place over them the side pieces and shape by rolling the end. You must make sure that the rolled end is approximately eye level.
Complete the face embroidering with black embroidery thread the hands, the side lines of the face and the smile over the mouth, as seen in the images.
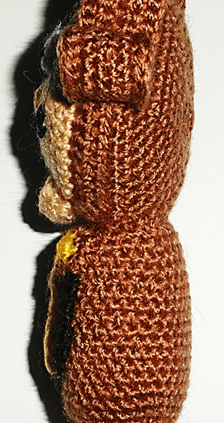
Body:
Sew the central ornament already assembled from the upper edge of the body, under the round 5 of this one, that is, the one that you crocheted in back loops only.
Join the legs to the support, placing the arched part to the outside to then sew the complete support to the body. To do this, join the 16 sc of the last round of the body with the 16 st of the round 5 of the support, that is, attached to the inside of the yellow line.
Sew the head to the free loops of round 5 of the body.
To finish, roll the end of the arms and sew it to the body, in line with the upper ornament.
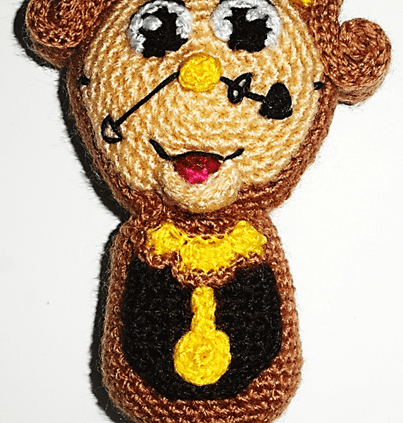
I hope you enjoyed crocheting Din Don!
If you want to download the PDF Patterns of Beauty, Beast and Cogsworth are available in my shop.
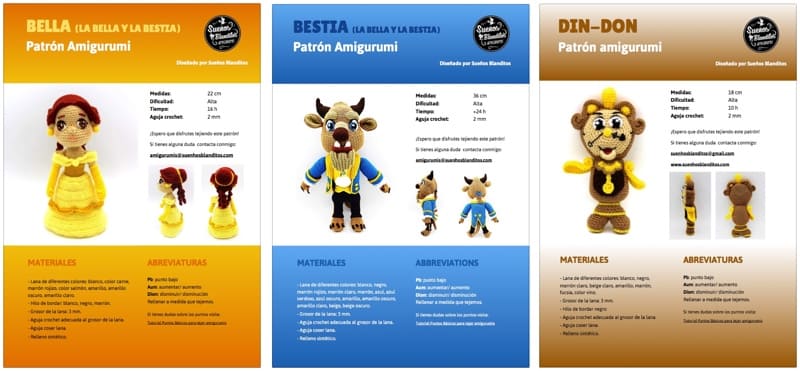
Download the PDF Patterns of Beauty, Beast and Cogsworth here >>
Share this Challenge:
[addthis tool=”addthis_inline_share_toolbox_djcd”]


What s a great idea
I think it’s a chiken
Yo digo q es un abeconejo
PATO
Tengo que decidir lo ya? O puedo esperar nuevas instrucciones…
El pajatiro de Charlie Brown y Snoopy. No se como lo conozcan: “plumita”, “Emilio” y se me escapa el oreo nombre que he escuchado para este mismo personaje.
People, it’s not an already published pattern, it’s unpublished and this is only the first part …
They will come out more parts throughout the month. Don’t rush to giving an answer, you only have one chance.
what does embroider the twinkles mean?
I love LOVE this idea! I’m starting on my first piece now 🙂
Hola ya hice mi primera parte pero todavía no sé que puede ser espero avanzar más y ya darme una idea de lo que es…..un saludo.
Paciencia Violetilla77, no te precipites al responder.
Veo que hablas español, ¿no prefieres participar en el reto de la página en ese idioma? https://www.suenhosblanditos.es/retos/reto-amigurumi-misterioso/
Puedes hacerlo en cualquiera de las 2 páginas, pero no en ambas.
Saludos
Hola participare
Hola Mariella. Como le he comentado a otra compañera, puedes participar en el reto en la página en español: https://www.suenhosblanditos.es/retos/reto-amigurumi-misterioso/
o hacerlo en esta, no en las dos. Lo digo por si te resulta más cómodo el idioma español a la hora de seguir el patrón.
Saludos
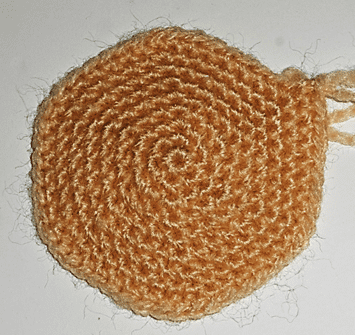
Part 2, row 6
I don’t understand what I am supposed to do here.
Currently, I just finished row 5; I have a small brown square.
Thank you.
You’re doing very well, Molly.
At the end of row 5 you have a small brown square. Then, put the marker in the st where you are and work around the 4 sides of the square. Do it on 2 of the sides in the holes between the rows and in the other 2 on the sc and the beginning chains. As you can see, you will start crocheting in rounds, 4 sc in each side.
I assure you that it is more complicated to explain than to do it.
Kind regards
Thank you. I understand now 🙂
Hallo Gretel ik ga er vandaag aan beginnen..super leuk!!
Veel succes Anja. Zorg ervoor dat je, voordat je antwoord geeft, weet wat de mysterieuze amigurumi is. Je hebt maar één kans.
Hi, Gretel. Happy second year! Does this latest piece, part 3, get stuffed?
Thank you very much, Sandy!
Yes, in fact, both parts, 2 and 3 are stuffed.
I didn’t say anything in the instructions, but I do mention the fiberfill in the materials, so some pieces are stuffed and others aren’t…
Recognize which part is stuffed is an added difficulty to the challenge… although by its form it’s quite obvious.
Good luck!
Oh no! I wondered if part three needed stuffed, but it did not say to, so I didn’t. Now I have to remake it because there is no way I can open it back up 🙁 Luckily it is small and didn’t take too much time.
You may want to mention in the opening explanation that we would not be told whether a piece will need to be stuffed or not. Just so people know they will need to figure it out as they go.
I’m so sorry, Molly.
Being an amigurumi, I thought it would be obvious that most of the pieces will need to be stuffed, especially if they are closed.
You’re right, I’m going to mention it in the explanation.
Thank you. Yes, I thought it seemed like it should be stuffed, but since I do not know what I am making, I am really following exactly what the instructions say. Since it didn’t mention stuffing, I didn’t stuff. Now I know I need to decide if it is stuffed or not.
It has to do with Easter I guess, so maybe a baby chicken..!?
Hi Gretel! I’m from Argentina, I can speak both, English and Spanish. I had done all the pieces yet, including those of this post, but I’m very confused at the moment and I don’t want to say anything by now. Have a wonderful day and enjoy your weekend!
Hi susy007! that’s wonderful. Participate here then. Make sure before giving an answer.
Good luck!. Happy weekend to you too.
Hola buen día .
Una pregunta la parte 2 y parte 3 se rellenan o así se quedan sin rellenar? Gracias y me está encantando el reto y ya más o menos se de qué se trata …… Un fuerte saludo.
Hola violetilla77! Me alegro de que te esté gustando el reto.
En cuanto a tu pregunta, sí las piezas de la parte 2 y 3 se rellenan. Fíjate que en la entrada, en las abreviaturas digo: Fill with fiberfill as you crochet. You would not be told whether a piece will need to be stuffed or not, so you will need to figure it out (Rellenar a medida que tejemos. No se dirá en el patrón si una pieza deberá rellenarse o no, por lo que tendrás que averiguarlo)
Saludos
Hello! I’m not sure but I would say it is Cogsworth the clock from the beauty and the beast. I am really enjoying this challenge. Thank you very much!! Part 5 done!
Hello Ziortza! I’m glad you like the challenge. Thanks for participating.
Kind regards
I was having a lot of trouble with my password. I had to do a 24 character before it would accept it. I am enjoying this challenge. cant wait for part 5
I meant part 6
I’m sorry for the trouble with the password, tinaguerr. If you have more problems, please send me an email and I will help you.
I’m glad that you like the challenge! See you on Thursday for part 6.
I agree, I think it’s Cogsworth! Having so much fun with this, thank you!
Hello lindapadget! I’m glad that you are having fun with the challenge. Thanks for participating.
Kind regards
Cogsworth from Beauty and the Beast! Yay!
Maybe I should have started with “It is”… Cogsworth from Beauty and the Beast! I was so excited when I figured it out.
I really am enjoying making a Mysterious Amigurumi. It makes it extra fun. Thank you for doing this.
I’m glad that you are enjoying the challenge, Molly. It is my greatest reward. Thanks for participating.
Hi TIna here, can you tell me what you mean by “with white yarn embroider the twinkles?” Thanks
Hello tinaguerr. It’s easy, What does twinkles mean? flash of light, sparkle, gleam of light, flickering brightness, sparkle or glimmer. Where do you usually see twinkles? There are 2 pieces with twinkles… I can’t give more clues…
Kind regards
got it. understand now. thanks
Hola, ahora si me perdi. Pero muchas gracias ha estado muy interesante
Todavía faltan 2 partes luzelenac58. Espero que te guste cuando lo veas completo.
Saludos
Would have never guessed something from the Beauty and the Beast. But as some of you mentioned the cogsworth (and I didn´t know him), i looked it up. Now i think, you are near but not quiet right – i think, we are working on the Lumiere! 🙂
C est un nid de Pâques avec un poussin et un oeuf
Ok. I finished all the pieces, trying to figure out how to assemble it. it does look like cogsworth so I am going with that too. will you be giving direction on the assembly? I am at a loss and I do a lot of stuffed stuff. Thank you.
Hello tinaguerr, don’t worry, in a few days I will publish the pattern with all that is missing, the photos, the assembly … everything necessary so that our dear mysterious amigurumi has identity and be perfect.
Regards
awesome. thank you
The last piece is done and I still have no really clue how they should fit together. 🙂 It is definitly not the lumiere so much i´m sure! 😉 However – thank you so much for this call. It was / is so much fun. And i´m looking forward to your last instructions to put the pieces correctly together. Aaannd … i hope you stare something similare some time (soon)! 🙂 Greetings from Austria!
Thank you so much Lady Margolotta von Überwald! I’m glad you like it. It means very much to me. Kind regards from Spain!
I have loved this challenge, but I have no idea what I have made! It has been a real family affair with my husband, my step daughter and her mum all joining in, but we are all completely stumped. I will not give up with my little jigsaw puzzle until you publish the answer. I love your work Gretel, and thank you for such a wonderful idea. Best wishes to you and congratulations on the success of your business.
Thank you so much Simmonds8. I’m very happy! Your words mean a lot to me. Thank you! Best wishes!
it is most definitely Cogsworth from Beauty & the Beast! Just a few more additions and I’ll post a photo. It’s great to have put everything together at last
Yo no sé si acertare o no pero me gustaría nos enseñaran q era.
Según yo es un conejo o ardilla pero mi hijo dice un abeconejo.
Así q mi respuesta es un abeconejo.
Cuando se sabrá el resultado
Gracias por participar lauraruipi! Mañana publicaré el resultado, el patrón completo y los nombres de los ganadores. Saludos.
ok i’m done. its put together. didnt come out exactly like yours but its close. I had to use the colors I had. with I could post a picture of mine
Well done tinaguerr! I’m sure that your Cogsworth is very nice. If you want to show it to all of us, you can email me a picture to amigurumis@suenhosblanditos.com
Kind regards
I sent you 2 pics of mine. would love to see how some others turned out too if that is okay. thanks
Thank you so much! I would love to see others too.
As always your beautiful amigurumis will be published in the section Yours of the web: https://www.suenhosblanditos.com/amigurumis/
Kind regards